My 6-Day Solo Travel in Japan: Tips, Costs & Itinerary for Filipinos
JM Sabariaga Born to wander and has a true passion for travelling and photography, JM is the guy who likes to takes pictures and loves to explore unknown places and climb mountains. Check his travel blog, The Lost Kid Travels, and follow his photography at his Instagram account.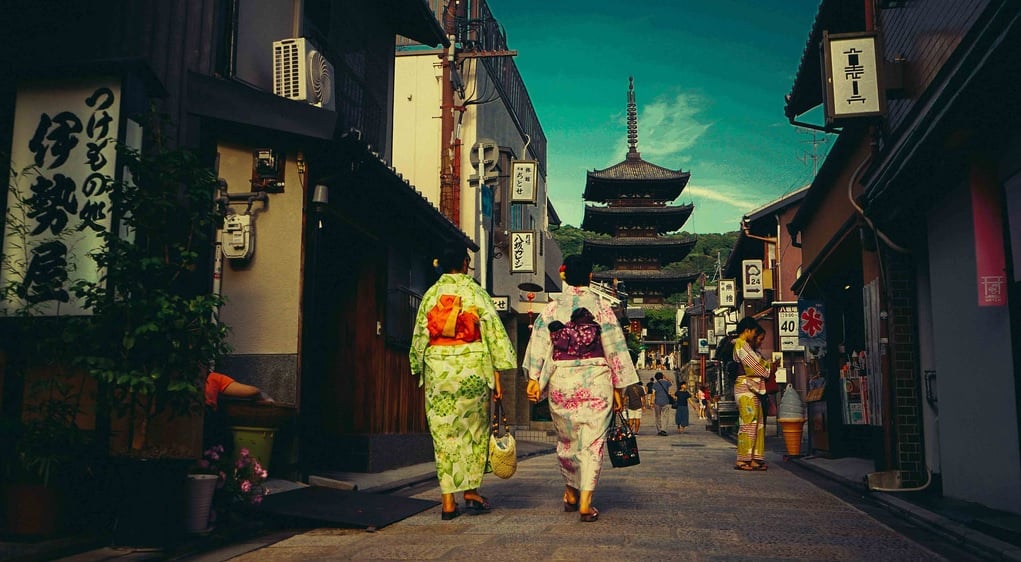
Contributed by The Lost Kid Travels

Let's face it, Japan is an expensive country to visit, kung pwede nga lang every year ako pumunta. (If only I can visit every year.)
I got lost several times, from finding the station to figuring out the exit point. This was not the first time that I travelled on my own, I researched all the necessary info I can possibly use. Here are some of my tips and recommendations that might help you in planning your trip to Japan!
Also read: My 7-Day Trip to Japan: Travel Tips & Cost Breakdown for Filipino Travellers


Visa
If you are a Philippine passport holder, you need a Japan visa. The easiest way to secure one is via a travel agency. You may read this Easy Japan Tourist Visa Guide for Filipinos.
That seat sale
I scored my ₱6k round-trip from Cebu Pacific Air.
Manila-Tokyo
Osaka-Manila
The trick is to book months ahead before your trip.
Also read: 8 Tricks to Successfully Grab Cheap Promo Flights in the Philippines
What route
If you want to make the most out of your trip in Japan, follow the GOLDEN TRIO route. Tokyo, Kyoto and Osaka or vice-versa like what I did. I booked a ticket from Manila to Tokyo, then the return point would be from Osaka to Manila. Nine days would be enough to cover it all, but it still depends on your itinerary.

Tokyo - Kyoto
If you're coming from Tokyo, the fastest way to get to Kyoto is by plan or by Shinkansen (bullet train). I took the slowest way to get to Kyoto which was an OVERNIGHT BUS (willerexpress.com). I chose this option because I want to save on accommodation and it was not pretty bad at all.
Kyoto - Nara - Osaka
Japan has an interconnected railway system, which means that Kyoto, Nara and Osaka are accessible by train. Travel time from Kyoto to Nara is one hour, which is the same as Nara to Osaka. I travelled to these three cities using my Pasmo card -- it's reloadable and easy to use.
Also, consider kung saan mo gusto matagal mag stay (where you'd like to stay longer). If you want cool stuff, shopping, urban explo and Mt. Fuji, then stay longer in Tokyo. If you want to experience old Japan, then Kyoto. If you are a foodie and a big fan of Harry Potter and theme parks, Osaka is the place to be. If you are a true explorer like me, visit all the three cities.
When to go
Japan has four seasons:
Late November to February - Winter
March to May - Spring
June to August - Summer
Late September to Mid November - Autumn
Pick what season you prefer. Spring is by far the most popular one because of the Cherry Blossoms while Summer is the best time to climb Mt. Fuji.
Where to stay
There are lots of options to choose especially for solo travellers, you can also look it up on Airbnb, Booking.com or Agoda.
Kyoto
K's Backpacker Hostel
Maybe if I'm not on tipid (budget) mode, I would choose to stay on a Ryokan, the traditional Japanese house just for curiosity.
Osaka
Dotombori Inn
This one is very accessible to the Glico man and the shopping district.
Transportation
If HK has Octopus card, Japan has Pasmo card. Actually, there are numerous tap cards ,but I chose this one because of the design. You can also purchase specialty cards like the 2 or 3-day tourist pass. All the tourist spots are accessible by train, so prepare to walk a lot. Isipin mo nang papayat ka sa Japan. Kaya siguro walang matabang tao sa Japan. (Just think that you'll lose weight in Japan. It's probably the reason why there's no fat person in Japan.)
The easiest way to get around all the tourist spots in Kyoto is by Bus. Get a 1 or 2-day bus pass (500 yen good for 1 day). Don't forget to bring the bus map because it can be quite confusing.
Pocket WiFi
It saved my life. There are free Wi-Fis in Kyoto and Osaka, but of course, it would not cover all the areas, and once you're out of range, it can be hard to navigate on your own (Google maps, of course). They will deliver the pocket Wi-Fi at your chosen accommodation.
What to see in Kyoto

Click here to see more photos of Kyoto.
What to see in Osaka

Click here to see more photos of Osaka.
* I did not include my Tokyo trip because the reason I went there was because of Mt. Fuji so I only had one full day to explore Shinjuku and Shibuya.
Suggested Itinerary
6 days Kyoto-Osaka trip
Day 0
Overnight bus Tokyo to Kyoto
Day 1
Visit 3 temples
Gion District
Day 2
Arashimaya bamboo grove
Monkey park
Nijo Castle
Kyoto Tower
Day 3
Golden Pavilion
Fushimi Inari
Tavel to Nara
Nara Park - feed the deer
Travel to Osaka
Food trip in Osaka
Day 4
Universal Studios
Day 5
Osaka Castle
Dotombori District
Umeda sky building
Day 6
Free time
Back to Manila
Cost estimate
Overnight bus - ₱2,700
Food - ₱6,000
K's Backpacker Hostel (2 nights) - ₱2,900
Dotombori Inn (2 nights) - ₱3,200
Entrance fees - ₱1,000
USJ - ₱3,400
Other expenses (transpo, etc) - ₱3,000
Pocket wi-fi good for 5 days - ₱2,000
That's roughly ₱24,000 pesos but it can also get lower if you have a friend with you to split the bill with! I don't recommend na magtipid sa food (that you limit your food budget). Why? Masarap kasi food sa Japan (food in Japan is delicious).


