Exploring Sagada: Sumaguing Cave, Hanging Coffins & Bomod-ok Falls
Showing you the beauty of Sagada from the perspective of this Filipina traveller.
Johanna Michelle Lim Johanna Michelle Lim is a brand strategist, creative director, and travel writer based in Cebu City, Philippines. She swims in jellyfish-infested oceans, treks through mountains, rides rickety buses, and walks in busy cities. She is almost always never home. Catch her at What Distance Tells Us.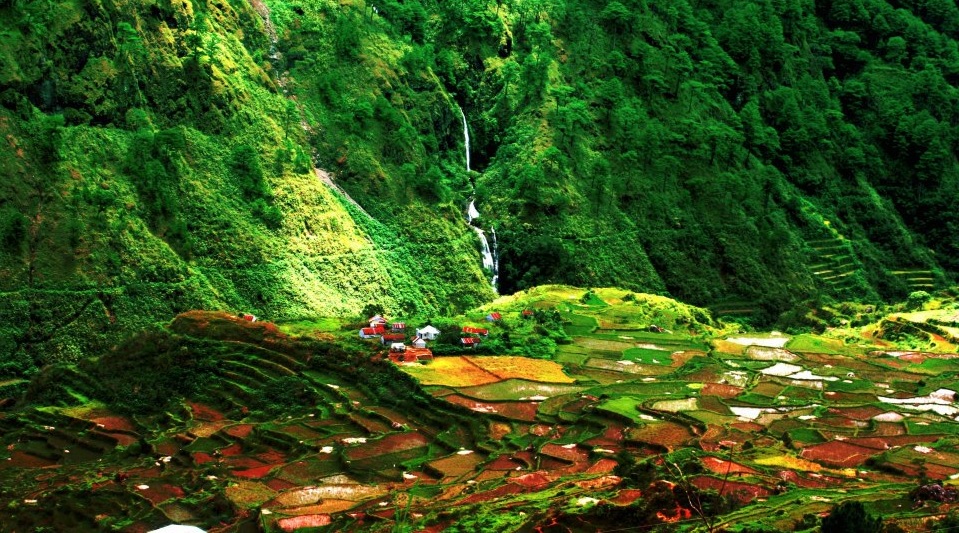
Contributed by What Distance Tells Us
It is a pain to take a bath in Sagada. “Mamaak ang kabugnaw!”, says a companion, who served as a congenial alarm clock to an early itinerary. At dawn, when most Igorots are still beginning to awaken in their metal-insulated houses, sipping Mountain coffee with the insouciance of someone who doesn’t know any less, we take a quick bath, the quickest we can muster, before heading on to a early hike.
In the Mountain Province, heat is the rarity. Oil bought in sari-sari stores congeal easily. Soft drinks are bought cold with no need for refrigeration. And as we puff up the Main Road to an even more elevated destination, breaths turn into mist, joining the omnipresent fog that signals the start of a typical Sagada morning.
Also read: Why Sagada Should Be Your Next Long Weekend Getaway
There are no flatlands in Sagada. Although a good number of their commercial buildings – pension houses, restaurants, souvenir shops – are congested in the Main Road, you have to navigate through an intricate system of stairs to go from Here to There. Even residences are two-floor levels below or above, most of them with open doors where children and old men peep for a glimpse of the outside world.
Up and Down. Up and Down. Only the Highway is considered as Middle Ground. There are all kinds of stairs – stone, wood, earth, concrete – all deceptive in their façade of sturdiness. Locals are easily distinguished this way. A local’s steps are always instinctual. There is carelessness to their stride, coming from someone who has already picked the more credible footholds even before feet touch ground. But a tourist, a tourist strides through these paths with a deliberateness of someone who is afraid to fall.
Sumaguing Cave

“Magpahulog ka na lang.”, was the advice of a SAGGAs (Sagada Genuine Guide Association) accredited representative, Janno, as he gives us a few tips before entering Sumaguing Cave. He wasn’t joking. It was, he said, the safest way to land. No resistance led to fewer scrapes. The entrance is a slippery drop comprised of 246 manmade steps from the start down to the base of the cave. There are no helmets, no safety ropes.
“Peru huwag kayong mag-alala.”, adds Janno as another tour guide lights two gas lamps that will serve as the only beacon in this 2-km., 60 ft. high dome. “Alam na namin kung anong gagawin kung anuman.” Janno smiles with the nonchalance of a born and bred Igorot who has explored his share of caves, without baggage. Not even a first-aid kit.
The first phase (there are three phases) is the most challenging. Guano is everywhere. Rocks are weathered. Surfaces are smooth. Still hit by sun and wind, the white rocks are the most dangerous, friendly to the touch but offering no support.
A first-timer, such as myself, has no fear of falling. The only way to survive is to act like a local, to realise that climbing is more instinctual than skill. The feet dictate where it takes you. Up down. Left. Right. Grip. Slide. And although rocks are deceptively slippery, it is the unassurance of the surface that gives a first-timer such as myself the heightened sensation of assurance. To look past where you almost slipped to where you’re supposed to go.
“May free footscrub pa, o diba?”, jokes Janno as slippers were taken off for the more reliable grip of feet. The second phase is a combination of the more porous limestone that once was submerged underwater. Imagination should be widened, he further appeals, as out of the limestone formations in one of the biggest caves in the Philippines, comes a Queen, a King, a Princess, a turtle, an elephant and even a birthday cake. On the way back, we blow it, to celebrate a feat. Survival perhaps.
The Hanging Coffins

To be an Igorot, if only by imitation, is the only way to survive in Sagada. The word “Igorot” means mountaineer, and whether it is belief or physical protection that dictate Igorots to be so, outsiders can’t really be sure. But you must have a certain reverence for height if you are to love Sagada, for it is only in the inaccessible that any sense of achievement can be found. Most Ganduyans (the collective name for the people in Sagada) rituals strongly follow the same belief.
“The nearer you are to heaven” or the higher you are from the ground, Janno explains, “the closer you are to God.” Hence, most Igorots, those whose religion fall more on the ancient than in the influence of Christianity, hang coffins in elevated places such as cliffs or caves. To get to the Hanging Coffins, you must pass through Echo Valley, an easy feat if you take a shortcut through the World War II Veteran Cemetery.
Going up to Echo Valley, where you can proclaim an enthusiastic “I love you.” followed by a surprising confirmation of “I love you.” too, is easy. Going down to the Hanging Coffins is not. Two kids, James and Dan, no older than 12, served as our guides. And while we find support from anything nature can give, branches, root ends, James and Dan whistle and pick leaves along the way to be made into their favourite sipa.

There, strapped on the side of a cliff, are about 20 or so coffins suspended by ropes. Some have chairs tied to them. “Chairs were used to place them in fetal position.”, said Dan. “Have you noticed how small some of the coffins are?”
The most recent addition was in 2010. The coffin is still fresh; the wood light. Going up the second site, another burial area, this time in a cave, Dan tells us this story: Once, a tourist took a skull from an open coffin with the intention of bringing it with him as souvenir. While going up, the skull talked to him in Kakana, the local dialect of Sagada. No one dared steal again.
The second site is a tricky play of holding on and letting go. Gravity is an adversary. Rain is making the already-steep path even more slippery. In the cave, are six or so coffins, toppled on top of one another. One was open. A bone sticks out. And I remember Dan’s story.
There are several more burial sites in Sagada that cannot be visited by tourists anymore. A good number of locals just bury loved ones in their backyards. This is to everyone’s mutual benefit, they say. This closeness allows makes guidance from the beyond easier.
Death in itself, while it brings about “closeness” of a sort, is still falling. But Sagada makes you realise that even falling has its advantages.
Also read: 4D3N Banaue Sagada Baguio DIY Itinerary and Travel Guide
Bomod-ok Falls

“Alam ko hindi kayo sanay sa ganitong lakad. So Gudlak nalang sa’tin.” Says Anita (Igorot name: Day-um), a guide from the Northern Sagada Indigenous Guide Association or NOSIGA. She hands us our walking sticks and teach us to walk sideways, testing how well each step receives our weight. Our all-girl group dismisses her admonition. In our heads, we are already retorting: “We can take it. We’ve walked farther before.” Inaccessibility is as much a driving force as the place itself. Inaccessibility connotes that not too many people have treaded there before.
Bomod-ok Falls is still 3km. or 4,000 steps down moss-covered rocks, rice paddies, a gold mine and several pocket streams. But confidence wanes the farther we descend. All throughout the trek, locals pass us, carrying the heaviest of loads – a sack of rice, a metal sheet, machinery parts.
Also read: 13 Awe-Inspiring Waterfalls in the Philippines You Must Visit
Bangaan, where Bomod-ok is found, is in the Northern part of Sagada, where even more isolated areas surprise you with an outcrop of people. “Naa pa diay mga tawo diri dapita?”, we asked as we pass by Barangay Fedelisan, the halfway point to the Big Falls. There are no roads for cars here. Everyday, the people of Fedelisan – students, workers, housewives going to the market – ascend and descend these stone steps back and forth. “And what if you’ve forgotten something?” we asked curiously. “Eh, di Doubletime!”, says a woman from Fedelisan.
We are trying to do just that. “Bilisan nyo!” is the constant cry of Anita, who constantly walks ahead of us as an example. It is supposed to take only 1 ½ hours going to and coming back from the falls. It takes us 6. We justify it to her by taking pictures of every local detail, storing it in Gigabytes as much as in memory. When in fact, we are resting every few minutes, hiding the sound of heavy breathing with the click of capture, the signs of wear with the viewfinder.

The falls itself is dependent on rain. Heat depletes its supply. Rainfall replenishes it. Water is abundant in Sagada. Every few metres or so, one will find a pocket stream, mini-falls or tag-ulan falls, as locals like to call those that appear only when it rains. While Bomod-ok’s grandeur is amplified by tourists, locals are more attracted to its functionality more than anything else. Water from the mountains is cleaner and richer in minerals. Bomod-ok’s is no different. Many tap it to supply their irrigation systems, their washing, even their drinking.
A few locals use it to supply romance. “Merong iba dyan kaya lang karamihan di talaga pinapayagan.” says Anita of local visitors. The current is too strong. Even she doesn’t allow her kids here despite the temptation of cool water, scenic view and the sound of constant falling that somehow invites its visitors to “fall” too. After we succumb to it, plunging in despite chattering teeth, we head back, the sound of the water getting fainter and fainter.

Living in an island, there haven’t been too many encounters made with mountains, or else there’ve been too many seas. Bodies of water teach us that everything can be coasted through. But mountains, mountains teach us that steps, whether deliberate or instinctual, are needed for any act worth accomplishing. The beautiful thing is sometimes the effort to climb or is just as fulfilling as the peak itself.
Every step is an experience. And what better place to learn this than in the town with a thousand stairs?

 Image credit:
  Image credit:
  Image credit:

 Abandoned lighthouse at Barangay Asluman
 Mounds of empty scallop shells everywhere in the island.
 Scallops in gata and other seafood favourites
 Giants’ coffins found at Hideaway Resort
 One of the exit points at Bakwitan Cave
 Manong Danilo with cockfighting afficionado, Francis, as Louie watches at the distance.
 Tangke Lagoon
 Image credit:
  Image credit:
  Image credit:


 Image credit:
  Image credit:


 Calvary Hills | Image credit: Remedios Lucio
 Vehicle Depot | Image credit: Remedios Lucio
 Callao Cave | Image credit: Remedios Lucio
 Cagayan Holiday & Leisure Resort | Image credit: Remedios Lucio
 Cagayan Beach | Image credit: Remedios Lucio
 Kapurpurawan Rock Formation | Image credit: Remedios Lucio
 Bangui Wind Mills | Image credit: Remedios Lucio
 Cape Bojeador| Image credit: Remedios Lucio
 Marcos Mansion| Image credit: Remedios Lucio
 Paoay Sand Dunes | Image credit: Remedios Lucio
 Paoay Church | Image credit: Remedios Lucio
 Calle Crisologo | Image credit: Remedios Lucio
 Cathedral of Vigan | Image credit: Remedios Lucio
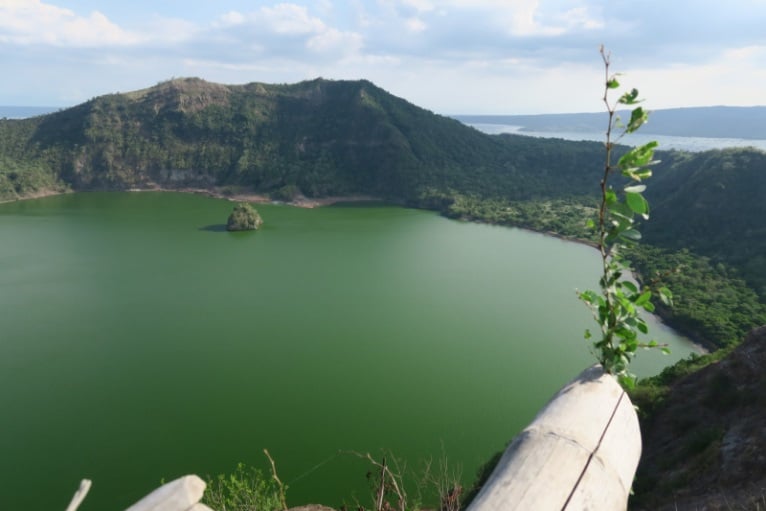


 Camp Phillips
 Pineapple Landmark
 Road going to the Adventure Park
 Pineapple plantation
 Dahilayan Forest Park
 Skytower Base Jump
 320-metre and 150-metre Zip Line
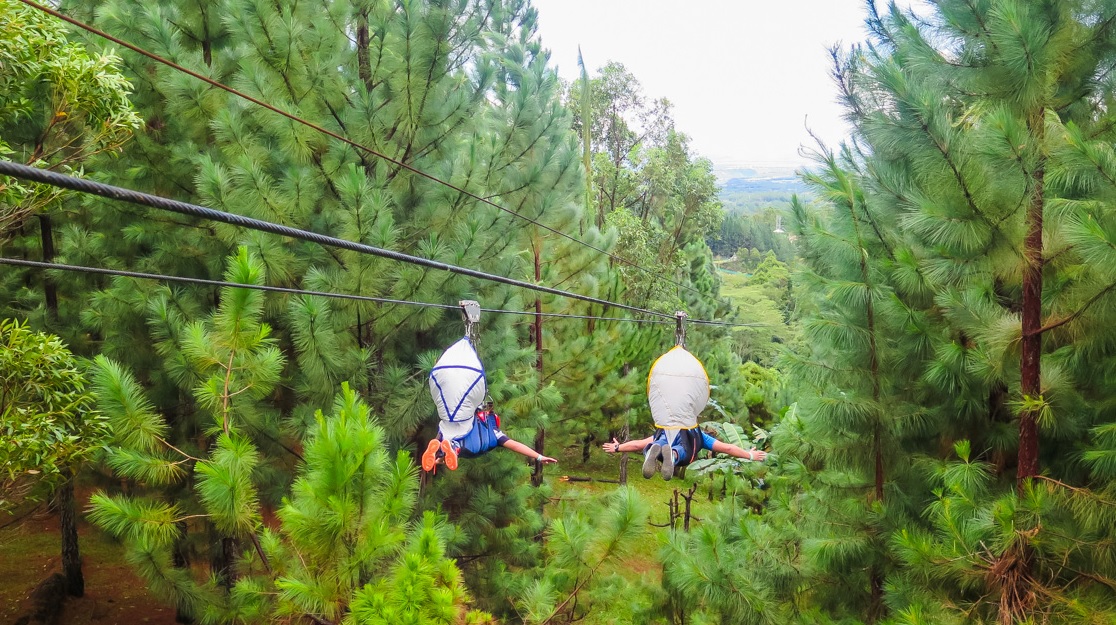
 840-metre Zip Line
 Drop Zone
 Rates as of Nov 2015
 Tickets
 The 320-metre zip line
 Followed by the 150-metre zipline
 Also tried the Python Roller
 The rail makes you bounce
 The Drop Zone
 Preparing for the ride
 Here we go!
 Really getting nervous at this moment
 Oh yeah!
 Suit up!
 All set and ready to go!
 Let's do this!
 Woohoo!
 Look up in the sky!
 I have 3 hands
 Cheers from Bukidnon!


 Image credit: Nick Jed Donaire


 Puente de la Reina marker


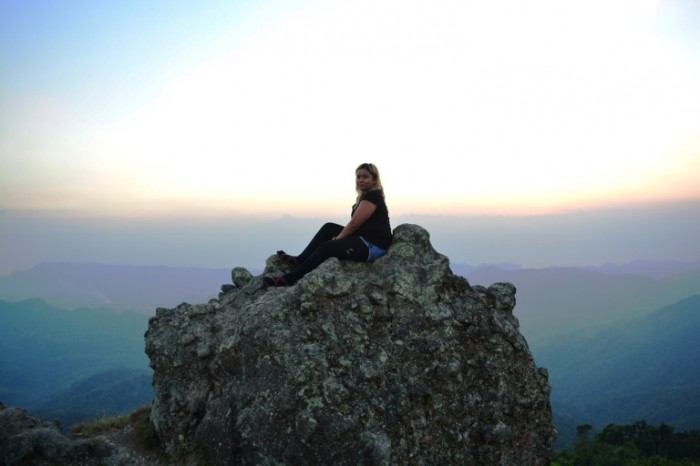
 Feeling the moment at Lake Kasudsuran.
 Image credit: Ramir G. Cambiado
 Image credit: Ramir G. Cambiado
 Image credit: Life on Frames Photography and Abra de Ilog Tourism
 Image credit: Life on Frames Photography and Abra de Ilog Tourism
 On our way to Agbalala Falls | Image credit: Ramir G. Cambiado
 Abra de Ilog lighthouse as seen from the Montenegro ship | Image credit: Ramir G. Cambiado
 Breathtaking mountain range | Image credit: Ramir G. Cambiado
 Parking area
 Visitor sheds


 The first hurdle of the trail is to go up on this rope obstacle.
 Walked further and got enchanted with all the rock formations we found along the way.
 It was an up and down trail with a single pathway all throughout.
 Thankful for friends who are as adventurous as me. Thank you Franco & Via, MJP, Jackie and Angel!
 With our ever reliable park ranger, Sidney. He is also well trained on the different plants, rocks and species inside the conservation area.
 One of the best adventures of my life!
 Going down from the Sapot, the trail continues by passing through the hanging bridge.
 Hanging bridge


 Inside Duyan with my girlies: Via, Jackie and Angel.


 Looking at the path, I was wondering if I could make it until the end of the hanging rope bridge.
 This trail is for fearless and adventurous people.
 We made it!
 Having fun inside the cave!
 We successfully went out from Yungib ni Ruben.
 Everybody was drenched with sweat and our bodies started to give up. Everyone blamed me for asking them to join me in this adventure. haha!

 At the highest peak of Masungi Georeserve. Topmost of Tatay.
 I can never get enough of the natural grandeur of mother nature!


 Plane used for skydiving.
 In skydiving, listening is key.
  Posing beside the divemaster.
 1… 2… 3… Let go!
  Jumping out of the security of the plane.
  GoPro shot during actual skydive.
  Even first-timers get to do a solo jump.
 Colourful parachute falling down from the sky.
 Another skydiver in the event.
  Amazing view during skydiving.
  Admiring the aerial scenery while listening to the radio.
  Landing after precious minutes in the air.
 Image credit: Remedios Lucio
 Image credit: Remedios Lucio
 Image credit: Remedios Lucio
 Image credit: Remedios Lucio
 Image credit: Remedios Lucio
 Image credit: Remedios Lucio
 Image credit: Remedios Lucio
 Image credit: Remedios Lucio
 Image credit: Remedios Lucio


 Bravo has a small dipping pool
 The common area for guests


 Naked Island
 Daku Island
 Guyam Island


