5 Sand Dunes in Asia for Your Mini-Desert Adventure
Gabrielle Goh
Gabrielle, better known as Gabby, loves seeking out scenic and culturally-rich destinations and is lately on a mission to uncover the lesser-known aspects in any locale. A long-time Korean buff, you will often find her pouring over Korean textbooks or binging on dramas. She also enjoys hanging out with friends in cafes or karaoke joints -- belting out K-pop favourites of course.
White sand dunes in desert on sunrise, Mui Ne, Vietnam.
The thought of visiting sand dunes often brings to mind the scorching sun and large swathes of lonely desert — far from the air-conditioned comforts of Singapore. But, hey, there are wonderful sandy oases in Asia totally worth checking out and having a dose of fun while there; they may not be as famous as the African Sahara or Mongolia’s Gobi Desert but definitely easier to access.
Here are six places in Asia where you can roll in vast sands without having to stray too far from civilisation. Disclaimer: You still can’t run away from the heat.
1. Red Sand Dunes in Mui Ne, Vietnam
The reddish sand dune is a stark contrast to the blue skies and sea of Mui Ne.
The Red Sand Dunes is conveniently situated a mere kilometre away from the beachfront hotels in central Mui Ne, a fishing-village-turned-coastal-resort in Southeast Vietnam.
Rise early and make your way to the sand dunes to beat the heat and admire the view of the morning sun casting its first rays on the reddish-brown sand juxtaposed against the blue sea. Sunset is also a good time to visit; avoid going at noon unless you want to experience walking in a fire pit. Locals are more than eager — sometimes a tad aggressive — to sell you snacks and sleds for sliding down the dunes.
Follow the main road west of the dunes and you will find the Fairy Stream that meanders its way between sand dunes and reddish rock formations before emptying into the sea. Relieve the heat on your feet by walking barefoot in the cool waters of the river towards the waterfall.
If you have more time on your hands, there is the larger and more stunning White Sand Dunes located about 22 kilometres away from town, which you can explore as part of jeep tours.
2. Paoay Sand Dunes in Ilocos Norte Province, the Philippines
Image credit: CC BY-NC-ND 2.0 (Ilocos Norte, 2010)
Jeeps speed across the sands of Paoay.
At the north-western tip of the Philippines lies an 88-kilometre stretch of sand where you will find the Paoay Sand Dunes, located near Suba Beach. It served as the setting for scenes of the Vietnam War in the award-winning 1989 film Born on the Fourth of July, which starred Tom Cruise.
Here, you can rent an ATV and embark on a roller-coaster ride over the undulating dunes, or grab a sand board and try surfing on sand. No worries if you can’t balance to save your life, the soft sand will help to cushion your fall!
While in Paoay, be sure to visit the Baroque-style St. Augustine Church and discover its rich history and architectural beauty that have earned it a recognition as a UNESCO World Heritage site. You can also go birdwatching or kayaking at the nearby Paoay Lake.
A couple enjoys a leisurely ride across the sand dunes on camelback.
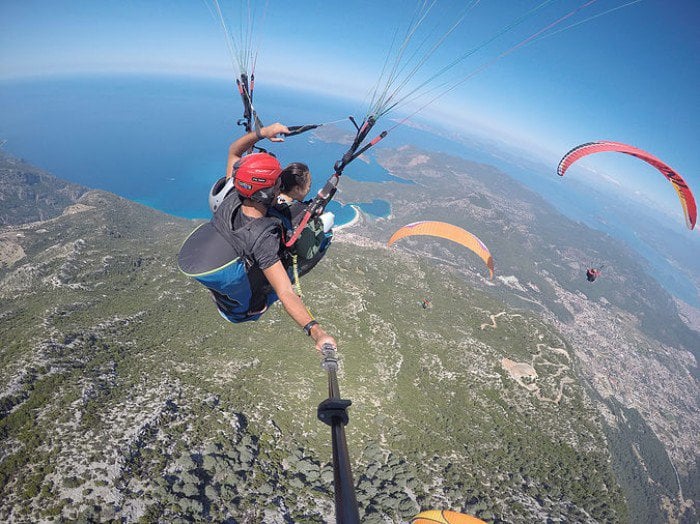
Sand dunes might be the last thing anyone will think of finding in Japan, but they are the star attraction in Tottori, a coastal town north-west of Osaka. Known in the local language as “Tottori Sakyu”, the sand dunes are among the largest in the country, measuring up to 50 metres high.
Ride among the hills of sand on camels or horse-drawn carriages; the more adventurous can take in the panorama of the mini desert and sea from above by paragliding. Why not also seize the opportunity to populate your Instagram with selfies featuring towering sand sculptures at the Sand Museum?
Outside the sandpit, feast on succulent Matsuba crabs — a local delicacy here; visit the picturesque Japanese garden of Kannon-in Temple; or shop at the department stores near the train station. And, for the record, you won’t find Totoro in Tottori.
4. Mingsha Shan (Echo Sand Mountain) in Dunhuang, China
Image credit: CC BY-SA 2.0 (小福, 2010)
Crescent Lake is a picturesque oasis among the sand dunes.
If sand dunes could speak, you will hear them at Mingsha Shan, literally translated as “Echo Sand Mountain”, and named after the deep moaning sounds made by the shifting sands when the wind blows. While the sounds can now be explained by science, legends still abound that allude the sounds to the cries of the souls of fallen soldiers buried beneath the sand.
Whether you believe that or not, you can take comfort in the fact that the city of Dunhuang is just 5 kilometres away from the sand dunes, which are situated at the edge of the Taklamakan Desert.
Electric cars and ATVs are at hand to take you around the sand dunes, but the camel is recommended for the true Silk Road experience; after all, Dunhuang was once a major stop along the famous route.
While here, don’t miss the unique sight of a crescent-shaped oasis — aptly named Crescent Lake — surrounded by the sand dunes. To the east are the UNESCO World Heritage-inscribed Mogao Caves, a cluster of more than 400 caves housing religious art.
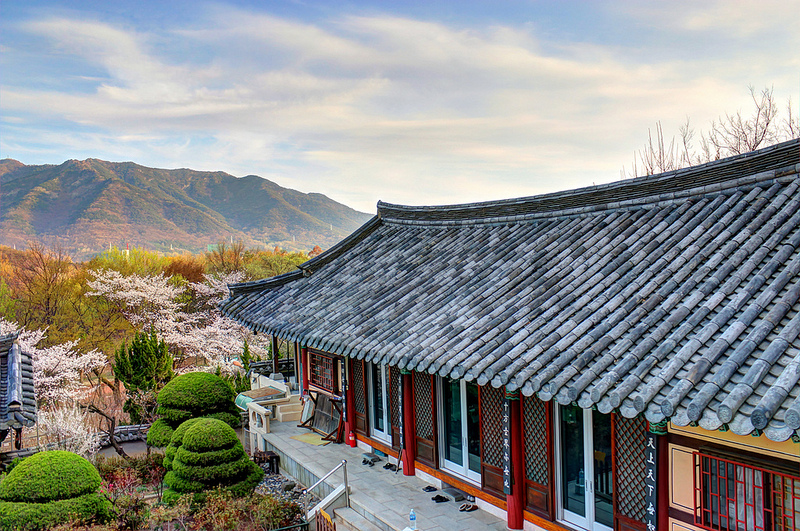
5. Sinduri Coastal Sand Dune, Taean, South Korea
Image credit: Korea Tourism Organization
Undulating white sand dunes along Sinduri Beach.
South Korea’s only coastal sand dune is found on Sinduri Beach, which lies within the Taean Haean National Park in the town of Taean south-west of Seoul. Lie on the sand and create sand angels as you admire the view of the Yellow Sea, and you might half expect Captain Yoo Si Jin to emerge from behind a sand dune a la Descendants of the Sun.
In fact, the sand dunes were featured in the Korean movie War of the Arrows, and you might have unknowingly seen the amazing sunset that the park is known for in K-pop group Big Bang’s music video, Sunset Glow.
Young ones can have fun with interactive activities at the Sinduri Sand Dune Center, which also includes English displays about the formation of sand dunes and the flora and fauna found in the area. Trails along the coast lead you to other parts of the national park, which is home to 130 offshore islands.
Denizens of the urban jungle, don’t let a rolling good time in the sand slip you by during your vacation!
You have a good reason to venture into the desert without losing creatures of comfort. Choose among the destinations above and start building that epic holiday or choose from one of these Ready to Tour packages. Quotient TravelPlanner specialises in bespoke travel, so you can make that desired trip happen according to your preferences. A tailor-made holiday for discerning travellers like you – how great is that?
Backpacking 15 European Cities Solo in 43 Days: Tips, Highlights and Lessons
Lyrenna Loh
Lyrenna Loh is a part-time traveller and on-the-go content crafter for independentflight. She identifies herself as a professional when it comes to the art of stretching the value of a social currency and the value of a dollar. An aspiring wanderer that indulges in occasional coffee runs, especially for Monday morning lectures. She is also a half-mermaid, half-human, who runs perpetually between the sea and the land when she does aquathlon.
They say, "No guts, No glory". So here I am concluding my Europe backpacking tour, which spun over a period of 43 days with a mere €1000 ($1500) budget to divide between 15 places in Europe. And I still have change to spare.
I'm aware that it's not the lowest budget for a trip around Europe, and I'm not here to compete. I've gained huge savings at the cost of many uncertainties; you see, there's always a trade-off for everything (comfort/safety vs. cost).
I know more people who rained on my parade than people who actually encouraged me when I said that I was going solo. Truth be told, it was insane and terrifying but it was also a hell load of fun when I didn't know where I was headed to each day or who I would be staying with. I didn't have a game plan when I departed from the UK, figuring my route day by day, often making spontaneous decisions to partake in unexpected adventures (and then panicking and contemplating my life decisions).
I've done an unimaginable amount of travelling in the short span of time and limited money that I can afford. I came back to see the world with a fresh pair of lenses, learnt the value of social currency and the value of a dollar. Accommodation was solely covered by Couchsurfing, and that translates to €0 spent on overnight stays. Transportation from one destination to another was a combination of flights, ferries, buses and BlaBlacar. I did a fair amount of hitchhiking and carpooling to save on costs as well. If you want to be precise, my transportation cost amounts to €289.68.
Route: Paris – Brussels – Amsterdam – Berlin – Prague – Vienna – Hungary – Venezia – Rome – Athens – Agristri – Santorini – Fethiye (Oludeniz) – Cappadocia – Istanbul
How to survive travelling when you identify yourself as a poor and adventurous traveller?
1. Know the resources to get FREE things (rides, accommodation, food, transport, apps, etc.)
Be shameless and disciplined when it comes to saving money. Every dollar saved goes a long way, and as I've mentioned earlier, social currency is a valuable resource.
Couchsurfing
I was hosted a total of 22 times, and met a couple of people during events or through meetups. I started Couchsurfing with the intention of getting a free stay, but along the way, I became an advocate for the platform. It is definitely a great way to be directly integrated with the local culture and the local's way of life since they include you in their routine. Even if I have the means to afford a hostel, I wouldn't because the social connections I have gained from the platform are so diverse and you often have very unique experiences with your hosts or co-surfers. Personally speaking, staying with guys is always easier because of their easy-going nature and there is always an ample amount of food, beers or wine available in the fridge.
How I received offers fairly easily was mainly because of this blog. I started writing because I wanted to store my memories somewhere I can put my thoughts and the pictures that I took (also aspiring travel writer) but who knew that it would come in handy someday? I find posting a public trip on Couchsurfing good to secure a host because you know that you have a person willing to take you in and if you are lucky, you get a couple of offers to pick from. Always read the references. It is your responsibility and best bet to keep yourself safe. Period.
I always hear complains such as "No one wants to host me because I am a guy." Not true. Here's the thing: you can always head for CS events or gatherings to score a stay with the locals too. The face-to-face interactions always make it easier as long as you are friendly. There are no gender preferences here. Get a cardboard and write things such as "Willing to clean and cook in exchange for a couch." I've heard success stories about it, and might contemplate giving it a try when in desperate times.
When taxis aren't an option and you need to get somewhere fast. Start with short trips to get a feel of it, then transit to longer rides. It wasn't difficult to get a ride at all, maybe it seemed like my struggles were too obvious to ignore, but if it works, it's all good. The auto-stop hand sign is universal and you won't be waiting for long before a car stops by. It took me 10 mins tops to get a ride; you just have to make sure that you are heading in the right direction and preferably stand by the side on the main road. Hitchwiki is useful to find out good hitching spots.
Once, I was picked up a Turkish guy who couldn't communicate well in English so we took turns using Google Translate to converse. It was pretty interesting and I learnt a couple of new words along the way.
Note: Bear in mind that stranger danger applies for both. Attempt at your own risk, just be a little street smart and always trust your intuition. Basically speaking, just trial and error and you will get a hang of things eventually.
Public transportation system
Rule of thumb: Never pay for public transportation unless you need to. Observe the loopholes, you'll find ways around sneaking in and honestly speaking, it isn't difficult. I have seen many locals doing the same. I've probably only paid in big cites such as Paris, Rome and Istanbul. Just be wary of the periodic checks (Argh, the €60 fine), or speak in a foreign language if you ever get caught. Perks of being Asian.)
Incognito mode on browser
For the lowest airfare/bus fare. Fares are usually regulated based on demand and supply. So basically, how this works out is that, by deleting your browsing history on the internet browser that you are using, the price stated for your airfare will be the lowest. This is one of the most useful tips on travelling cheap since transportation is the mother of all expenses.
Apps
The app store is a treasure trove of FREE resources for you to exploit. Maps.me (download the map of the entire country/city) and wifimaps was extremely useful during my travels to get the passwords for wifi. Not to mention, locals are your best resource for finding out the best instagammable places or unique bars.
Food
Ask and you shall receive. Head to restaurants/cafes after closing times and ask for leftovers that they will be throwing away. It's not extravagant but at least you don't run hungry. Sometimes, you get nice people who will sit beside you in the bar/pub and pay for your food and drinks when you strike a good conversation with them. Other times, you can have cooking sessions to bond with your hosts and whip up something each to share.
Others
It's an instant visual memory boost when you are travelling alone. Maps become secondary when you recognise streets by memory. I am constantly forced to re-learn new streets and be familiar with them in a short period of time. If anything, just be sure to know your way back to your accommodation, if not you are in real trouble. Always have a drop pin of the place that you are staying at on your Google map. If you need people to share the cost for a roadtrip, use Facebook groups e.g. Singapore Exchange Students in Europe/set an event on CouchSurfing, and chances are, you will be able to find interested parties. Or Blablacar.
Always have a drop pin of the place that you are staying at on your Google map. If you need people to share the cost for a road trip, use Facebook groups (e.g. Singapore Exchange Students in Europe) or set an event on Couchsurfing, and chances are, you will be able to find interested parties. Or Blablacar.
Pinching pennies doesn't mean that I deprive myself from having fun.
Free falling over a Blue Flags Beach in Oludeniz, Turkey
Music Festivals and conveniently getting a shoulder ride
Lowkey enjoying the ride, highkey scared that I'm going to fall.
Impromptu acoustic showcase by vocal powerhouses
Getting lost in the middle of the valley and meeting people who led us to ancient byzantine church and monastery
Skinny-dipping in the Mediterranean Sea
Camping out on a Greek island
Cycling for six hours through the parks and city of Prague, then rewarding ourselves with a pint of beer at every rest stop. 100% approved drink driving!
Living with a rescue dog who runs faster than I cycle
Visiting my host's future cave house. Flintstones dreams turning into reality
Free climbing and free falling into the depths of Cappadocia's pigeon valley
Swimming in one of clearest blue waters I have ever seen
Meeting cool co-surfers
Picking ingredients from the backyard
Impromptu photoshoots
Meeting like-minded independent travellers at random places and figuring out new places together
Roadtrips and hikes
Doing my assignment with such a picturesque sunset view, hoping that inspiration and determination will literally shine through
Of course, there are tons of perks to travel solo:
The autonomy to do whatever you want (seriously, who the f cares?)
For the first time in forever, I had total control of everything, my budget, my destinations, and my time. I had no plans whatsoever, riding along what comes in my way. It's easier when you are alone and you have the advantage of making decisions that only affects yourself in contrast to a group. Don't worry about sticking to schedules, it's never going to work out quite right.
I usually book my tickets for my next destination the day before I leave because I enjoy the flexibility rather than having to follow a rigid excel sheet schedule. Of course, it's stressful as well because the prices are usually higher but at least you are not cutting your time off in a city. Slow down, you are supposed to appreciate the surroundings, comment on the architecture of buildings, or take the best instagrammable photo, not rush through them.
It's liberating and refreshing when you meet new faces and the fact that you are anonymous in a sea of foreign faces makes it easier to start afresh each time. Throw away your fears and legal laws/norms in your own country because that ain't gonna apply when you travel. Everyone back home always tells me "Don't do this, or Don't do that". Well, when I'm travelling and if I choose to be liberal in my thoughts or actions, I will be liberal, my choice. Period.
Independent and wiser decision making (especially when Time=Money)
When you are alone, you know exactly how to survive. You have been through some tough shit and you deal with it. I have made some very bad decisions that had repercussions and those are lessons that you will never forget when you pay the price. When you are alone, you have ample time to think through everything, and be more clear-minded when it comes to making decisions, weighing the pros and cons of each option. And yes, you also become the best MasterChef/fixer/problem solver in a short span of time.
Self-confidence and freedom of speech
When fear turns into a leap of faith. Talking to strangers used to be a real struggle for me, as ironic as it sounds. You work on it, one person at a time. Be very comfortable with yourself, and engage in a lot of positive conversations. Sure, some topics are definitely more difficult to talk about than others but feel free to express your thoughts. I have realised that I can talk about anything and everything, controversial or not, to someone who barely knows me, but I just can't do the same with the people who are close to me, which is an irony. Be it the issue of modern relationships, abortion laws and pro-choice/pro-life, euthanasia etc. Proceed with caution and be tactful with your discussion. You don't want to come off as being intrusive or offend anyone. Never be apologetic for being opinionated, unless you are being rude about it.
As I mentioned previously, there are always people who judge you and are sceptical of your abilities to do something because of the limitations that they choose to see. Surround yourself with people who embrace your capabilities and make you the best you that you can ever be. The people that I have met during my travels are probably the most positive and encouraging people to be with and I am extremely grateful for all the good vibes.
The world is a big place, and every country has their own issues to deal with. Staying with an unemployed man in Greece as well as talking to one of my host's friend on a video chat was enlightening for me, realising how they are being affected by the economic crisis and the political corruption in their country. A lawyer who has not been receiving her paychecks for six months? An educated young man settling for a hostel job? We often pass through a country without realising the grime reality that locals are going through.
The media is a double-edged sword. Yes, it informs, but don't forget that it also manipulates how you see the world. You learn about the right to bear arms, gun control laws and politics from a different perspective. Browsing the internet in different countries also brings about new discoveries, such as the privacy controls and censorship in each place. It's a huge topic of discussion these days.
Catch flights, not feelings.
You meet TONS of people every single day. You'll fall for places and occasionally the people that come with it. Just keep in mind the expiry dates. Catch flights, not feelings.
I've met many expressive and open-minded guys when I was travelling, which was nice for a change. When people like you, they tell you directly, which is pretty cool. There's no messing around with your head, it's served to you right there. It's really sweet when guys make an effort to do something nice for you like putting a "Good Morning" post-it note on the bathroom mirror so that you will see it when you wash up in the morning. It might be due to culture, bonus points for that. To be honest, it's a surprise to meet guys who are such gentlemen, they probably fulfilled all my romance-comedy fantasies. It's been a dream come true, even though there was no happily ever after.
Racism
You'll find out racism isn't an explicit word or action, it's usually hidden between the lines or the subtle tease. Sometimes ignorance is the best defence and it always happens when you are a minority in a foreign country. Look closer, its everywhere.
I'm from Asia, and yes I speak fluent English. Yes, I'm Asian, but that doesn't mean that I come from a third-world country. Saying "Ni Hao or Konnichiwa" isn't going to impress me if you are not going to hold a decent conversation and it's extremely rude. Just don't.
Misogynistic Stereotypes
At times, you will be catcalled, you will face sexual advances, you will be objectified, you will be given the benefit of a doubt especially when you travel alone as a woman. I have been through those incidents over and over again. Challenge people's view when they try to put you down just because you are anything unlike them. If someone offers you bribes to sleep with them or pushes you to sleep with them just because they offered you an accommodation, know your worth enough to stand up for yourself. You are not a commodity, you are a human, and you will not allow anyone to degrade you to a value. I can't emphasise that enough.
Setbacks are there for you to learn from. Some days you get discouraged, but you never ever quit because you are a fighter. Limitations are there for you to overcome. I never knew myself as someone who was capable of completing a Europe backpacking tour alone, it still feels surreal that I completed the backpacking tour despite all the roadblocks.
Listen more than you speak
Be willing to listen, otherwise, how can you expect to understand anyone if all you hear is your own voice? When someone takes time out of their busy schedule to meet you or host you, appreciate it. Do your part to be a good guest as well as a good friend. It's not hard to listen to their lives as much as they listen to your travel tales. Sure, it doesn't seem as exciting as yours but you learn something out of the conversation, it could be an intriguing or an interesting insight into their lives that can be applied to yours.
You hear about their first love, their recent heartbreak, their family, their Tinder matches, their college life, their childhood trauma, their insecurities, their travels and beyond. In a short time, you break the ice of being strangers to become the best of friends, even if just for a night or two. It's an intimate conversation, and it often takes courage to say things we don't usually say to people. especially when you barely know them, and I am thankful that they let their guard down. Empathy is extremely important here, know the difference between empathy and sympathy. Get comfortable with silences, sometimes we just need to feel the presence of someone with us. Oh, not to forget, a pint/shot to bring out the truths and humour.
12 Most Exciting Philippine Festivals You Don’t Want to Miss
Kate Biol
Kate Biol is a modern marketer: one part creative and one part scientist. She's a big believer of happy endings - in books and in real life. When she's not closing business deals, implementing marketing activities or reading, she'll be traipsing across the country with her well-travelled red maleta.
Festivals or fiestas add more colour and meaning to the Filipino culture. Take away these celebrations and the Philippines will never the same. The country celebrates various festivals every month with themes that range from religious to cultural and indigenous.
In fact, there’s just too many festivals, and it would be hard for you to celebrate all of them in a single year. To help you make your pick, I’m listing 12 of the most exciting ones for you to anticipate, from January to December.
'Sinulog' comes from the Cebuano adverb "sulog" which means "like water current movement”. It describes the forward-backward movement (two steps forward and one step back) of the Sinulog dance. This dance is performed to the beat of the drum. The festival is celebrated in honour of the Child Jesus, Sr. Santo Niño. Fluvial Procession happens the day before the grand parade and in the afternoon, a formal procession participated by Santo Niño devotees takes place. On the feast day, a Pontifical Mass is given by the Cardinal with several bishops of Cebu, followed by the Sinulog Grand Mardi Gras.
Pintados de Passi is one of the best known festivals in Iloilo. Performers are adorned in traditional body tattoo with intricate designs on their bodies. They interpret stories about the town’s history and their way of life through theatrical street dancing performances with aggressive body movements. Highlights of the celebration include Sinadya sa Suba, Carabao Painting contest and Pinta Lawas.
When: Moveable, depending on the Holy Week schedule
The Moriones Festival is a folk-religious event held during Lent in Marinduque. Its etymology, "Morion" refers to the visor of the helmet worn by the Roman soldiers. “Moriones” refers to the locals who dress up in Roman soldiers costumes and masks. These locals are fishermen and farmers who participate in the street theatre as a form of penitence.
Flores de Mayo (Spanish for "Flowers of May") is a festival honouring the Blessed Virgin Mary that lasts the whole month of May.
On the last day of Flores de Mayo, a pageant called Santacruzan is celebrated in honour of Queen Helena (Reyna Elena) of Constantinople and her son, Constantine the Great, in finding the True Cross of Jerusalem. She carries a small cross and escorted by his son under a huge canopy of flowers. Reyna Elena is accompanied with the beautiful Philippine maidens and their handsome escorts under the hand-carried bamboo arc decked in flowers.
When: June 24, feast day of San Juan (St. John the Baptist)
Batangas is known for its lechon as its delicacy and it adapted the tradition to serve lechon during celebrations. The pigs are roasted, dressed in costumes and brought to the church. Roasted pigs line up the church patio while the mass is celebrated and they are blessed in honour of St. John the Baptist. The street parade showcases the roasted pigs in their colourful and outrageous costumes. Bystanders then drench the participants with water. This act signifies the baptism of Jesus by St. John the Baptist.
When: July 1-31 with big activities on 3rd or 4th Sunday
In the 16th century, Bohol leader Datu Sikatuna and Spanish conquistador Miguel Lopez de Legaspi sealed their treaty friendship with blood compact or “sandugo”. It is a month-long celebration with highlights on beauty pageants and street dancing on the third or fourth Sunday of July.
The festival started way back in 1986, and was formerly known as “Apo Duwaling,” taken from the country’s highest peak: Mt. Apo, durian fruit and waling-waling. In 1988, the festival was renamed “Kadayawan sa Dabaw” to honour Davao’s cultural heritage, history, abundance of flowers and fruits. Citizens celebrate on the streets and parade in full regalia in thanksgiving for their rich blessings.
As tribute to the Generals’ tuna industry, they pay homage by celebrating their city-hood with what they are known for: tuna. Tuna Festival is a weeklong celebration with tuna float replicas street parade, dance, music and art.
Coined from the English word “mass” and the Spanish “kara” (means face), Masskara Festival is celebrated every third weekend of October or the closest weekend to October 19. It started in 1980s when the sugar industry took a nosedive and Bacolod City, the country’s sugar capital, was affected. The government took matter in their own hands and decided to throw a party to uplift the people’s spirits. The festival is a reminder to the Negrenses to put a smile and a positive attitude when faced with challenges.
“Higantes” are paper mache giants towering four to five feet in diametre and ten to twelve feet in height. Paper mache art making is quite popular during the Spanish era. The Higantes is a major festival in honour of San Clemente (patron saint of fishermen). The festival dates back when Angono was a Spanish hacienda. Hacienda owners were a bit uptight about money and prohibited all celebrations except one annual fiesta. Townsfolk make best of the situation, created larger-than-life cartoon of their Spanish landlords—a typical Filipino combination of part stunning spectacle and an inside joke.
The word “parol” came from the Spanish term “farol”, which means light or lantern. Filipinos regarded the parol of star lantern as a sign of hope and a fount of light. Each barrio created these lanterns using bamboo and other indigenous materials. Each of the barrio's parols are brought around in procession to their vista during the nine-day novena mass before Christmas which coincides with simbang gabi from December 16 to 24. On Christmas Eve, the lanterns are brought to the church along with the barrio patrons before the midnight mass starts. The San Fernando lantern industry evolved from the Giant Lantern Festival of San Fernando.
Singapore Staycation-Goers: 7 Types You Will Totally Recognise
See Wah
See Wah loves to immerse herself in the poetic side of life: art, literature, photography, and of course travelling - poetry (of the human condition) in itself. She believes that the world is endlessly inspiring and beautiful, and when her head isn’t in the clouds, she hopes to fill her life with all these things that makes life wondrous
Taking a staycation in Singapore is the perfect way to take a quick chill pill over the weekend. Interestingly, we Singaporeans have so many 'pattern' that there's a wide variety of staycation-goers right here in our little red dot!
Fortunately, no matter what kind of staycation-goer you are, Singapore offers many hotels that suit all these different ‘patterns’! So... exactly which kind of Singapore staycation-goer are YOU? Read on to find out!
Singapore Staycation-goer Type-1: The ‘Bring-Whole-Extended-Family’ Kind
These staycation-goers seriously love their families. Aunties, uncles, cousins, grandpas, grandmas… Bring the whole lot in. This group’s pretty easy to spot: just look out for a big group at the hotel lobby. Not just any group, though, it’s the one where there’s kids frolicking around, teenagers glued to their phones, grandparents chilling away on the cushy sofas, and parents trying to keep it all together, as one of them tries desperately to check in as fast as possible. Despite the hectic-ness of it all, though, it’s rather sweet that these families still make the effort to come out and connect with each other during their precious weekends!
It doesn’t matter which room you get for your staycation (Superior from $170, Deluxe from $190, or Club from $220), get ready to have a whole lot of family fun! Soak in some sun with a cycling excursion, with this hotel’s complimentary bicycle ride (and don’t worry about getting lost, they offer a cycling reference guide as well!). If that’s not up your and your family’s alley, then why not go for a free bowling game or two instead? Lastly, partake in a koi feeding session, which is perfect for the little ones! If you’d rather have a more chill time, then check out their Ubin Adventure instead, and enjoy a FREE three-hour bicycle rental at Pulau Ubin. Family fun combined with the languid Ubin life? Sounds great to me!
Learn more about Village Hotel Changi’s weekend promotion here (Play & Stay) and here (Ubin Adventure).
Singapore Staycation-goer Type-2: The Helpless Foodies Kind
Everyone knows at least a few people who love to call themselves foodies, with their Instagram palette filled with endless photos of food from cafes, hawker centres, restaurants, and more. For them, a staycation in Singapore is the best excuse yet to spend frivolously on food! After all, you’ve got to make the best out of your mini-vacation, yes?
No need to bust out that wallet for a staycation in this hotel. Not only do you get a complimentary paired mini wine, brace yourselves for an exceptional dinner for 2 at JIN Fine Dining! With freshly-flown ingredients coupled with the skills of the renowned Chef Thomas Koh, who’ve previously helmed Hokkaido Sushi at M Hotel and have been in this industry since the 70s, this would surely make a great foodie experience for you (as well as awesome photos to upload onto your Instagram account!). Get the Deluxe Double room from $298, and enjoy all these amazing value-for-money deals with Singapore’s number one hotel
To these staycation-goers, why would you even want to, when your hotel has so many amazing amenities, and the only thing softer than your sheets would be how your heart feels when you’re sinking into them? Also, room service is seriously the best invention after sliced bread. Bring on the slob!
You know what would make your chill staycation even better? By getting yourself some club privileges, of course. Book a Club room for your staycation with Oasia Hotel Novena and gain access to the Living Room, with its very own delicious complimentary breakfast, private pool, and absolutely breathtaking views of the sunset beyond. Also enjoy evening cocktails on the house, priority check in, as well as unlimited internet access, just to name a few more perks! With all these available to you within the comforts and confines of the hotel, seriously why even bother stepping outside?
Learn more about Oasia Hotel Novena’s weekend promotion here.
Singapore Staycation-goer Type-4 : The Lovey Dovey Romantic Kind
This type of staycation-goer needs no introduction. Starry-eyed lovers will agree that staycations are the perfect way to spice things up. These couples love that they can finally enjoy some extended quality time, and take delight in indulging in a variety of rom-com-esque fare. *winks*
Looking for something super fun and different to do besides the usual staycation? Then why not enjoy a Chocolate Truffle Making session together on a gorgeous Saturday afternoon! After all, what better way to bond with your other half than through the aphrodisiac powers of cacao? Then, enjoy a movie under the stars by the pool as you sip on your complimentary red wine, sinking into your lover’s arms. And all from only $278 for a Studio room! Pretty sweet deal, huh?
If chocolate’s not your thing, though, then why not check in for your staycation on Sunday instead, and have a Couple Art Jamming Session together! Bring out the creative sides in both of you - or, alternatively, laugh at each other’s complete lack of artistic sense. Either ways, it’s bound to be fun, and definitely a staycation to remember!
Learn more about The Quincy Hotel’s weekend promotion here.
Singapore Staycation-goer Type-5: The Atas Wannabe Kind
So you really enjoy the atas lifestyle… And love to show it off to all your friends whenever you can. And what better way to do so then to plaster luxurious photos of you enjoying your bubbly champagne in an opulent-looking room on your staycation all over your social media! Better yet, gain access to exclusive club privileges in the hotel and, well, basically geo-tag everything, just so everyone knows where you're having your staycation. After all, if you've got it... flaunt it!
Who says you can’t enjoy the luxurious life without the moolah? On your next staycation, book a Club room from just $298, and get ready for a weekend of opulent fun as you enjoy a whole host of activities! Relax that body of yours as you slip into the dreamy haze of the included Thai aroma oil body massage. Then, chill out even more with your complimentary movie tickets to chase away your Monday Blues. Hungry? Then head back to your hotel to enjoy your free afternoon tea as you Facebook about how simply divine your fancy Singapore staycation is! Finally, just lounge around a bit more, because you only have to check out at 4PM the next day. Ahh, bliss. Pamper yourself crazy without that hefty price tag!
Learn more about Rendezvous Hotel Singapore’s weekend promotion here.
Singapore Staycation-goer Type-6: The Too Broke to Go Overseas Kind
Looking wistfully at those amazing overseas photos on Facebook with your band of girlfriends? Well, a staycation right here in Singapore is way better than nothing, yes? Fortunately for us, Singapore has tons of great affordable hotels for us to do some R&R in, and we gleefully pounce on any great hotel deals, just so we can pretend that we’re overseas, too!
Here’s a superbly affordable deal for you and one or two gal pals for the perfect girls’ staycation: book the Premier Room at The Elizabeth from $170, and enjoy the late check-out at 3PM the day after! What’s more it’s located at the peaceful residential corner of Mount Elizabeth, so you can either choose to chat the day away about anything and everything, or take a 5-minute walk to Paragon Shopping Centre, if you’re feeling a lil’ more active and shop till you drop with your girls! But who are we kidding? Wouldn’t you rather just laze your day away at this little slice of heaven and soak in the awesome staycation vibes?
Learn more about The Elizabeth Hotel’s weekend promotion here.
Singapore Staycation-goer Type-7: The ‘Shop-Till-You-Drop’ Kind
Shopaholics, unite! Some people’s idea of a perfect holiday would be one that involves tons of shopping, and luckily for this group of staycation-goers, Singapore is filled to the brim with shopping malls! These people are likely to book hotel rooms during the Great Singapore Sale period, just so they can wake up with the world of shopping at their doorstep, and hang around Orchard until the very last mall closes before retreating back to their cosy hotel room. Shopper’s paradise, indeed.
Starting from only $160, book the Superior room with for your staycation at this hotel and have the world of shopping at your feet, literally! A five-minute walk away from Orchard ION, get ready to really shop till you drop, as you go from one mall to the other. After all, Orchard isn’t known as the shopping hub of Singapore for nothing.
Learn more about Orchard Parade Hotel’s weekend promotion here.
So which type of Singapore staycation-goer are you? Or are you just a bit of everything? Either ways, it’s always fun to take a break at a divine hotel and feel pampered by these Weekend Deals once in awhile. Feel the chill vibes soaking into your bones, as you take your well-deserved break to charge up for the week ahead!
1-DAY FLASH SALE: Awesome Deals to Make Your Trip Planning THAT Much Easier
E-lyn Tham
Having a strong conviction that getting lost is just another adventure in itself, E-lyn takes particular delight in wandering stranger lands, inhibitions and fears thrown asunder. There’s so much left in the world to see, and there’s nothing she would like better than to spend her days dreaming whimsical, thinking adventure, and laughing curious.
We travellers are always strapped for cash. We hear you! How on earth does anyone travel the world and still have some money left in their pocket?
Here’s a solution for you. Take it from us - these deals and promotions will surely help make that booking process that much easier, and that much affordable. THESE are the deals you’ve been waiting for, and most of them are only valid for one more day – the DBS Online Fair is only on until 24 August 2016 (Wed), so what else are you waiting for?
The world awaits!
KLM ROYAL DUTCH AIRLINES - FLY TO OVER 10 DESTINATIONS IN EUROPE FROM S$828A Euro-trip is the quintessential trip of a lifetime. Cities in Europe are interconnected by a vast network of domestic flight and train routes, making inter-city travel across the whole continent a breeze. The selling point would be the diverse melting pot of cultures; no city is the same as another, making your European experience as carefree and enriching as you care to make it. Why not be spontaneous, book your flight and see where it takes you? Throw out all your inhibitions with reckless abandon, and book your flight to over 10 cities from just S$828 with KLM Royal Dutch Airlines! Start your journey from either Amsterdam, Paris, Rome, Barcelona and so on. Who knows? This might just be your most exciting adventure yet. Book till 24 August 2016 for travel until 31 May 2017.
CRUISE ARENA - S$50 OFF PER CABIN FOR 7N HONG KONG - SINGAPORE CUNARD FLY CRUISESometimes, the journey is what makes any trip overseas exciting. Sure, it just takes 5 hours to fly from Hong Kong to Singapore, but why not make the journey a trip in itself and visit a couple of places along the way? Depart from Singapore to Hong Kong, eat as much dim sum as your stomach can handle, plus visit Vietnam’s Nha Trang and Ho Chi Minh before heading right back to sunny Singapore. Nha Trang is famous for its’ beaches, and the pho is (excuse the pun), pho-nomenal in Ho Chi Minh. Take to the high seas and have first-row unobstructed views of the fiery sunset everyday as your cruise ship sails into the horizon. For a limited time only, get S$50 off per cabin when you embark on this 7N cruise. Time to set sail, mate! Book from now to 31 August 2016 for travel from 24-31 March 2017.
READY TO TOUR - 15% OFF ALL READY TO TOUR ITINERARIESThink an exciting holiday at a comfortable pace is impossible without planning it yourself or breaking the bank? Think again! With Ready to Tour, you can browse land itineraries featuring over 50 countries, having the assurance they have been designed by experts in private customised travel and affordable too - under S$2,000 for a 6D self-drive trip to Italy’s Puglia. Whether you vacation in classic cities such as Rome, Paris and Kyoto, or more exotic destinations including Patagonia and the Gobi Desert, you’ll return with plenty of treasured memories and cultural insights. The best time to indulge in a Ready to Tour holiday is now - enjoy 15% off all itineraries by entering the promo code “DBSQTFAIR” at checkout. Quick, offer only lasts till 31 Aug 2016!
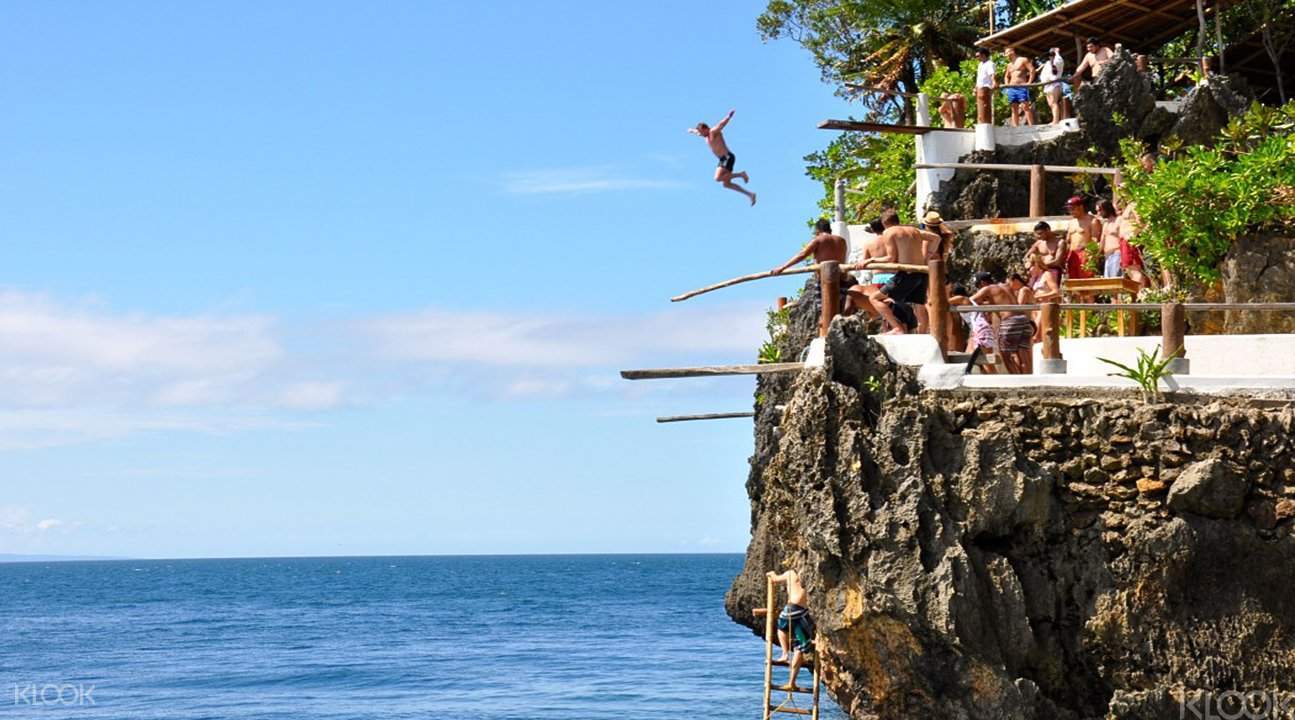
KLOOK - UP TO 70% OFF ACTIVITIES AND ATTRACTIONSImage credit: DBS; KlookSo your flights are all booked, and you’re left wondering what to do at your destination. No matter your destination, there’s always a must-do activity that you gotta strike off the bucket list. At Boracay, it’s diving off a cliff at Ariel’s Point. At Hanoi, it’s discovering the city on a well-worn trishaw. At Siem Reap, it’s discovering the magnificent ruins of Angkor Wat at dawn. If you’re worrying about how much all that is going to cost, stop right there! Klook is offering up to 70% off all activities and attractions, including all the above mentioned and much, much more. There’s just so much to do, and so little time – quick, grab the deal by 24 August 2016!
HOMEAWAY - ADDITIONAL 10% OFF BOOKINGSImage credit: Sarah ChambersUpgrade to a whole vacation with HomeAway. Stay in a holiday home and enjoy your vacation your own way - more space, more privacy, and with all the comforts of home. Book now on HomeAway and choose over one million awesome holiday homes worldwide - whether you are looking for an apartment in Tokyo, a luxurious villa in Bali, or a unique home in Singapore. Here’s your chance to stay at a home away from home with an additional 10% off bookings at HomeAway for your next trip! Simply enter promo code “HOMEAWAY10” to enjoy this offer. Book now till 30 Aug 2016 for travel by 31 Dec 2016.
EXPEDIA - UP TO 50% OFF HOTEL STAYSAccommodation can be really expensive. In fact, accommodation costs usually take up the bulk of your budget! But what if we told you that there’s a way to get around that, without scrimping on comfort, and do we even dare to say… on luxury? Save up to 50% off your stays when you travel to Melbourne, New York, San Francisco, Seoul, Sydney or Tokyo – think: an apartment overlooking the Golden Gate Bridge, or even the all-too-famous Plaza Hotel in the Big Apple. The choices are endless! P.S. DBS/POSB cardmembers even get an additional 10% off. Deal is only valid till 24 August 2016 – we know you only have a day to make your booking, but sometimes the best decisions are made on a whim. Go for it!
ROOMORAMA - 10% OFF ACCOMMODATIONS WORLDWIDETravelling with a big group? We bet all of you know all too well that the headache doesn’t come during the booking of flights and coordination of dates, but after. With so many people, it’s just so hard to find suitable accommodation that will fit everyone comfortably. Your best bet? A villa or an apartment. Splitting the costs of such an accommodation may be fairly more affordable than booking individual hotel rooms as well! Browse through tons of gorgeous villa and apartment listings on Roomorama – we spent an entire afternoon just marvelling at them all. What makes it even better is getting 10% off accommodations worldwide. Yes, worldwide! Just enter the code “10DBSSG” + the first 6 digits of your Credit or Debit card on the checkout page, and you’re good to go. Discounted rates are available bookings until 31 December 2016. Opulent living without breaking the bank – check!
ISHOPCHANGI.COM - ENJOY S$20 OFF WITH A MINIMUM SPEND OF S$200One of the best things about travelling would be the chance to shop, duty-free! Don’t underestimate the savings from duty-free shopping; you can easily save up to 60% off your goods. The only issue is the restriction of time, it’s really easy to get carried away with all your shopping and risk missing your flight. The blasphemy! However, as with everything else in this time and age, you now get the chance to do all your duty-free shopping online and without time constraint. That’s right, take your time to browse through the various catalogues, and mull over your decisions – there’s no need to hurry. Enjoy S$20 off with a minimum spend of S$200 at iShopChangi.com; enter the code “DBSTRAVEL20” at checkout and you’re all set. Promo code is only valid until 31 October 2016. Other T&Cs apply. Shop away!
DBS ALTITUDE CARD - ENJOY UP TO 10 MILES/S$1 SPENDRedeeming flights with accumulated miles has got to be the best feeling on Earth. Why wouldn’t it be, when you get to fly for free? After all, if you’re going to spend anyway, might as well get something out of it! With the DBS Altitude Card, you get up to a whopping 10 miles per S$1 spend! This applies for online flight & hotel transactions which includes hotel bookings on Kaligo when you book with your DBS Altitude Card. You also get up to 8 miles per S$1 spend when you book on Expedia, and more! This card also looks super sleek and shiny, giving you that extra flair whenever you whip it out. If you don’t already have the card, apply online and receive up to 8000 miles. New addition to our wallets, yes pleaseeee! Get your card from now to 30 Sept 2016.
So there you have it, incredibly irresistible deals all laid out for your picking. What can we say? These will well help you be on your way. Enjoy!
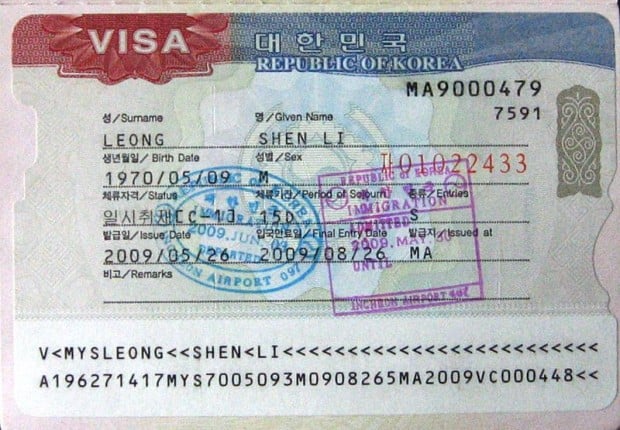
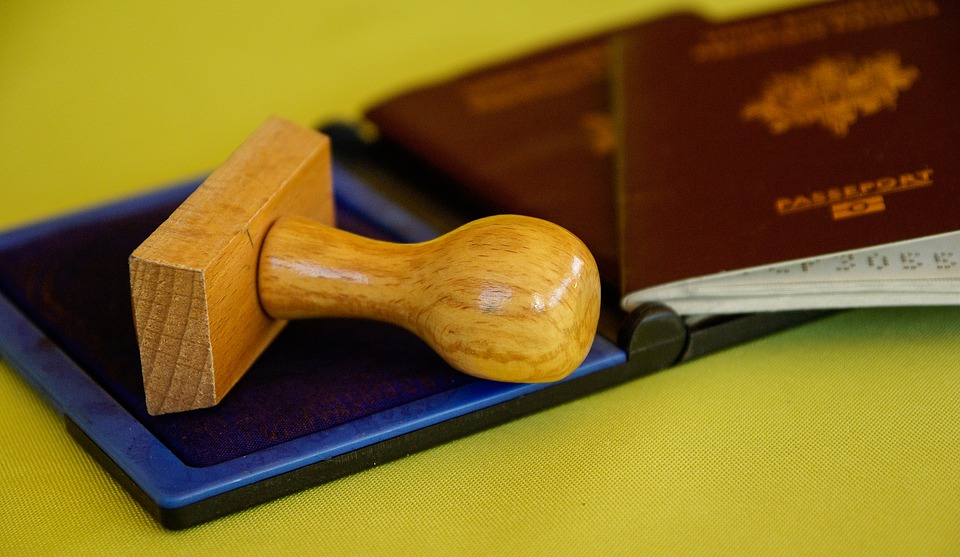
Korea Tourist VISA Guide for Filipino Employees and Married Couples
Jayson Concepcion
Jayson Concepcion is a programmer by profession but has a soul of a traveller. Aside from his ultimate dream of travelling around the world, he loves to eat, drink, listen to music, talk about aliens and indulge in his occasional secret guilty pleasure of singing love songs in videoke. His favourite superpower is to teleport from one place to another. I guess you know why. Follow his latest pursuits on his blog, Facebook and Instagram.
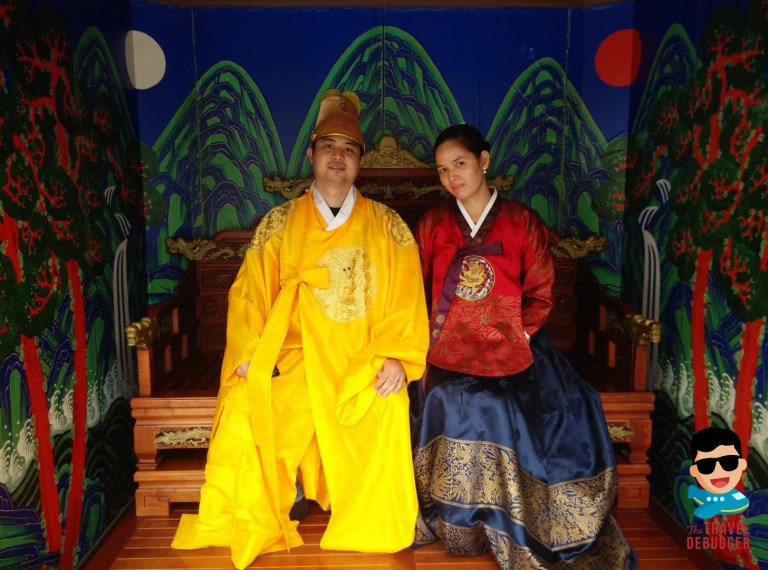
Travelling to South Korea was always a dream for us, ever since my wife and I were college sweethearts. We were just drooling over the country’s beauty in K-Dramas back then, but 12 years later, it finally happened!
So after months of preparation, finally, we got our South Korean Visas! And it’s not just for Single Entry but Multiple Entry for 3 years! Let me share with you how we did it -- our strategy, how we prepared and lots of tips. Read on!
Our Profile
Nami Island
Me: Employed and has not been issued a South Korean VISA before.
Wife: Housewife, unemployed and has not been issued a South Korean VISA before.
The plan is, I sponsor my wife’s travel expenses and make use of BDO’s credit card promo to avail both of us a multiple entry visa. I contacted BDO to upgrade my BDO classic card to Gold credit card to avail the promo.
Address: 122 Upper McKinley Road, McKinley Town Center, Fort Bonifacio, Taguig city 1634, Philippines
Schedule:
VISA Application - 8:30 am to 11:00 am
Releasing of passports - 1:30 pm to 4:00 pm
Parking: You can park in Tuscany just near the British embassy where the restaurants are at.
Tip: Arrive early! At least 30 minutes before. Upon entry, the guard will inspect your documents and hand you over a number and on what window you will submit your documents. Processing is fast and efficient! Only took us 30 minutes.
A representative or one in your group can submit your documents and claim your passports after. No need for personal appearance.
Processing Time
3 working days (for those who have been to OECD member countries within 5 years as tourist)
3 working days (for those who are BDO Gold/Elite cardholders, BPI Gold/Platinum cardholders and BPI Gold Express teller debit cardholders)
5 working days (for those who have not been to OECD member countries within 5 years)
Visa Fee
59 days (or less) stay in Korea -- GRATIS
60 to 90 days stay in Korea -- PHP 1,800
The Requirements
Please note that this guide will focus on the VISA requirements for employees and for housewife/househusbands. For other types, kindly check the requirements on South Korea’s embassy website here.
Original Passport (should be valid for more than 6 months)
Photocopy of Passport Bio-page (page 2)
Original & Photocopy of valid visa/s and arrival stamps to OECD member countries for the past 5 years (If applicable only).
Original Certificate of Employment (must include applicant's position, date hired, compensation, office address, HR landline number [cell-phone number is not allowed], and HR e-mail address)
Original Personal Bank Certificate (must include account type, current balance, account opening date, and Average Daily Balance - ADB)
Bank Statement (original or certified true copy of bank statements/passbook for the last 3 months)
ITR (Income Tax Return) or Form 2316 Copy
Copy of PRC Card or IBP Card (If applicable only)
Visa Requirements for Housewives / Househusbands
Same as numbers 1 to 5 for employee requirements above with additional requirements below:
Additional documents
If spouse is employed: Husband's Employment Certificate Original (must include position, date hired, compensation, office address, HR landline number [cell-phone number is not allowed], and HR e-mail address)
If spouse is self-employed: Business Registration from SEC or DTI (Copy), Business Permit or Mayor's Permit (Copy)
Original Personal or Spouse's Bank Certificate ‘(must include account type, current balance, account opening date, 6 months average balance - ADB)
Personal or Spouse's Bank Statement (original or certified true copy of bank statements/passbook for the last 3 months)
Spouse's Copy of Income Tax Return (ITR)
Copy of NSO Marriage Certificate
Other Information
If personally invited by Korean (authentication not required):
Invitation Letter
Photocopy of invitor's Passport or Identification Card
If invited by Company in Korea (authentication not required):
Invitation Letter
Photocopy of Korean Company Business Permit
*Frequent travellers who have travelled as tourist to OECD member countries within 5 years are exempted from submitting ITR.
Click here for the application form. Print the form and fill it up completely with no erasures! Don’t leave a field/item blank. Put n/a or Not Applicable instead. I will try to explain some of the fields in the new form but most are self-explanatory.
1.7. National Identity no. – We Filipinos don’t have this, so just put n/a (Not Applicable).
9.4. Address in Korea / 9.5. Phone No. in Korea – You can put undecided if you haven’t decided yet where to stay in Korea. But for me, I advise you to put a place where you intend to stay like the name of a Hostel in Seoul even though you haven’t booked a reservation yet. There are also Hostels/Hotels in Korea that accept reservations with no down payment, so if ever you get denied, you can just cancel your reservation. Easy as that!
9.7. If you have visited more than 5 countries in the last 5 years (as there are only 3 spaces in the application form), write the other details on a separate sheet of paper. If the stamps of these countries are in your old passport, then bring your old passport too. It won’t hurt if you photocopy the stamps and bio page as well.
9.8. If you are travelling with any member of your family, then write it down in this section. I think this is for the embassy to check easily who is sponsoring who in case there is, like me and my wife where I am sponsoring our trip in terms of funding.
10.1. Write here the estimated travel cost (in USD) of your whole trip in S. Korea. Be realistic and maybe increase it a little, but make sure that what you write here is equal or lesser than the fund in your bank statement or bank certificate. For example, if your fund in your Bank is PHP 50,000 (reflected in the Bank Statement), then put around USD 857 (PHP 40,000). I subtracted PHP 10,000, assuming that the maintaining balance in your account is PHP 10,000.
10.2 Who will pay for your travel related expenses. Write here the person or company who will pay for the expenses of your entire trip. For the Type of Support here, you can write Financial support or a particular expense like airfare, accommodation. If you are funding yourself, then put ‘myself’.
2. 1 piece of Passport size coloured picture
We got our picture taken at Great Image for a more professional look. We paid PHP 370 each (PHP 740 total) for 8 pcs of passport size coloured picture with white background. Just tell them it’s for a S. Korea VISA application and they know the size for it.
3. Original Passport (should be valid for more than 6 months)
Make sure your passport is valid for 6 months.
If female, married and your expenses are sponsored by the husband, be sure that your name in your passport is your married name, not your maiden name.
Bring your old passports too if there are any. The consul did look at our old passports (maybe skimmed a bit on the stamps) but quickly gave it to us on the day of the application.
4. Photocopy of Passport Bio-page (page 2)
It should be a clear one but not necessarily coloured. Just enough to see the details.
5. Original & Photocopy of valid visa/s and arrival stamps to OECD member countries for the past 5 years
(If applicable, and Korean Visas will not be counted)
6. Original Certificate of Employment
(must include applicant’s position, date hired, compensation, office address, HR landline number [cell-phone number is not allowed], and HR e-mail address)
Request for a COE with your HR Department at least a week before your VISA Application as this needs to be recent.
Request for additional copies if you are travelling with a dependent. In my case, I requested two. One for me and one for my wife.
7. Original Personal Bank Certificate
(must include account type, current balance, account opening date, 6 months average daily balance or ADB)
You request this at your branch of account. I requested mine at BDO where I paid PHP 100 for each certificate (I requested two, one for me and one for my wife). Just tell the staff at your bank you are requesting such for a Korea VISA Application.
8. Bank Statement
(original or certified true copy of bank statements/passbook for the last 3 months)
This is different from the Bank Certificate. It is a list of your transactions with your Bank (credit, debit items) for the past 3 months just like what is shown in your passbook.
If you are travelling with a dependent, then you must request a copy for each dependent.
9. Photocopy of ITR (Income Tax Return) or Form 2316
You will request this from your HR and you only need to submit a photocopy or photocopies for your dependent(s).
Make sure your TIN number appears in this document.
If you don’t have an ITR yet because you are fairly new to your job, then I think you can prepare a letter stating your situation.
10. Photocopy of NSO certified Marriage Certificate (For Spouse category only)
You can request a certified true copy of your Marriage Certificate in NSO on their e-census website. No need to go personally in their offices. This is a proof that you are married to each other.
You only need to submit a photocopy.
How much cash do you really need in your bank account?
This is not set in stone. I guess you should also ask yourself first. If you are staying in Korea for around 5 days, how much pocket money do you need then for your expenses? If you say your budget is PHP 10,000 a day, then PHP 50,000 is enough to have in the bank account. But if you are staying for 30 days, then logically, you should have a bigger amount in your stash.
Also, since they ask for the ADB (Average Daily Balance) for 6 months, make sure that the amount you estimated to spend in Korea matches or close to the ADB in your account. In my case, since I’m also sponsoring the expenses of my Wife, I have to double the estimated expenses per individual. I also steadily increased my BDO Savings for the last 6 months and I seldom withdraw large amounts. Basically, if you are just staying around 5 to 7 days, I think PHP 50,000 is a safe bet (I heard that others were approved by only having PHP 30,000). Just make sure you don’t withdraw that P50,000 for 6 months before your VISA application.
Credit Card Promos
If you are a BDO Gold/Elite, BPI Gold/Platinum or a BPI Express Teller Debit cardholder then you are eligible for a 3-5 years Multiple entry visa and are exempted from submitting a Bank Certificate and ITR when applying. For more information on this promo, go to the Visa Announcement section in the Korean Embassy’s website.
Bring your credit card with you, photocopy of the front of the card and 2 months of the most recent credit card statements. In my case I only have 1 month statement on my BDO Gold card but they still accepted it anyway.
The reason why I still submitted my ITR and bank certificate is to show proof that besides having the credit card, I can support my wife’s travel expenses in Korea through my financial capacity.
You will line up at Window 3, and you will claim your passport 3 days after the application.
More Tips
No need to submit your itinerary, plane tickets, hotel bookings, tickets to Everland/DMZ, etc, just submit what is required in the application.
Bring a Valid ID (aside from your passport). You need this to enter the Embassy.
How can I be exempt from securing a VISA? Read from this link or see screenshot below:
If using Philippine Official and Diplomatic Passport
If transiting only and going to the U.S., Canada, Australia, or New Zealand. But must not stay beyond 30 days and with confirmed onward ticket to the 3rd country
If the individual has been to Korea for four (4) times within the past two years with a C2 or C3 visa. Or has been to Korea for more than ten (10) times already
If Nationality is among the list of those exempted from securing a visa. For information, or list of these nationalities, you may visit the website.
For other visa information, you may also refer to this site.
Reasons why the embassy denies an application:
The reasons of the denial of visa application are as follows:
Your passport is invalid;
You are prohibited to enter Korea as per Korean Immigration law no.11 sec. 1 (Prohibition of Entry);
Our record shows that you have previously violated the Korean law;
You failed to submit the required document completely;
The documents you have submitted cannot be verified;
You failed to prove the purpose of entry to Korea;
You failed to prove strong economic and family ties to the home country;
Your inviter is not qualified to invite you;
You failed to prove the relationship with your inviter.
In addition, the reasons of the denial of spouse visa application are as follows:
You failed to give prima facie evidence of your marriage validity according to the Philippine law and regulation;
You failed to give the correct information about your spouse;
You and your spouse failed to prove keeping a normal marital life.
If your application is denied, you have to wait for 6 months to re-apply.
Conclusion
So guys, it is advisable to check the Korean Embassy’s official website from time to time for new announcements. You can avail the credit card promo if you want for less hassle and more chances of approval. Be sure to prepare all the documents, arrange it in the order listed above and hope it gets approved so you can enjoy South Korea in no time!
A Filipino Traveller’s Guide to Visiting Korea for the First Time
Jane Galvez
Jane is a homebody, but the promise of an adventure of a lifetime inspires her to spend her weekends travelling. When she's not on the road travelling, she's writing about the places she's been to or planning her next exploit at Oh My Janey.
For Filipinos, South Korea sounds like an expensive travel destination. Being one of the leading economies in Asia, its high cost of living and visa requirements often make Filipino travellers think twice before booking a flight to the country.
Believe it or not, you don’t have to be rich to explore the Land of the Morning Calm. For Filipino first-time travellers to Korea, here’s a little guide to make the experience worthwhile.
How to apply for a visa: Lax rules and easy application process
Applying for a Korean Visa is almost hassle-free if you have the necessary requirements and enough time to accomplish it. Though a travel agency can help you when applying for a Visa, it’s something you can do yourself.
Luckily for Philippine passport holders, a single entry 59-day South Korean tourist visa comes for free! Though there are requirements, accomplishing one is no rocket science.
Step 1: Compile the necessary requirement for a tourist visa
Complete all the necessary requirements needed for the visa application. It varies from one individual to another, but there are general requirements that every applicant needs to submit.
General requirements
Application form
Philippine Passport valid for more than 6 months (original and photocopy of Bio page)
If applicable, original and Photocopy of valid visas and arrival stamps to OECD member countries for the past five years.
NSO-certified Birth Certificate
Original Personal Bank Certificate
Original Bank Statements
Original or Photocopy of Income Tax Return (ITR) or Form 2316
1 passport-sized picture
Travellers with OECD member country visas and arrival stamps within the last five years are exempt from submitting an ITR. A recently revised condition also exempts from submitting an ITR frequent travellers who have been to Korea at least once for the last five years .
Supporting documents
Invitation letter from a Korean or a company in Korea
Roundtrip airline ticket
Hotel booking
Aside from the requirements mentioned above, some applicants are required to submit other documents.
For employees
Original Certificate of Employment (COE) including applicant’s position, compensation, address, date hired, office landline or mobile number, and email address
Certificate of Leave of Absence
For businessmen
Copy of an SEC or DTI-issued Business Registration
Copy of Business or Mayor’s permit
(Optional) Electricity bill statements for the past three months
For students
Since they do not have an ITR and probably a bank account, they’re required to submit the following instead:
Original School Certificate
Photocopy of School ID
Parent’s Documents:
Original Employment Certificate
Or Business Registration from DTI or SEC & Business Permit or Mayor’s Permit
Original Bank Certificate
Original or Certified True copy of Bank Statement
Copy of ITR
Copy of NSO Marriage Certificate
For a more comprehensive list of visa requirements, visit mofa.go.kr.
Step 2: Accomplish the visa application form
The visa application form can be downloaded from the embassy website, but it’s also available when you go to the embassy to submit your requirements. However, it’s advisable to finish filling up the form before going to the embassy.
You can download the new visa application form here.
Step 3: Head to the South Korean embassy to submit your requirements
The South Korean Embassy is located at McKinley Town Centre in Taguig, and filing of visa application is available from Monday to Friday, 8:30 AM to 11:00 AM only. However, you must arrive there early, because they accept applicants earlier than 8:30 AM. I made the mistake of arriving at exactly 8:30 AM and had to face a terrific queue of applicants.
There’s no need to make an appointment as it’s on a first come, first served basis. You will be directed to a specific window, depending on your traveller type—first time travellers, frequent travellers, seamen, travellers with OECD-member country visa, etc.
Though the single entry visa valid for 59 days or less is free, other types of visa comes for a price. A 60 to 90-day length of stay costs PHP1,350.00, while a multiple entry visa sets you back to PHP 3,600.
It’s also possible to submit the application for someone else. When I travelled with my family, I am the one who submitted their visa application forms and requirements, with no additional charge at all.
Step 4: Return on your scheduled date to claim your passport and visa
Processing time varies—3 working days for those who have been to an OECD country within the last five years and 5 working days to those who haven’t.
Claiming of passport can be done from Monday to Friday, 1:30 PM to 4:00 PM only.
If applying for a visa is too much hassle for you, then great news! Jeju Island requires no visa for Philippine passport holders. The island has enough charm in itself that it’ll already be a perfect destination for a 3 to 4-day visit.
Yes, you’ve read that right. It’s possible to automatically be granted a free multiple entry visa valid for a year or two years, even if you didn’t apply for it! However, the only way to be granted this kind of Visa is if you applied for one within two years after your last visit.
Since it’s your first time, you’re still not eligible for this. It’s still a nifty information, because once you’ve visited Korea, you’ll be planning to return as soon as possible.
Don’t forget to check out the South Korean embassy website, and read it again and again so you won’t miss out anything.
Getting around Korea: A guide to buses, subways, taxis, and trains
Getting around Seoul is easy enough. South Korea has one of the most efficient transportation systems in the world, and tourists will definitely find it easy to navigate the country.
The T-Money Card
If you plan to use the public transportation consistently during your stay, then it’s best to get the T-Money Card. It’s a transportation card that also functions as a discount card and can be used in select convenience stores. The rechargeable T-Money Card is used in subways, buses, and taxis, and it’s honoured in Seoul, Gyeonggi-do, Daejeon, Incheon, Busan, and Daegu.
One of the advantages of a T-Money Card is that travel fare is KRW 100 (PHP 4) cheaper compared to paying with cash. Transferring from one subway line to another, from bus to bus, or bus to subway is also free with T-Money. But of course, the transfer must be done within a limited time.
Though the card itself costs KRW 2,500 (PHP 100), a card with KRW 20,000 (PHP 800) or less credit can be refunded with KRW 500 (PHP 20) service fee. The refund can be done at partner convenience stores with a T-Money logo.
You can buy a T-Money card from a vending machine or a convenience store inside subway stations. I remember buying mine from a convenience store in Anguk Station, and another one from a vending machine in Hongdae.
There’s also the M-Pass card, which offers 20 rides per day for the user. There are 1-day, 2-day, 3-day, 5-day, and 7-day passes, and it can also be used in subways, buses, and taxis. I honestly don’t recommend getting this. A 1-day M-Pass card is worth KRW 10,000 (PHP 400), but there’s no way you can use up that much just on transportation. Even with multiple transfers, we didn’t spend more than KRW 6,000 (PHP 240) on transportation in a day.
Check out Visit Korea’s page to see the full list of cities that use T-Money.
The Seoul Metropolitan Subway makes travelling around the capital not just easy but cheap and comfortable. It has 18 rapid transit, light metro, and commuter rail lines that extend to a number of nearby towns and cities, such as Incheon and Yongin.
If you’re DIY-ing your South Korea trip, then it’s best to familiarise yourself with the subway lines. I often plan my itinerary based on the attractions’ nearest subway lines. Be prepared to make a lot of transfers, but learning how the subway lines connect can make planning a lot easier. I suggest downloading a mobile app of Seoul’s subway system. You can also save a guide of the Seoul subway.
Be prepared for a lot walking, because most subway stations don’t have escalators. You’ll also be walking a lot, especially when you make a transfer. Walking from one subway line to another can already take 10-15 minutes, depending on foot traffic.
Aside from Seoul, the other big cities with subway lines are Busan, Daejeon, Daegu, and Gwangju. Instead of using single journey tickets, use your T-Money to save time and money.
Another affordable way to explore cities is to ride the buses. The buses in Seoul are frequent and inexpensive, but they travel at a limited time period. We didn’t know this so when we arrived in Seoul from Busan at around one in the morning, the buses going from Seoul Station to Hongdae already stopped its operation for the day. We resorted to riding a cab.
Bus stops in Seoul have route diagrams in English, so you can check whether your bus passes that way. Most bus stops also have a LED sign signalling the arrival of a bus. Keep watch for your bus number, because if the sign says it will arrive in 5 minutes, it will.
In the province, buses follow a schedule. It usually arrives every hour or 30 minutes. Timetables, names, and destinations are rarely written in English, so look for the nearest tourist information centre to help you with the Hangul (Korean language).
While you can use the T-Money when riding buses, bank notes are also acceptable, but only coins are given as a change. So save your KRW 1,000 (PHP 40) notes for bus rides if you don’t plan to use the T-Money.
Taxis
Despite being a developed country, South Korea boasts of affordable taxi fare. Depending on the destination and the size of the group, commuting via taxi can be cheaper than riding the subway. We sometimes resort to riding the taxi, with no worry whatsoever of the cost, because we know that the taxi drivers wouldn’t charge us heavily.
Regular taxis charge around KRW 2,400 (PHP 100) for the first 2km, but there’s a surcharge of 20% from midnight to 4:00 AM.
Though taxi drivers are not that good in English, they try their hardest to communicate with you. The drivers who know English will be chatty, so be friendly and introduce them to the wonders of our country as well.
Many Korean drivers cannot read phonetic alphabet, and most of them wouldn’t understand your pronunciation of a place with a Korean name. Chances are, you’d be misunderstood.
Here’s a tip: Have someone—your host or a hotel receptionist—write out your destinations for the day in Korean, which you’ll show to the driver. It’s also good to have the address of your hotel written in Korean, just in case you’ll need to get home via taxi one lost night.
Travelling around Korea
Though not the cheapest mode of transportation, the Korea Train Express (KTX) makes moving around the country faster and easier. Operating at 300 km per hour, the express train can take you from Seoul to Busan in less than three hours. It’s a fast, safe and easy way to travel, but it can also cost you a lot. But if your goal is to travel more than one city, you must definitely consider this mode of transportation.
Reservations can be made via travel agents, ticket counters at the station, the internet, and automatic ticketing machines. You can check train schedules and book tickets online a month in advance. You can do so here.
When to use the discount pass
The Korail Pass is a great way to travel from one destination to another, without burning a hole in your wallet. You can ride the KTX for unlimited times on your chosen number of days—1, 3, 5 or 7 days.
The catch is, you’re required to use it on consecutive days. But if you’ll be frequently travelling via the KTX, then it’s an ideal option for you.
My friends and I used the KR Pass for a two-day trip to Busan. We purchased a 3-day KR Pass, even though we’ll only be spending overnight in the city. It’s still a lot cheaper compared to buying two separate tickets.
Upon arriving in South Korea, you’ll be welcomed by the grand Incheon airport. You’re still far from Seoul, but numerous modes of transportation are available to reach the capital.
Airport Rail Express
Taking the AREX is the quickest and cheapest way to reach Seoul. Depending on the traveller’s needs, there’s the Express Train and All Stop Train. Both stop at Seoul Station, which is right where you want to go if you need to head directly to KTX.
The Express Train, which travels non-stop to Seoul Station, operates with 25 to 40-minute interval, with KRW 14,000 (PHP 560) fare for adults. The rates are adjusted to KRW 8,000 (PHP 320) for adults and KRW 6,900 (PHP 280) for kids, until December 31, 2015. You can use your Express Train ticket to get a discount when purchasing a KR Pass.
On the other hand, the All Stop train costs KRW 4,250 (PHP 170) for adults, KRW 3,040 (PHP 120) for the youth, and KRW 1,900 (PHP 80) for children. It stops at 11 subway stations, 6 of which allow passengers to transfer to other subway lines.
If you decide to take the AREX, be prepared for a lot of walking and heaving luggages up multiple flights of stairs. Many subway stations do not have an escalator.
The airport bus is one of the easy ways to reach Seoul from the airport. Just ask the contact person of your hostel or hotel which Airport Bus Number you should take to your accommodation.
No matter where you’re going in downtown Seoul, the travel fare of the Deluxe Limousine Bus, which makes fewer stops, and the Standard Limousine bus are KRW 14,000 (PHP 560) and KRW 9,000 – KRW 10,000 (PHP 360 - PHP 400), respectively. Ticket booths are right outside the passenger terminal, while the bus platforms are right outside the gates.
Taxis
Though not exactly a budget-friendly way to travel, riding a cab offers the convenience that neither a bus nor a train can offer. This is ideal when you’re travelling with kids and the elderly.
Riding a standard taxi from Incheon airport to Seoul can set you back KRW 60,000 - 100,000 (PHP 2,400 - 4,000), and the KRW 8,000 (PHP 320) toll is the passenger’s responsibility.
What to wear in Korea: Four seasons of fashionable dressing
My friends and I always joke that Korea is the place where we can unleash our inner fashionistas. The country has four seasons, which means there’s a lot of room to experiment on clothes. However, as someone from a tropical country, it can get pretty cold! I make sure to check the weather at least two weeks in advance to plan out what I would wear on the days I’d be in Korea. This makes packing easier.
Being from a tropical country, winter can be the harshest weather condition we face on our travels. But winter clothes and thermal wear can be your best friend in navigating the winter wonderland. My cheapskate self will tell you to visit your favourite ukay-ukay for parkas and jackets, but a quick visit to a mall can also direct you to international brands carrying an affordable winter line.
Though it’s mostly chilly throughout the day, the days are tolerable compared to the nights. While coats and thick jackets are necessary when roaming the streets at night, it’ll be bearable to wear only long-sleeved shirts or thin cardigans during the day. But the temperature can drop to an almost freezing level when it rains.
Summer
Just think of a regular hot day in the Philippines, minus the humidity and the threat of rain every minute.
Fall
The temperature of spring and fall are almost similar, but autumn nights can get a little colder. It’s when the temperature drops almost everyday as it slowly approaches winter. Wear thick coats over long-sleeved shirts, and warmers under your pants. Boots are also applicable.
Where and what to eat: A brief introduction to Korean food
Breaking news: Not all Korean food is spicy! And it’s not just vegetables either.
As pork lovers, Filipinos are often terrified at the sight of a Korean food-filled table. At first glance it may look either very green (veggies) or very red (chili), but Korea has a wide selection of Filipino-friendly dishes.
The famous samgyupsal may be best enjoyed with ban chan (side dishes) wrapped in lettuce, but it can also be eaten as a viand with rice. Speaking of rice, Koreans probably put magic on their rice because it tastes really good! My mother who’s not fond of Korean food is very fond of Korean rice. It is also often served with beans.
When eating at Korean restaurants and you’re not into spicy food, don’t hesitate to specify that you don’t want gochujang (chili paste) on your food. Emphasise this especially when you order bibimbap. Also, you can ask the servers which food on the menu isn’t spicy. They’ll happily point it out to you.
There are also a lot of fast food chains in Korea, with a little twist from what we’re used to. If you’re uncomfortable experimenting with the local food, you can always resort to the tried and tested international fast food chains like McDonald’s and KFC or the obscure Popeye’s and Lotteria.
But if you’re willing to introduce yourself to the charming and addicting world of Korean cuisine, I recommend the following:
For non-veggie lovers: Omurice, Hotteok, Cup Toast, Pork Cutlet (donkasu), Samgyeopsal
For non-spicy lovers: Bulgogi, Mandu, Patbingsoo, Kimbap, Galbitang
For spicy lovers: Jjamppong, Korean fried chicken, Ramyun, Odeng, Bibimbap, Kimchi jjige
Must-try Korean restaurants
Though I highly suggest trying small-scale restaurants serving home-cooked Korean cuisines, there are restaurant chains that you must try:
From a university project to an established restaurant chain in Seoul, The Fry Pan serves one of the best Korean fried chickens you’ll ever taste in your life. A plate of boneless chicken breasts fried to perfection served with a side of potato wedges will make you love and crave the fried chicken culture in Korea.
You can find it in Hongdae, Myeongdong, Itaewon and more.
2. Hello Kitty Café
Decorated with anything pink and Hello Kitty, even the food and coffee served in the Hello Kitty Café are definitely cute. There’s already a Hello Kitty museum in Jeju, but if you’re stuck in Seoul, you can visit any of the cafés in Hongdae, Hyehwa, or Sinchon.
3. School Food
Korean food with a twist! This restaurant chain takes the ordinary Korean homey food and puts a spin on it. A kimbap is not just a kimbap, because their fillings range from beef teriyaki to bacon to fried shrimp. School Food is already scattered around the country, and there’s one in almost all tourist hubs.
If the Japanese has the bento, Koreans have the doshirak! Miss Lee Café specialises on the lunchbox meal that consists of rice, egg, spam, kimchi, and seaweed. The trick is to shake, shake, shake the box to mix all the ingredients inside.
5. Lotte Mall Food Court
Probably the fanciest food court I’ve ever tried, the Lotte Mall Food Court is adjacent to the supermarket. You can pass it on your way to Lotte World. They have a wide selection of food, that it’ll be impossible not to pick one that’s good and fits your budget.
Where to stay: Hostels, hotels, home stays, temple stays
Growing to be one of the hottest destinations in Asia, South Korea has a booming hospitality industry. There’s a wide selection of accommodation perfect for every budget.
A stone’s throw from Haeundae Beach, Hi Korea Hostel offers affordable accommodation with free breakfast. Their shower is top-notch and their dorm-type rooms still offer a sense of privacy to the guests. Read my review here.
2. K Hostel in Seoul
Conveniently located at Dongmyo station, K Hostel is within walking distance of Dongdaemun and the Seoul Flea Market. Any KPOP fan will also appreciate its decoration. Read my review here.
3. Koreastay (homestay)
If you want to learn more about Korea and befriend the locals, homestay might be perfect for you. It’s available in pretty much all provinces in Korea. Though not necessarily cheaper, homestay is a great way to learn about the culture directly from the source and not the guidebook.
A unique way to experience Korea is through its lifestyle and beliefs. It’s not just an accommodation, it’s a cultural experience. Here, you can learn and practice Buddhist teachings during your stay. Visit templestay.com for more info.
5. J Hill Hotel
Though not a 5-star hotel, J Hill Hotel has everything you need for a satisfying and comfortable stay in Seoul. From buffet breakfast to coin-operated do-it-yourself laundry, it’s conveniently located in Myeongdong—the shopping mecca of Seoul.
And if all else fails, you can always spend the night in a sauna.
What (not) to do: Customs and traditions to keep in mind
I always think that Korea and the Philippines have similar values. However, there are still striking differences. Check out these customs and traditions that you must always keep in mind when in the country:
They have great respect for the elderly. No matter how tired you are, do not sit at the subway and bus seats provided for the seniors and pregnant women.
It’s a complete taboo to wear shoes inside the house or a room. When we stayed at a hostel in Seoul, we were scolded on our first day for bringing in our boots inside the room. Do not let the same thing happen to you.
Absolutely no jaywalking!
When handing money or cards when paying, try to use both hands as a sign of respect.
Bowing is common. When you end up meeting the gaze of the locals, especially the elderly, bow your head a little as a sign of acknowledgement and they will gladly do the same.
Tipping is uncommon in Korea. Don’t feel obliged to give tip to your taxi driver or to leave tip at a restaurant.
Be respectful at all times, because they will definitely show you hospitality and kindness.
Let’s keep our corny jokes to ourselves for awhile, and at least try to understand their language.
When in Korea, it’ll go a long way if you know a little Hangeul (Korean). The country has become incredibly tourist-friendly in just a couple of years, but it’ll still be good to show the locals that you’ve made an effort to greet them in their language.
Of course, you can’t learn a language just a month before your trip! Here are some words, phrases and sentence that you can find useful in your travel:
An-nyong-ha-se-yo! – It’s both hello and bye in Korean.
Budget Travel in Seoul: 12 Tips from First Time Visitors
Jayson Concepcion
Jayson Concepcion is a programmer by profession but has a soul of a traveller. Aside from his ultimate dream of travelling around the world, he loves to eat, drink, listen to music, talk about aliens and indulge in his occasional secret guilty pleasure of singing love songs in videoke. His favourite superpower is to teleport from one place to another. I guess you know why. Follow his latest pursuits on his blog, Facebook and Instagram.
Travelling to Korea for the first time last year was a dream come true for me and my wife. It was an experience that we will never forget. So good that we already booked our next flight to Korea December this year to experience Snow!
Many of us think that we need loads of money to travel in Korea. That is not entirely true because you can travel Korea on a budget. On our trip, we spent a total of PHP 22,649.82 including airfare and accommodation (but excluding shopping and souvenirs) per pax for 6 days. For me, this figure is just okay. It’s not that high, but not that low either. This figure can definitely be lowered by following the tips I listed below. Just note that some of the items listed below are things we have done and would have done if given the chance again just to lower our expenses.
Based on my observation these past few months, the airline that offers the cheapest rate from Manila to Incheon is AirAsia especially during promos. On our trip last September, we got round trip tickets at PHP 7,203 all-in (base fare at PHP 5,638 plus seat reservation fee, processing fee, baggage allowance) per pax. But on our future second trip, I booked a round trip flight at PHP 5,560 all-in (base fare PHP 4,340) which is cheaper than our first flight. However, they don’t have direct flights to Busan. So if Busan is part of your Itinerary, then you can try Cebu Pacific if they have promos. In any case, you can just go by train from Seoul to Busan.
Aboard the Air Asia flight to Incheon
2. Accommodations
No need to book a posh hotel in Korea unless you really want to. But for budget travellers like us, a Hostel is fine (read our review of Zaza Backpacker’s Hostel here). We initially planned to book in Airbnb (a much cheaper alternative) but since it was the height of the Mers-cov disease in Korea, we opted not to (better safe than sorry). Of course, there are other options like couch surfing, house-sitting, staying in relatives (if you have one in the host country) or staying at hostel dorms, but it all depends on your comfort level. For us, we wanted a little bit of privacy so we booked a private room with own toilet and bath.
Tip: You would need a multi-voltage travel adapter in Korea as their outlet has two round holes. Instead of buying one, you can just borrow one from your hotel/hostel. More details here.
Before your flight to Korea, make sure that you’ve printed some of the promotions and discount coupons they offer to foreign nationals. Below are some of the links where you can print out these coupons. On our last trip we used discount coupons on entrance fees to Korean Folk Village and Petite France. We also didn’t pay any rental fee on the pocket wifi. Here are some of the links. Enjoy!
Tip: In Myeongdong, there are lots of stores that give you freebies by just entering their establishment! So even if you are just window shopping, you can take a basket with a freebie in it.
4. Get T-Money or Seoul City Pass Plus
The T-Money is a transportation card used to pay for fares in subways, taxis, buses and even at convenience stores. When using T-money, the public transportation fare is KRW 100 cheaper than when paying in cash. The card costs KRW 2,500 but you can refund the remaining balance for a fee of KRW 500.
If you’re going to take the Seoul City Tour bus to go Palace Hopping and Lotte World, then you must get the Seoul City Pass Plus card to avail some discounts. Its use is similar to the T-Money card, but offers discounts on some select attractions in Seoul. The card costs KRW 3000.
Tips: In Seoul, you usually don’t need a taxi. All places are accessible by train and bus but be prepared to walk a little bit. Wear comfortable shoes.
If going to/from Incheon airport to downtown Seoul and you’re taking the Airport Railroad Express, a good option for budget travellers (and not in a bit of a hurry) is to take the all-stop train. The all stop train only cost KRW 4,250 while the express train cost KRW 14,800. The time difference is not that much also as the all stop train travels at 56 minutes while the express is 43 minutes.
If you’re travelling with someone, especially someone close to you and you’re in a really tight budget, then consider sharing food between yourselves. Some dishes in Korea are good for two. Just check that some restaurants/eateries in Korea don’t allow food sharing but most of them allow this.
For budget conscious travellers, it’s also a good idea to bring some food with you in Korea like breads or canned goods. But of course, don’t bring a lot as you have to enjoy their food too.
Also check if your hostel has free breakfast even if it’s just bread or coffee. You can ask them if you can take some with you outside especially if you are touring early in the morning and have no time to eat in the hostel.
Cold Buckwheat Noodles for KRW 6,000
6. Food is cheaper in non-touristy areas
Myeongdong is a tourist hub so prices of food there cost higher than other areas. If budget is a concern, walk a little bit away from the tourist spots and check if there are small eateries or street food there where locals eat. We found that university areas like Hongdae is cheaper.
If you will go Palace hopping i.e. to Gyeongbokgung, Changdeokgung (including Huwon Secret Garden), Changgyeonggung, Deoksugung, and Jongmyo, then it’s better to get the Integrated pass that costs KRW 10,000 as opposed to buying the tickets individually which will cost you a total of KRW 14,000.
We didn’t avail this since we only went to Gyeongbokgung Palace.
Click here for more details regarding the Integrated Pass.
There are several museums in Korea that are not only awesome; they have free admissions too like the National Museum of Korea and War Memorial of Korea. Trust me, it’s enlightening.
Admiral Yi Sun-Shin’s Turtle Ship
9. Try the Hanbok dress for free!
There are spots in Seoul where you can fit Korea’s traditional costume for free. In our case, we tried it in the vicinity of Gwanghwamun square.
You can find cheap clothes at Dongdaemun and Namdaemun market. We scored some tees there for KRW 2,000 only. You can find women’s accessories and fashionable clothes at Ewha and Sinchon area. There are also cheap accessories and cosmetics in Myeongdong and in subways.
Shop shop shop… while me, I look look look for a chair.
For electronics, you can try Yongsan Electronics Market, though we didn’t go there.
Lotte Mart is great for buying grocery items and food souvenirs.
Tip: If you’re a guy like me and you are with your wife or girlfriend, always look for a chair or a coffee shop. Yes, shopping may take a while… hang in there my friend.
It’s a pain in the ass to get lost much more so to your wallets. So it’s always better if you bring a map with you or download an offline map or just get connected to an online navigator app.
12. Buy some KRW and USD in your country
It’s better to be prepared. In the Philippines, BDO has some good PHP-KRW rates but I think you have to be an account holder and exchange it in your branch of account (that’s what they told us and that’s what we did). But don’t change your entire travel fund to KRW, and buy some USD too.
My Wife and I Travelled 6 Days in South Korea for Only PHP 23k Each (All-In)
Jayson Concepcion
Jayson Concepcion is a programmer by profession but has a soul of a traveller. Aside from his ultimate dream of travelling around the world, he loves to eat, drink, listen to music, talk about aliens and indulge in his occasional secret guilty pleasure of singing love songs in videoke. His favourite superpower is to teleport from one place to another. I guess you know why. Follow his latest pursuits on his blog, Facebook and Instagram.
Travelling to South Korea was my wife and I’s dream since we were still boyfriend and girlfriend in College. It was the time when the Meteor Garden fever struck the Philippines and the K-Drama series was rising in popularity as well. Series like Full House, My Girl, Winter Sonata and Stairway to Heaven were just among those K-dramas my wife is totally crazy about. We got really hooked in My Girl and the crazy antics of Lee Da-hae and thought about making a wish and holding our breath while going up to the elevator to meet each other. We were also crazy about our Korean crushes. My wife always tells me that if Lee Min Ho would date her, she would leave me in a blink of an eye. I then retorted that I’ll go to South Korea and find Song Hye-Kyo, never to go back to her again.
To stop all these craziness, I booked two tickets last February 2015, and we finally travelled to South Korea to achieve our dream. This post will include an itinerary, expenses summary and links to our guide and experiences in South Korea. Please enjoy and read on!
Wifey posing while eating a hotdog in Cheonggyecheon Stream
Itinerary
Our planned Itinerary wasn’t followed as we expected it to. Nevertheless, we went to almost all (85%) of the places we planned to visit. So here is our DIY semi-impromptu itinerary:
Note: Travel time from ICN to Hostel is only an hour and 20 minutes by Limousine Bus. We just got hung up in line for the rental of the pocket WiFi and got lost finding the Hostel.
We booked our roundtrip tickets last February 2015 from Air Asia for PHP 7,203 Net each using a Credit Card. I think it’s a pretty good deal. Even though it is a normal promo fare, you can still get lower fares if you wait for a super low promo.
We took the Standard Limousine Bus number 2015 for KRW 10,000 each going to Myeongdong. After purchasing the tickets, we proceeded to bus stop 12A and waited in line. Travel time took us about an hour and 20 minutes. It was pretty fast as there was little traffic that time.
Inside the Limousine Bus going to downtown Seoul
Going around Seoul
Seoul City has one of the most efficient mass transport systems in the world. You can go from one place to another in the fastest time possible. Just be prepared though that there will be lots of walking especially on train transfers. Wear a pair of comfortable shoes ideally with good foam. In preparation for this, we bought our Champion shoes at Pay Less in SM Megamall. It is cheap and has a memory foam. It did its job and our feet were well protected from lots and lots of walking (sometimes even running).
Waiting for the Train to arrive
Be sure to purchase a T-Money from the convenience stores and/or vending machines. This will make your commuting more efficient and convenient. We charged our T-Money KRW 25,000 each with KRW 4,000 deposit. It was sufficient for our six-day stay. We didn’t bother to get the M-Pass as the T-money is sufficient. Click here for more details regarding T-Money.
Also, before you board a train or bus, purchase a Subway Map and a Map of Seoul. These two maps are your best friends when navigating especially if you don’t plan to rent a pocket WiFi or purchase a sim card. Though we have a map in our guide book that I borrowed from my office mate, we were happy that our hostel provided us one as well as we can just fold and slip it in our bags conveniently anytime.
We were proud to say that this is the first country where we didn’t ride a taxi. All of the places we went to are either reached efficiently via train and bus or just by walking.
Going back to ICN Airport
There are lots of ways to go back to the Airport. You can take the train, bus or a taxi. We took the Airport Railroad Express (AREX) All Stop train from Seoul Station as it is much cheaper and there is just a little time difference between the All Stop and Express train. Since we refunded our T-Money in downtown Seoul, we just bought a Single Journey ticket from Seoul Station to Airport. Note that we too are in a hurry to go back to the Airport but we like to save more money and just spend the remaining KRW we had so we didn’t need to exchange our USD. All’s well that ends well, we left our hostel at around 5:00 PM and checked our baggage in at the airport at around 6:30 PM. Good thing that our hostel is just two stops to Seoul Station.
Accommodation
We booked our stay with Zaza Backpackers Hostel for five nights and six days for a total of KRW 300,000 (KRW 60,000 per night). I really liked the location as it is just a 3-5 minute walk from Myeongdong station Exit 2 and 3 and around 10 minutes walk to Myeongdong Shopping Center. Our room was really clean and the beds are comfortable but the aircon has a little drip; we managed to put tissues to stop the dripping. The place is quiet and the staff are really helpful and friendly. They have free breakfast everyday which consists of bread (with peanut butter and jelly) and coffee. We paid cash (full stay) upon arrival. I’m not sure if they accept credit cards.
Zaza Backpackers Hostel was our home for six days.
Tip: Book a hotel/hostel that accepts payment upon arrival; that means no downpayment or deposit in advance. This is to make your plan flexible.
Tours
We didn’t book a single guided Tour in Korea. All of our tours are DIY and all of our tickets were purchased in the destination but if you will book a DMZ tour, then it is required to have one.
Entrance to the Gyeongbokgung Palace
For the places we went to, check our Itinerary or the Related Links below!
Food in Korea is amazing but it’s not that cheap as well. Be prepared to shell out around KRW 3,000 to KRW 12,000 per meal in a restaurant. That’s around PHP 120 to PHP 470. Street food ranges from KRW 900 to KRW 6,000. The prices also differ depending on the location e.g. a skewered sausage in Myeongdong cost around 3,000 to 4,000 while in Hongdae, a University place, is just KRW 2,000 to 2,500.
Of course, it also helps if you have brought your own food with you. Food that will just get you by, like when you are aboard the plane and you don’t want to buy airplane food with exorbitant prices. You can also buy sandwiches or biscuits in supermarkets or convenience stores as it is much cheaper than dining in a restaurant. It can also save time as you can just eat while walking or when you are in the metro. Also, since our hostel provides bread for breakfast, we asked them if we can just bring some bread with us instead of eating it there in the hostel lobby. Saves us precious time and we can get our bread from our bag every time we get hungry.
Cold Buckwheat Noodles with chili sauce. Very delicious!
Expenses Summary
Here is a summary of our Expenses in Seoul. Please note that shopping items and souvenirs were not included as this may vary per individual preferences. Food and drinks were shared between the two of us.
South Korea Expenses Summary for Six Days
Well, not bad for a six-day trip right? If you will exclude the air fare then the total expense (excluding shopping) is just PHP 30,893.63 for two persons. Then maybe just allot PHP 10,000 to 15,000 for shopping and souvenirs then you’re all good.
How I Travelled 7 Days in Korea This Winter for Only PHP 15,000 (All-In)
Chedric Angeles
Chedric has a strong desire for food, photography, baking, travel, theater, and classical music - as strong as his favourite coffee mix. When got nothing to do, he stares at a wall brainstorming his next exploit. He also likes to view different travel blog posts and ends up extremely jealous.
To witness the snowfall is everyone’s dream especially to the ones residing in a non-four season country (e.g. me lol). Add to that, the fascination for wearing chunky, stylish winter staples. It has been a dream I could only fulfill through gliding on ice in a skating rink in our town’s shopping mall. It is sort of a “winter feel” albeit not seeing a real snow drop on my head. I couldn’t wait for that rare moment. Thus, I planned out an itinerary, packed my bags, and then flew to Seoul in December 2015.
Join me as I finally witnessed the freezing cold weather in the Land of the Morning Calm. Through this post, I will share with you my exciting 7-day winter season trip to South Korea with a tight budget.
Thanks to the birth and proliferation of low-cost carriers, travelling to the K-Pop nation is not anymore an option, it’s a must! I booked 9 months before my flight and luckily opened the web browser with a surprise. Without any hesitation, I reserved my ticket to South Korea via Cebu Pacific.
Cost: ₱6,510.31/$138.34 (inclusive of round-trip meals on-board, 20-kg baggage allowance, seat selection, terminal fee, Fly Me Next privilege)
Quick tip:
The technique doesn’t change at all. Scoring a wallet-friendly airline ticket fare entails a simple effort; make it part of your daily or weekly grind. Always check! Or better yet, subscribe to their newsletter!
Accommodation
In my post about Hostel Maru, I mentioned all the inclusions of a ₱441/$9 per night stay. To cite some, an unlimited American breakfast, high-speed Wi-Fi, showers, etc. Book it to stay cheap and stay hip!
Cost: ₱3,085.00/$65.55 for 7 days
Quick tip:
I discovered that when reserving your accommodation, booking late is a good thing this time. Which contradicts the hack in booking an airline ticket. Based on my experience, I booked my stay 2 days before the check-in date. It was by accident when I realized that most of the hostels I was browsing through the previous weeks, obviously cheapen their prices to almost 70%-80%! I was then indecisive of which guesthouse to stay at, which brought me to a late but cheaper reservation. Cool right?
Food
With a budget of ₱400/$8.5 per day, surely you can find a decent and delicious meal without getting your wallet run on empty. You can opt for store-brought ramyun, cheap meals in subway stations, restaurants like the Food Cafè, and of course, street food!
Cost: ₱2800/$42 for 7 days
Quick tip:
Since breakfast is the most important meal of the day, always do a run through the inclusions when booking your hostel/guesthouse. It’s best when there’s free breakfast; it’ll save you up a bunch of money. Plus you can bring with you whatever breakfast is served, placed in a plastic container. That’s what I did and trust me, it’s the best tip ever.
Transportation
As I’ve mentioned in my previous post, the fastest way to get you to your favoured tourist attractions is through subway. Upon arrival at the airport, you can already purchase your T-money card. Convenience stores, all subway stations, and other dealers (with the T-money logo) sell these cards as well.
Costs:
T-money card – ₱1,566.10/$33.11 (loaded up with ₩40,000, good for 7 days)
Bus – ₱236.04/$5.02 (Gapyeong shuttle bus that will take you to Nami Island and Petite France)
Ferry – P314.73/$6.7 (ferry to Nami Island)
Quick tip:
The advantages that the T-money card can be overwhelming; it can also be used when riding a bus, some taxi cabs, public telephones, and when making a purchase at convenience stores and vending machines. Works just like your debit card!
Listed here are the fees to different attractions in my DIY 7-day Itinerary.
Costs:
Gyeongbokgung Palace – ₱118.02/$2.5
Deoksugung Palace – ₱39.34/$0.83
Namsan Seoul Tower (one-way cable car) – ₱236.06/$5.02
Trickeye Museum – ₱590.15/$12.56
Petite France – ₱314.70/$6.7
Quick tip:
Don’t consider going to Nami Island and Petite France on a Sunday, these two places are a bit touristy. Another thing, the four major palaces in Seoul (Changdeokgung Palace, Changgyeonggung Palace, Deoksugung Palace, Gyeongbokgung Palace) have an Integrated Palace Ticket for ₩10,000/₱392.87/$8.35 valid for 1 month of unlimited use.
Fortunately, the Philippines is given a lenient process in terms of visa application. On top of that, 59-day tourist visa can be availed for free!
Quick tip:
It’s better to include your roundtrip itinerary receipt (if you’ve booked already) for a higher chance of getting your visa application approved; although that’s not listed as one of the requirements. It will serve as a strong supporting document. The price of visa processing through a travel agency ranges from ₱800-₱1,o00.
Foreign Shoppers Can Now Enjoy Immediate Tax Refunds in Korea
E-lyn Tham
Having a strong conviction that getting lost is just another adventure in itself, E-lyn takes particular delight in wandering stranger lands, inhibitions and fears thrown asunder. There’s so much left in the world to see, and there’s nothing she would like better than to spend her days dreaming whimsical, thinking adventure, and laughing curious.
Shopaholics rejoice!
In 2016, foreign tourists visiting Korea will be able to enjoy immediate tax refunds upon purchase of goods from any duty-free shop.
Gone will be the days of hunting down the customs office at the airport, or waiting ages in a line that never seems to move…. In 2016, purchases of less than 200, 000 won qualify for an immediate tax refund limited to a total of 1, 000, 000 won per visit.
The scheme has just been announced, and the Ministry is working to extend this system to all eligible shops. The list of participating shops is available here. The immediate tax refund will be in place soon, and do keep a look out for more information on the Korean Tourism Organisation's website!
In addition, the visa-free exemption period has been extended for an additional year to December 31, 2016. This exemption will benefit group tourists from China, Vietnam, the Philippines, Indonesia and Cambodia.
How I Spent Winter in Korea with My Family for PHP 25,000 Each
Irene Justin Maligat
Irene Maligat falls in love easily - with people, with places, and with experiences. Her main goal in life is to inspire and empower a lot of people through travel and the value of gratitude. She gratefully writes inspiring articles at Inspiring Grateful Travels.
“It is so important to dream, and to dream in the family” – Pope Francis
My dream is to travel the world and I wanted to share this dream with my family so for the first time, I treated them an international trip! Korea is the best Asian country I have been to so far! It is the only country I want to go back to so soon already. 4 days is not enough. I want to experience all the seasons!
My family and I are very grateful to have been blessed with this travel experience!
First, I want to thank everyone who helped me out! Thank you for sharing your itineraries, pieces of advice and experiences! We also want to thank YOU – Kritzia Santos, Tita Marie Yuvienco, Tita Jenny Santos Silayan and Tita Melet for sharing your winter clothes with us! It really helped us save a lot of money! Your clothes were both stylish and almost effective in keeping us warm! Thank you! We’re very grateful!
Korea is a great country! I’d like to go back soon maybe during Spring or Autumn. It’s not a place to spend just 4 days in.
We stayed at BOA Guesthouse because it's where a lot of my mom’s friends stayed at. We booked it through Agoda so we got a discount. People were so nice and very accommodating! Breakfast was really good too! The bread was so good that I wanted to steal the whole loaf! Our room was very clean and the floors were heated so it felt really nice when we got back from the outside. This guesthouse is near tourist places and a train station Hongik as well.
Train system
The train system in South Korea is amazing, efficient, clean and cheap.
Attractions
1. Hongik University Street
Night Life at Hongik University Street
In Seoul, near universities, there are a lot of shopping and food streets! Lucky for us there was one near our guesthouse! This street is very cool as there are a lot of shopping and food finds! We also saw a lot of students singing and playing guitar along the streets! I can’t imagine how they could do that during the cold weather but they do have an audience! We ate the best Korean food here and walking here was basically an experience. The sights and the weather were really a blessing.
2. Myeongdong
Freezing Myeongdong!
Myeongdong is like the High Street, Greenhills or Makati of the Philippines. Lots of cheap finds for pasalubong! Lots of restaurants, money exchanges and shops! Since we went at night, it was extremely COLD! An amazing sight! There were a lot of Koreans speaking to us in Filipino. Here, you’ll find a lot of socks! I don’t know why but almost every alley had a store selling socks at PHP 40. The socks were very cute. The Korean restaurant we ate at here had the best beef! My sister and I liked it very much.
Since it was very cold, we didn’t get to explore this place. We just took a picture outside the palace walls. Maybe when I come back, and the weather is a little bearable, I would visit all the famous palaces.
4. Trick Eye Museum and Ice Museum
In the Jungle
We loved the Trick Eye Museum! I really missed my family laughing a lot! That’s why this travel was really good for us. This museum got us to laugh a lot and take nice pictures. All the paintings were really creative.
With Puss and his boots
5. Petite France
Eiffel Tower at Petite France
Petite France is about 2 hours away from Seoul. It is very scenic and a representation of Paris’ top tourist destinations and provinces. My sisters found it too cold here as it was surrounded by mountains so they stayed inside the luxurious lodge most of the time. My mom and I explored a bit so that we wouldn’t waste the entrance fee. What I really loved about this place was the part of the Art of Southern France.
Southern France Art
I am not really a fan of art but I’m a fan of this one. When I get my own home, I’m going to buy one of those paintings. It’s very beautiful. Southern France is now a part of my must-see travel list!
6. Namsam Tower
Namsam Tower
I was really excited about this one because I am a fan of Boys over Flowers! Gu Jun Pyo and Geum Jan Di used Namsam Tower as a shooting location! For me, this is the coldest place we went to. The views were nice but food was very expensive.
We availed the popular public Drama + Ski tour from SEOULNTOUR. Our tour guides, Gina and Kas, were very accommodating and cool. They are well travelled and really knowledgeable! Since it was a public tour, we were with 2 more people and they’re from Singapore.
7. Nami Island
Nami Island is one of the most beautiful places I have ever seen in my life so far!
Nami Island Tree Rows
The place was just so overwhelming! Since this island was surrounded by a river, it was extremely cold. I couldn’t even feel my feet anymore. I didn’t mind though, the place was just too beautiful. I just ignored my cold feet and hands just to experience this amazing place as much as I can.
Snowman by the Frozen Lake
The best scenery – Line of Korean Trees, Mountains and Frozen Lake! We were just here for about 2 hours but if given more time, I’d stay here for one whole day. I’ll definitely come back to this place.
Playing around with the GoPro at Nami Island
8. Elysian Gangchon Ski Resort
Skiing at Elysian Resort
Best activity ever! Before I turn 25, I really wanted to experience SNOW and what a better way to maximise it than to go to a SKI RESORT?! Elysian Resort was beautiful! I only see this in movies, and I was really in awe during those moments thinking, “Wow, I’m really here!”.
Skiing is scary at first and the snow boots are very uncomfortable but the overall experience was worth it! One of the best experiences in my life I have to say!
KOREA WAS REALLY AN AMAZING EXPERIENCE. I’m going back and I’m going to experience all the seasons! I love travelling alone but I also love travelling with my family, and this trip made me realize that. I dream to travel the world and now I dream to travel the world with my family.
15 Unique Experiences Every Traveller Should Have in Korea
Jisu J.
Jisu is a freelance journalist currently contributing to several magazines in Hong Kong, Singapore and Seoul, specialising in lifestyle content covering fashion, beauty, travel and Korean culture. Her pieces have appeared on The Korea Times, HOKK Fabrica and STYLEPX. She is based in Seoul but deems herself an honorary Hongkongese after falling in love with the city by spending a semester abroad during her undergraduate years. Follow Jisu on Facebook, Twitter and Instagram.
Visiting some royal palaces, pigging out on Korean barbeque, going full-out Gangnam style, and you think you’ve pretty much done everything in Korea? That’s not the end to it in this vibrant land, or maybe you need to update your list to new and local standards. Here are the top 15 unique experiences every traveller should have in Korea to up your travel game.
Korea is home to the most-consumed alcohol in the world – soju, the country’s national alcohol that gives massive hangovers. Relatively cheap in price, it is not surprising to see soju bottles stacked up at a local bar. If you’re already familiar with soju, why don’t you try out the country’s new hype – sweetened soju? They come in various fruity flavours such as citron, blueberry and apple.
Warning: You might lose track of how many shots you’re taking since they’re so sweet
Never heard of a Korean Big Mac? Don’t worry. I made it up! Many of you will already know about the wonders of scrumptious Korean barbeque, but if you’re going to enjoy the food, have it the right way. When the locals have Korean barbeque, they like to make a ssam, which is basically rice and condiments such as well-cooked meat wrapped in leaves of lettuce, cabbage, sesame or other greens. Don’t forget to add ssamjang, a special sauce made out of processed soybean paste.
If China has all kinds of ridiculous seafood on sticks, Korea has edible live seafood for you. Visit street stalls in any local markets and you’ll be able to try raw squid cut up in pieces. They wiggle around in your mouth as you eat them, so if you’re adventurous enough, go for it, but certainly not for the light-stomached.
Most travellers who come to Korea end up going around Seoul, Busan, or Jeju Island, but Jeonju is definitely a must-visit city for foodies and culture junkies. A city located at the southern part of Korea, Jeonju is often dubbed as the most traditional city in Korea, famous for its old palaces and amazing food. It is the home to the famous bibimbap and miscellaneous authentic Korean food.
Korea, like Japan, is obsessed with anything cute. The epitome of this? Themed cafés. Korea has a wide selection of themed cafés from pets like dogs and cats to reptiles and lambs, onto dress cafés such as wedding dresses and hanbok cafés. One complimentary drink gets you in this wonder of themed cafés, so make sure to try them out on your next visit.
Hanbok, a type of traditional Korean clothing, was worn as everyday apparel among Korean ancestors. Vibrant in colour and distinguished for its clean, artistic lines, hanbok is a must-try option for many travellers. Visit the traditional streets of Insadong in central Seoul and you’ll find many places that offer simple photoshoots with you in hanbok, or even a sticker photo booth if you like it that way.
Have you watched the viral video of The Walking Dead’s Steven Yeun on the Conan Show, in which both of them strip down in a Korean bathhouse and go through painful body scrubs? That’s it. It’s your turn now for some authentic Korean spa experience. Don’t forget to make cute lamb towels and put them on your head like the locals do.
Most tourists visiting Korea would know about Hongdae, since it is a convenient place where food, shopping, nightlife, accommodation and cultural experiences are all available. Upon your arrival at Hongdae, you might recognize the abundance of street performances, pop-up art galleries and exhibitions. Why not spend some time supporting the local indie bands that are performing on the street?
Han River, the main river that crosses Seoul, is where the locals love to spend their pastime. With several parks arranged along the river by Seoul Metropolitan Government, you could either enjoy a stroll along the river or go for a picnic during the day, or even visit the Banpo Bridge at Banpo Han River Park at night time for a magnificent “rainbow show.”
Did you know that Korea is the one and only divided country in the world? While many refer to South Korea when they say Korea, the troublesome upper half under the infamous Kim Jongeun never stops to threat the world. If you hold a foreign passport, you are allowed to visit DMZ, the demilitarized zone and step in (a tiny bit) into North Korea. It is worth a day trip and many travel agencies offer this tour.
Welcome to Jeju, the country’s favourite holiday destination, famous for its sub-tropical climate and eye-dazzling tourist attractions. Located at the southernmost tip of the Korean peninsula, Jeju Island had the honour of making nine of its geological sites to UNESCO heritage sites. Jeju boasts bountiful natural reserves, but its neighbouring island Udo treasures pristine water and beautiful scenery that you might mistake for an island in the Philippines at first sight.
Every summer at Daecheon beach, a popular beach along the west coast of Korea, join a flood of festival goers for the famous Boryeong Mud Festival, where you can enjoy a variety of mud activities under the sizzling sun. From mud slides to mud pools and not to mention the beauty products made out of mud, Boryeong Mud Festival offers everything related to mud in any form of activity or product you can imagine. There’s a nice beach right next to the mud festival site, so if you plan to visit a beach during your trip, don’t forget to check out this festival.
If you’re a hike lover, check out the mountains in Korea. Hiking in Korea is no joke, as the mountains are steep and dangerous. However, a nice maggeoli (rice fermented alcohol) and kimbap (condiments and steamed white rice rolled in dried seaweed) will make up for the after-hike pain. Famous hiking destinations are Seoraksan, Dobongsan and Bukhansan.
A big hurrah for shopaholics! You are officially in the land of shopping heaven, where the malls are open till late at night, ready for your “shop till you drop.” Although many shopaholics go to Myeongdong for clothing, cosmetics and luxury products, you might want to pay a visit to Namdaemun market, which is a late-night and early-morning market that runs late at night and throughout the break of dawn. Sounds interesting?
Every big city has at least one sky tower, and Seoul is no exception. If you’re one of those who love to see the city from high above, visit N Seoul Tower, located in Namsan, central Seoul. On a nice, clear day, you can enjoy a panoramic view of Seoul on the observatory deck. At night between 7:00 P.M. and midnight, the tower illuminates in dazzling colours. Choose which one you prefer; both options are definitely on the must-visit list.
Summer in Korea: Fantastic Things to Do During this Special Season
Johanna Ella May Erroba
Johanna is a Philippine Youth Ambassador of Goodwill for life, a travel writer at TripZilla Magazine by day, public management (master's) student when she has homework, English tutor by night, singer-musician in the shower, wanna-be beauty and fashion expert when she feels like it, cook and baker on the weekends, techie and travel junkie on pay-days, photographer and videographer on random days, a neat freak all year round, and her new found passion is community development. Just like most millennials, she loves to travel. She expresses all of her musings on Camera and Cheese.
SUMMER IN KOREA. Sounds good? Well, it should! Korea is one of the most sought-after destinations in Asia. While many tourists flock to the country during winter season, relatively few people go there during the dry, hot and humid summer season which starts around June through August. But wait – why not?!
If you're thinking twice about visiting the Land of the Morning Calm during summer, here are ten interesting things to do in Korea that might convince you!
Music festivals are a hit in Korea especially in summer. From rock to jazz to pop and EDM, I'm sure you'll find a genre to suit your taste. Among the most popular music festivals are Ultra Music Festival Korea for EDM junkies, Rainbow Island in Nami for the hippies who love camping, Incheon Pentaport Rock Festival for the headbangers and Seoul Jazz Festival which is now on its 10th year.
2. Get Down and Dirty at the Boryeong Mud Festival
About two hours by bus from Seoul is Boryeong, a town most popular for its mud cosmetics. Every July, Boryeong holds its two-week summer mud festival at Daecheon Beach. It's a very unique way to enjoy the summer heat in Korea as you'll be able to participate in different activities such as mud sliding, mud skiing and the famous mud wrestling. Make sure you come prepared as you are sure to get muddy all over! Don't worry, it is said to be healthy for your skin.
Summer will never be complete without a visit to the beach! Korea boasts of its white sand beaches such as Cheongsando Island, Udo Beach, Gyeongpo Beach and Eurwangni Beach, among others. In many of its beaches, you may also choose to camp and enjoy the night sky with the sea breeze. A perfect summer getaway for the beach bums!
The R16 Global Series, better know as R16, is an annual b-boy competition with its World Final held in Seoul. The week-long summer festival aims to celebrate urban youth culture and features hip hop concerts, popping and locking battles, street arts and many more! The event is mainly sponsored by the official tourism organization of Korea
Hallasan or Halla Mountain, located at the center of Jeju Island, is the tallest mountain in South Korea which rises 1,950m above sea level according to their website. It was awarded as a UNESCO World Natural Heritage site in 2007. Hallasan National Park features seven different trails that can cater to beginners and those who want a more extreme adventure. Just make sure to bring enough water with you to stay hydrated on your journey!
6. Take Lots of Pictures at the Buyeo Seodong Lotus Festival
The unique lotus festival is held at Buyeo-gun Seodong Park every July. It is mainly a tribute to Seodong, later King Mu and the love of his life, Princess Seonhwa. You'll see lotus flowers everywhere! The festival also features activities such as painting, sketching and concerts.
Mul Naengmyun or cold noodles is made up of buckwheat noodles and is topped with ice-cold vinegary broth. Some like their noodles with meat and vegetables, others with only the latter. During the hot season, it's definitely the perfect non-dessert summer dish in Korea!
Are you looking for a place to keep cool that's not on a beach? You have to go to this combined indoor and outdoor pool in Everland Resort. Many of the visitors are families with children as it is also part of the theme park -- definitely a must visit this summer!
Valleys in Korea are the perfect places to counteract the hot and humid summer season. Stay cool and refreshed in the valleys of Yongchu, Sogeumgang, Binggye and so much more! While you're chilling on cool waters, you'll also get to enjoy the surrounding greenery.
10. Buy Everything and Anything at the Seoul Summer Sale
Shop until you drop at the annual Seoul Summer Sale. It is held mainly in the Myeong-dong, Dongdaemun area. It features many local and international stores that offer items on discounts. There are also plenty of free gifts and even welcome kits containing free samples and coupons! Last year, 1,446 stores participated in the sale including Dongwha Duty Free Shop, The Face Shop, Etude House and even Seven Luck Casino.
What are you waiting for? Prep your sunscreens, pack your bags, hop on a plane and head to Korea now!
[DEAL ALERT] Fly to Korea this Summer with Asiana Airlines from just SGD705!Spend the summer heat in Korea! Get roundtrip tickets from Singapore to Seoul (including fuel surcharge and airport tax) from only SGD 705.**Terms and conditions applyTravel period is from July 1 to August 31, 2016 and promo ends on May 31, 2016.Hurry and BOOK NOW for your next summer adventure in Korea!
Quez V
Quez is a Pinay blogger of the world. She is an ambassador of positive change whose main goal is to empower people thru self-discovery while travelling. She writes her travel experiences to become an instrument in transforming people to find the importance in everything including the beauty of the world and the language of the universe. Read more of her adventures at Anatomy of the Awesome.
I just realised that I failed to write about my previous experience of getting a Tourist Visa from the Indian Embassy in the Philippines, which I think is already obsolete. Instead, let me make up for it by sharing my first-hand experience of applying for an Indian Tourist Visa on Arrival in India. If you are like me who makes impulsive decisions of booking a ticket to see an online friend or wants to do side trips while backpacking, this post might help you.
Visa on Arrival in India is available for the citizens of these countries: Finland, Japan, Luxembourg, New Zealand, Singapore, Cambodia, Vietnam, Philippines, Laos, Myanmar, Indonesia. See updated list of countries here.
Indian tourist visa on arrival are being issued in four major Indian airports: Delhi, Mumbai, Chennai and Kolkata.
The single entry visa that will be given is going to be valid for 30 days from the time of entry.
Application should be a maximum of 2 times in a calendar year with a minimum gap of 2 months between each visit
Who are eligible for tourist VOA:
The purpose of visit to India should only be for tourism (recreation, holiday, vacation, sight-seeing, visiting friends and relatives)
Should not have a residence or occupation in India
Not a person-non-grata to the Government of India
What to prepare:
Passport should have a minimum of 6 months validity
Has a good financial standing which is shown by production of return ticket and availability of sufficient money on the duration of stay
Photocopy of the first page of your passport
1 passport sized photograph
Completed application form which is provided by VOA immigration officer
Go straight to the visa on arrival desk which is before the immigration counter. In Kolkata, I did not see a VOA desk so I approached an immigration officer regarding my concern and they gladly escorted me to their office.
You can present supporting documents like bank certificate, itinerary and hotel bookings if you are not confident with the documents that you have.
In some websites, visa application will cost 60 USD, but I highly recommend that you pay the exact amount of 3,300 INR instead to avoid hassle of causing a scene in the immigration counter and going out to exchange money in the airport arrival area. I don’t know what is up with the increase of VOA fee but IO told me that the updated amount they should receive is 3,300 INR.
Immigration will ask you basic questions. They asked me what my purpose of visit was and I mentioned that I will be visiting an acquaintance and also I want to experience the Holi Festival (which I didn’t really experience since I came a day after it). They also asked me how many days I plan to stay, where I will stay, do I have plans of marrying an Indian and what my religion was. It is important to only give out the specific answers they are looking for when they ask you questions. Do not give out any other unnecessary information because this will only lead to further interrogation.
Do not be surprised if the days of visa validity issued to you is not exactly 30 days like what is usually expected. The Immigration officer explained to me that I have roughly 28 days for my visa but then I frankly told them that I don’t need that much amount of time, and I only need 4 days since I have to head back to the Philippines because I have to report back to work ASAP.
One should take in consideration that tourist visa on arrival depends on the discretion of the authorities. Rules and regulations change from time to time. It is still advisable and appropriate to get a tourist visa before travelling to India to avoid any problems.
Do not leave without being issued an official receipt from the VOA you purchased.
If you were able to submit everything they need, then it is very unlikely that Immigration officers will not give you a visa on arrival.
Until now, I cannot imagine the anxiety I had when I was applying for an Indian tourist visa. I was really scared because I did not have anybody to ask about it. Also, I came from Kuala Lumpur and I thought immigration officers will question me of my previous consecutive whereabouts (I went to a lot of places before I got in my connecting flight to KL). Being a solo female backpacker travelling to India is scary, but it will definitely make you a better person. I have learned that India is never for the fainthearted so make sure to plan your travel ahead of time. As for me? I have plans of going to India in the near future but this time, I'll probably go to see the Taj Mahal. I want to do a golden triangle tour—travel to Delhi, Agra and Jaipur and I think this is going to be an exciting experience of a lifetime.
My Dream Europe Trip: 6 Countries & 7 cities in 12 days
Anne Grace Apostol
Pinay wanderer. Endless dreamer. Bliss advocate. Anne Grace Apostol aka Ninay is a small-town girl brimming with dreams and ambitions. Currently based in Manila, Philippines, she hails from Zambales, a sleepy coastal province in northern Philippines. She is a full-time corporate communicator and a part-time traveller who proves that a day job should not keep you from getting a tan, exploring the world, and chasing your sunshine. Read more of her daydreams, travels, and proud probinsyana adventures at Girl Chasing Sunshine. Follow her on Twitter and Instagram @anneisninay.
A dream come true—this pretty much sums up my whirlwind trip to Europe late last year. Never have I ever imagined that I would be able to take this trip in this lifetime, let alone in my early twenties, in my own capacity, and for the most part, all by myself.
Like most avid travellers, I’ve always wanted to go to Europe but the seemingly expensive cost of travelling around the continent, along with the difficulties in getting a Schengen visa, held me back. But thankfully, everything just perfectly fell into place this year and I found myself wandering and gallivanting around seven cities and six countries in Europe for 12 days.
I wouldn’t have survived the “what-the-hell-let’s-do-this” phase, all the planning and bookings, the long-haul flights, and the first four days in Europe without my travel buddies who also happen to be my former bosses. On my fifth day, I relied on my own courage, stubborn will, and wanderlust. And I made it! Now, I can proudly share with you that yes, Europe is possible!
Twelve days were certainly not enough to squeeze in all the European destinations I’ve long been planning and dreaming to visit. It was a whirlwind vacation as I tried to see as much as I can of Central Europe and Scandinavia. Was the rush worth it? Did I enjoy? Hell, yeah! If I had the time, of course, I would have loved to travel slowly but it was my only chance of roaming around Europe and I made sure to get the best out of the experience.
Admittedly, there were some hiccups along the way but they all faded into the background as I focused on the moments that matter— drinking hot wine in the middle of a Viennese food market, waking up early to walk through Prague Old Town and on the Charles Bridge before it was flooded with vendors and tourists, feeling like a local in Berlin, being whisked away from Copenhagen to Stockholm by a tilting high-speed train, and surprisingly, enjoying the expensive and freezing city of Stockholm.
There were a lot of blinding highlights, among many memorable others but for now, here’s a quick preview of my 12-day Eurotrip:
Kiev, Ukraine (2 hours)
Kiev—the cold city with equally cold-hearted citizens. We were only at the Kiev Boryspil International Airport for a 2-hour layover. Our airport experience was scathing. The transfer desk was not manned despite the long and urgent lines; no airport personnel cared enough to help and answer inquiries; heck, they weren’t even smiling nor greeting the passengers; they even had the nerve to shout at us. Thankfully, it was only a quick layover and soon, we were off to our destination.
Getting to Kiev: Kiev was a short layover from our Manila-Dubai-Vienna flight which costed around PHP 15,000. We nabbed a promo fare from Manila to Dubai. From Dubai, we flew with Ukraine International going to Vienna with a short layover in Kiev. Had we booked the Dubai-Vienna leg earlier, the fare could have totaled to just less than PHP 10,000. Unbelievable! It was unusual and risky; we encountered a lot of questions and inquiries from the airline staff and immigration personnel but since we were on a purely-for-leisure trip and weren’t dabbing into some illegal stuff, everything went well, eventually.
Vienna, Austria (2 days)
I am not exaggerating when I say that Vienna is beyond flawless! This picture-perfect city proved to be an immaculate beginning to our eventful Eurotrip. There’s so much grandiose and glory in this city of beauty—from the responsibly-preserved architecture, the charming traditions, and the royal-imperial culture to the world-renowned museums, works of art, and even the fascinating side-street food markets! Just wow!
There was no shortage of exciting things to do and beautiful spots to visit. We didn’t mind walking aimlessly even if it was freezing. If you are to get lost, get lost in Vienna and I swear, it will lead you to something stunning!
Getting to Vienna: From Dubai, we had an eight-hour flight going to Vienna (layover in Kiev is included) via Ukraine International.
Where to stay: When we booked our guesthouse days before the trip, we were not aware that it was in a Benedictine monastery! Benediktushaus in Freyung, Inner Stadt is such a pleasant surprise—the vibe is so relaxed; there’s a tree-lined courtyard; a truly Viennese and extensive breakfast spread; it’s within walking distance of all the main tourist attractions; and there was a European food market just outside our doorstep!
Prague, Czech Republic (4 days)
I’ve heard and read a lot of people singing praises for Prague so naturally I set my expectations high for this city. And it did not disappoint! It’s teeming with everyday wonders and old-world charm that it’s almost impossible to describe how much character and beauty this golden city really has. The cobbled streets, the red-roofed abodes, and the thousand spires surrounding the city beckoned us to another era. It felt like a dream; like we were trapped in a time warp; like magic.
Nearly everything about Prague was a highlight—the food, the skyline, the façade of Baroque houses, the historical cafes and restaurants, the classical plays, Prague Castle, Charles Bridge, the view from the Astronomical Clock Tower… I could go on and on.
One of my personal favourite memories from the trip was exploring Old Town Square on my first night alone. Trldenik (a cylindrical sweet pastry) and hot chocolate on hand, I sat at one of the benches in the square and watched the bustling performances. The spires of the Tyn Church and the Astronomical Clock Tower stood proud amidst the square’s chaos and the light of the November moon illuminated the splendour of the city. Over and over again, I was thinking, “Thank you, Lord, I made it to Prague!”
Getting to Prague: This was our first European rail ride! We booked our tickets through www.cd.cz/eshop and rode a blue Czech railjet, which operates most departures. There are also the red Austrian Railways railjet but we found that it's relatively cheaper to book your tickets through the Czech website than the Austrian booking site (http://www.oebb.at). Travel time was around four hours and the cost of our ticket, including seat reservation, was 22 euros or 607 CZK. Police staff randomly checks on passengers so make sure that you have your passport and other pertinent travel documents on hand.
Where to stay: We had a wonderful and historic stay at the Hotel Clementin Old Town. Located in the narrowest preserved building in Prague, this charming boutique hotel is smacked at the centre of Prague 01—the Charles Bridge was a few steps away and the Old Town Square can be reached in around six minutes. The Staromestska Metro Station is also nearby. There’s a complimentary breakfast spread accompanied with a one-pager daily news and “what’s-hot” digest. The hotel staff was equally delightful.
If you are eyeing a more affordable yet still comfortable stay, check out Sophie’s Hostel at the newer part of Prague. Voted as one of the world’s top luxurious hostels, this boutique hostel is chic and modern: the designer dorms and private rooms are well-equipped and comfortable. I actually thought that the facilities and the service are more of hotel rather than hostel quality. It’s half an hour walk from the Old Town Square but if you want to set out from the touristy side of Prague, then this one’s a good choice. The I.P. Pavlova Metro Station is only a 2-minute walk from the property.
Cesky Krumlov, Czech Republic (1 day)
If there was a fairytale world, then Cesky Krumlov would be it. From the moment I knew about this place in travel blogs, I made a pact with myself that I must make it there. There was no way I’m going to the Czech Republic without visiting Cesky Krumlov—even if it meant going alone and embarking on a 3-hour land travel from Prague with a local bus line where most staff and passengers speak a different tongue.
Most tourists just come to the country to visit its captivating capital. Not many know that further down the Southern Bohemia lies a small, sleepy town waiting to be discovered.
I truly felt Cesky Krumlov’s simple charm and modest medieval feel as I walked around, with the huge castle overlooking the dreamy town and the Vltava River winding its way around it. The castle, and the whole town itself, is one of the most charming and well-preserved ones in Europe. It very well deserves its UNESCO World Heritage Site title. My time in the little town was fleeting but I know that it was exactly the kind of European countryside experience that I've been dreaming.
Getting to Cesky Krumlov: The Student Agency bus is one of the most convenient and cheapest ways of getting to Cesky Krumlov from Prague. Don’t worry, you don’t necessarily need to be a student to ride the bus—it’s just the name of the company. There’s Wi-Fi on board, free hot chocolate, free newspaper, and free movies. We reached Cesky Krumlov in 2 hours and 55 minutes and the ride costed 7.60 euros, one way. You should secure your tickets at http://www.studentagency.cz. I’ll post a detailed step-by-step guide soon.
Where to stay: I only went for a daytrip but if you are staying overnight, you should definitely choose Penzion Delanta, Hotel Bellevue, or the Castle View Apartments.
Berlin, Germany (2.5 days)
It’s true what they say; Berlin is an old city with a young heart. Ask anyone who’s been to Berlin to describe Germany’s capital and ‘cool’ would be one of the adjectives. There’s a lot of history, motion, and art bursting around Berlin and I was pleased to discover those when I went on a free, informative walking tour with Sandeman’s Berlin. It took us through the city centre, showing all the highlights and history. Everything was bustling and vibrant.
What I would remember most in my time in Berlin was how I tried to live like a local despite my short time in the city. I went electronics shopping, bought a new luggage, and had my first try at a coin-operated laundromat. I went to the local grocery and scored super cheap Ritter Sport chocolates. The folks from Visit Berlin gave me a complimentary Berlin WelcomeCard which included free transportation around the city and discounts from tourist attractions, museums, and restaurants among others—my first collaboration with a city tourism board! Yay!
Getting to Berlin: The route from Prague to Berlin was the most scenic train ride I’ve ever experienced! Seeing the breathtaking scenery of the Central European countryside from the train was so romantic and surreal. I boarded the EC 176 Johannes Brahms which took 4 hours and 45 minutes from Prague to Berlin. The train ride costed 17 euros. I loved the train bistro food! If you have the time, you can check out Dresden, Germany before continuing your trip to Berlin. They say it’s worth a look!
Where to stay: I stayed at the trendy and colourful The Circus Hostel, which is at the heart of Berlin, between the popular districts of Mitte and Prenzlauer Berg. The Rosenthaler Platz U-Bahn Station is just right across the hostel. The dorm rooms are modern with each bed provided with a private locker, tables, and chairs. Wi-Fi is free and the best part is that the property has its own restaurant and brewery! There’s also a lounge area and an outdoor sitting area. Such a totally hip and cool place! I’m glad I stumbled upon and joined The Circus!
Copenhagen, Denmark (1 day)
Would it be wrong to say that I was a bit gloomy during my stay in the happiest place in the world? My daytrip in Copenhagen started rough. It was raining when my plane from Berlin landed. Then, when I bought a DKK 36 train ticket from the Copenhagen Airport to the Central Station, the ticket machine failed to give out the change to my DKK 200. From here, it went downhill. You see, I only had DKK 250 so after the ticket machine fiasco, I only had DKK 50. No problem, I thought, I can withdraw and use my credit cards. To my horror, all my ATM and credit cards failed to work! Then I got lost finding the baggage counter at the train station.
So yes, you could say I was a bit down in Copenhagen. But I only had a day to spend in the wonderful city so I quickly composed myself, and instead of letting the anger and the frustration linger, I let go because that’s the way it is with travel. There will be bad times. Mishaps and accidents will happen, just like any other day in our lives. But these bad times should not shape our days; our attitude and outlook towards the situation must always shine through. By the time I was walking along Stroget, the longest pedestrian shopping street in Europe, I was already my usual happy self. Then I saw the colourful houses of Nyhavn and everything seemed all roses and rainbows again. In the end, it still was a good day in Copenhagen.
Getting to Copenhagen: To get to Copenhagen from Berlin, I flew with the notorious European low-cost carrier, EasyJet. For 52 euros, I had to leave my hostel at 5:00 AM to make it to my flight and wear layers of clothing to save on luggage space (LCC regulars, you know the drill). The flight took a little more than an hour. How was it, you may ask? Same as flying with Cebu Pacific. You get what you pay for so suck it up.
Where to stay: I only stayed for one whole day but I was initially looking at booking a bed at the Urban Hostel Copenhagen which has glowing reviews.
Stockholm, Sweden (2.5 days)
I went all the way to Scandinavia from Central Europe because I found the cheapest fare going home to Manila from Arlanda. Stockholm is nothing like I have seen and experienced before. It’s a Scandinavian gem—one that’s freezing cold and freaking expensive. But every shudder I got from the icy weather and every penny I spent in Stockholm were totally worth it.
For some reason, it felt like home. It must be the beautiful harbour and the sparkling sea just like what I had back home in the Philippines. Everything in Stockholm was so photogenic. I found myself falling in love with its islands, the historic coloured houses and narrow alleyways in Gamla Stan, the stylish establishments, the Vassa Museum, Djurgarden, the Royal Palace and everything else in between. Despite the numbing temperature, I felt warm and welcomed in Stockholm.
Getting to Stockholm: From Copenhagen, I rode the SJ, a tilting high-speed train, travelling 200 kilometres per hour. It was awesome—five solid hours of feasting over the scenic countryside and hinterlands of Scandinavia! I dare say that this is the way to go to Sweden! I booked my tickets online at www.snalltaget.se.
Where to stay: There’s a reason why City Backpackers Hostel is the most highly-rated hostel in Stockholm. If you’re incredibly social, want to meet people, and have a crazy good time, then this is the place for you! The Central Station is just a short walk. There’s free pasta in the kitchen (eat all you can!), a table football, and lots of common rooms and lounges.
Overall, it was such a beautiful and unforgettable trip—one that brings twinkle to my eyes up to this day. Europe took my breath away and I can only hope and pray to come back again one day.
“To accomplish great things, we must not only act, but also dream; not only plan, but also believe.”~Anatole France
How about you? What goal have you accomplished lately? What steps are you taking to fulfill your life's biggest dreams?
How to Apply for a Schengen Visa for Philippine Passport Holders
Tin Mendez
Tin aspires to live a creative life every day. She likes to tinker with paper, wires and anything she can fabricate into something new. She is fascinated by stories of the past and years gone by, old pictures, abandoned buildings and wild nature. While her past work experience was in the field of design, currently, she juggles writing gigs about her travels while at the same time establishing her personal creative career.
Ah, Europe! The place of culture, history and fine cheese, chocolates and beers. A place for great adventure and cross country trips by trains with idyllic sceneries. A place which brings many Filipinos to their childhood dreams of Heidi and the Alps, of Little Lord Cedie, and of the Flemish orphan boy Nello and his dog Patrasche.
But to many Filipinos, Europe is but a distant dream. The funny thing about dreams is that most of the time, they remain dreams because we never took the time to actually learn how to make them “a dream come true”.
“A Schengen Visa is the document issued by the appropriate authorities to the interested party for visiting/travelling to and within the Schengen Area.” – Schengenvisainfo
The Schengen Area is composed of 26 countries that have all agreed to allow free movement of their citizens within the Schengen region. This means that only one visa is required to travel to any or every 26 countries under the Schengen Region. Perfect for that cross country travel!
Most of the countries in Europe are part of the Schengen Area, except the United Kingdom and countries which are still in the process of becoming part of the agreement like Romania, Bulgaria, Croatia, Cyprus and Ireland. This means Filipinos may need a separate visa to travel to these countries. So we might not be able to exactly relive our Cedie and Princess Sarah dreams, but castles and gardens we won’t be lacking!
One can apply for a Schengen Visa as early as 3 months before the intended travel period. It is better to apply early to give room for delays. For a single entry short stay visa, you can travel within Schengen region for a maximum of 90 days.
Below are the countries under the Schengen Agreement:
Filipinos can apply for a Schengen Visa at the embassy of a Schengen member country which will serve as the point of entry of their trip or the country which they will spend most of their days in. Some embassies process visa for other Schengen member countries which don’t have embassies here in the Philippines, like the Norwegian Embassy which processes visas for Estonia, Denmark, Finland, Iceland, and Sweden.
For a list of European Embassies (not all Schengen) in Metro Manila, you can refer here.
How to get a Schengen Visa?
Getting a visa might be a tedious process, but before you lose hope, take in consideration that applying for a visa to a country is like the first security checkpoint by that country to protect its citizens. With the risk of terrorists looming here and there, it is only natural that embassies are more thorough in their process. Strict does not mean impossible though.
My experience for getting a Schengen Visa was through the Belgian Embassy with a Visit a friend/private person Tourist Visa. Most of my knowledge is specific to this type of Visa but I have listed general tips so that everyone who wants to apply for a Schengen Visa can benefit.
Remember the 3 R’s
1. Research
The first step to applying a visa is researching about:
Where to get the Visa?
What is the specific visa you will need?
What are the requirements?
Since I have already tackled where to apply for a Schengen Visa, let us talk about what type of Visa one will need for a short trip to Europe. The type of visa will depend on your purpose of travel. Information about Visas can be found in every embassy’s website.
Travellers/Tourists would need either a Tourist Visa for visiting a friend/private person or a regular Tourist Visa. The difference between the two is again, on the intent of travel. If your main purpose of travel is to visit a friend or a private person and this person would shoulder parts of the expenses that the travel will incur (i.e. plain ticket and/or accommodation), then you will need a Visit a friend or a private person Tourist Visa. If your purpose is to just travel plainly and you will shoulder all of your expenses, then you will need a regular Tourist Visa.
For a general knowledge about the different types of Schengen Visa, please refer here.
2. Requirements
General Requirements are more or less uniform in every embassy but they might require different supplementary requirements, so it is important to focus only on the visa type you are applying for and the specific embassy you are applying at. To avoid having to return to pass supplementary requirements and delaying your visa process, it is helpful to broaden your research to blogs and forums and ask about information regarding the exact visa type you are applying for at the embassy you are applying.
A general list of requirements for Tourist Schengen Visa can be found here.
Once you are clear with the requirements, make a checklist so that it is easier for you to keep track of the things you need to accomplish. Here’s a list of requirements I gathered before I scheduled for my interview appointment:
Note: These requirements are based on the Visit a friend or a private person Tourist Visa to Belgium.
Passport (with at least 3 month validity prior to travel date)*
Photocopy of Passport information page and visa/stamps from other countries visited
2 Copies of Visa Application form with required pictures attached (as specified by the Belgian Embassy)
NSO Birth Certificate (original and photocopy)
Personal Bank Statement
Business Permit (original and photocopy). (As I am working as a freelance designer/writer, my income is filed under a business permit under my name.)
Email correspondence relating to my design/writing projects (I opted to secure this to prove further that I am active in my business.)
Cover Letter stating reasons for travel and relationship to sponsor. (My sponsor is my boyfriend’s mother. I stayed at their house for the most part of my travel, so it means that she shouldered parts of my accommodation.)
Proof of Relationship (Pictures of my boyfriend and me, pictures of my boyfriend and his parents, and email correspondence of me and my boyfriend’s mom.)
Letter of Invitation / Hotel Reservation (Letter from my boyfriend’s mom stating that she is inviting me and that I will be staying at their house. If you will be staying at a hotel, then you might need a hotel reservation.)
Photocopy of work permit card, leave of absence, and work contract (Since I was travelling with my boyfriend, I secured documents to prove that he is working here and that he will come back.)
Requirements from Sponsor (photocopy and original-sent from Belgium as specified by the Belgian Embassy)
After I have gathered all the requirements, I called the Belgian Embassy for my most important requirement; the interview appointment. I then paid the 60 Euro Visa Fee (exchange rate based on embassy’s rate) at the bank account specified by the embassy.
Another thing to keep in mind, the embassy will only ask for a paid plane ticket and travel insurance after you have been approved.
3. Ready
Now, ready for the interview. If you have all the necessary general requirements and substantial supplementary requirements, you don’t have any reason to be worried about. Lack of proper requirements may lead them to think that you are not serious about your application. It is good to organise your files in a folder so that you can hand them in easily when the interviewer will ask for them. Prepare 1 set of photocopies of the requirements. Dress casually and comfortably as long as it is clean and presentable.
In the interview, it is best to be honest with your intentions and in your answers. Speak in Tagalog if you are more comfortable with it as the interviewers are also Filipinos. Generally, there are two things that the interviewer will be keen to know. First is if you are financially capable to shoulder the expenses of your travel or if your sponsor will shoulder some or most of your expenses, that they are also financially capable. Secondly, that you are only going to stay there for the number of days you specify. In other words, you have a reason to come back which you can prove with a leave of absence from work.
Most of the questions are general information about you and your travel, things that are already supplemented with the requirements you prepared. Naturally, most will focus on your job, on the company you work for/or your business, your leave of absence, about your travel, what you will do there, where will you stay and when are you planning to go, how long are you going to stay and what will you do when you come back. Since I was travelling with my boyfriend to meet his parents, I was also asked personal questions about how we met and how long we have been together.
Be early, so you have time to relax and prepare for the interview. Cell phones won’t be allowed inside the embassy, but you can bring a book or a magazine so that you won’t be bored. After the interview, it is basically waiting time. Again, it depends on the embassy how long they take to process applications.
When I received my result, I was asked to pass a confirmed flight reservation and a travel insurance from one of the insurance companies specified by the embassy. I booked my flight through Emirates giving at least 3 working days for the embassy to stamp the Visa on my passport and then I bought my travel insurance from Bluecross. After that, I was asked to come back to get my passport with visa stamped on. Hurray!
This article might not answer all of your Visa application questions but I hope that it has given you directions on what to ask and where to ask at. Although the real experience is in the travel, the processing of Visa has really spoken to me. It started from reading articles such as this and then slowly gathering the requirements, until finally having the courage to take the interview. For some, Europe is but another holiday destination, but for common people like myself it was a dream that came true. The Visa application was not only another requirement, but a courageous step to try and make a dream happen.
Note: Better leave at least 6 month passport validity prior to travel date to avoid being questioned further by the NAIA immigration officers.
How to Apply for a UK Tourist Visa for Philippine Passport Holders
Catherine Mirasol
A trader in the world of corporate finance but also a frustrated writer and photographer, Catherine admits to being a walking contradiction. Although born and raised in the Central Business District of the Philippines, this girl actually prefers searching for adventures in remote destinations than urban jungles. Follow her quest to become a "World Traveller" on The Wandercat.
The British pound has been taking a beating recently on "Brexit" fears (the possibility of the United Kingdom leaving the European Union). From approximately 1 GBP = 72 PHP last December 2015, the exchange rate is now at approximately 1 GBP = 65 PHP.
Say what?! 7 pesos cheaper?!
Yuuuup! Those figures are real! And since this opportunity doesn't come very often, I suggest you grab a pen and paper and start planning a trip to the UK. ASAP!
How to get started? Well, if you're a Philippine passport holder like me, you will need to apply for a tourist visa.
Lucky for you, I already went through the process and just got my 6-month multiple entry tourist visa. Since I want you to visit the land of Harry Potter, James Bond, Sherlock Holmes and The Beatles too, I'm going to share a few pointers on how to go about the application process.
But before I get to that, let me highlight one thing -- A UK visa only covers the following "countries": England, Wales, Scotland and Northern Ireland. The UK did not participate in the Schengen Agreement (a treaty that eliminated border controls between its European member states for international travel purposes) in 1985. Thus, it is not a part of the Schengen Area. If you want to travel to other European countries before or after travelling to the UK, you will most likely need a separate visa in order to do so.
Okay, now that that's out of the way, let's proceed to visa application matters:
Visa Type
Choosing the wrong visa type can make or break your application so select the one that best matches what you will be doing in the UK.
I applied for a Standard Visitor visa because I only plan to stay in the UK for a short period (less than 6 months) and will be going on holiday there with my family. You can choose this visa type as well if you're going to the UK for reasons other than leisure, such as business (for example, to attend a conference, meeting or training session), family visit or medical treatment. Don't choose this visa type if you plan to work or get married. Those reasons fall under different visa categories and are not included in the scope of this article. Visit the UK Government's website to know for sure if you should apply for a Standard Visitor visa or a different visa type.
The Standard Visitor visa is usually for multiple entries and is valid for up to 6 months. You can apply for a visa that lasts longer (1, 2, 5 or 10 years) but you will have to pay extra and show proof of why you need to visit the country regularly for an extended period of time. Also, you can only stay for a maximum of 6 months per visit.
Visa Application Form
You have to create an account with Visa4UK before you can fill up the online visa application form. It's pretty easy! It'll only take about 5-10 minutes. The hard part comes after creating an account and logging in because accomplishing the visa application form will be painstaking.
I suggest you gather the following information before you start typing and clicking:
Current and old passport details (passport numbers, issue dates and expiry dates)
Travel plans (people you'll be travelling with, planned arrival and departure dates and the place where you'll be staying)
Travel history (countries you've visited, arrival and departure dates and reasons for visiting)
Employment and income details (employer, monthly income after tax and monthly living costs)
Trip expenses (plane tickets, accommodations and daily expenses)
Detailed day-to-day itinerary
Most of the amounts will have to be denominated in GBP so you can give rough estimates. Just make sure the amounts on the form coincide with the amounts on the documents you will be providing. Completing the form will take some time so you don't have to do it in one go. You can always save what you've done and finish your application later. Just make sure you complete your application within 120 days so your application won't become inactive and you won't have to do the whole thing over again. Once you've completed your application, you will be asked to electronically sign a declaration stating that the information you have provided are true and correct to the best of your knowledge. Then, you will be given an application reference number.
Visa Application Fee
Paying for your application fee can be totally hassle-free! You can do it online using your Visa4UK account and using your credit card. Don't worry! It's processed by WorldPay, a well-known global payment provider, so it's safe and secure.
A Standard Visitor visa valid for 6 months costs GBP 85 (PHP 5,700). Extra charges apply for long-term visas: GBP 324 (PHP 21,700) for 1-2 years, GBP 588 (PHP 39,400) for 5 years and GBP 737 (PHP 49,300) for 10 years.
Note: Your payment will be for the processing of your application only. It doesn't mean that you're guaranteed a visa once you send your payment. It is still possible for your application to be denied. And you won't be granted a refund if this happens.
Appointment Schedule
Also through your Visa4UK account, you can book an appointment with VFS Global Services Philippines, the visa application centre of the UK, for the submission of your documents and biometric information. You can only choose from 2 offices, though -- Manila or Cebu.
Note: The UK visa application centre doesn't accept walk-in applicants so don't forget this step.
Visa Application Pack
Obviously, you have to submit your passport, which should have a page that's blank on both sides and be valid for at least 6 months from the date of your intended departure from the UK.
You should also provide documents (original and photocopy) that show the following:
That you've travelled before (for example, old passports)
That you have sufficient funds for your trip (for example, bank statements/certifications, income tax statements, payslips, etc)
That you have strong ties to the Philippines (for example, employment certification)
That you will leave the UK at the end of your trip (for example, flight bookings)
Submission of these documents will not guarantee that your application will be successful so it'll definitely be risky to book before getting a visa. Although, I have to admit that that's what I did. Couldn't pass up a seat sale. Whoops!
Note: Your documents must be in English or in Welsh. If not, they have to be translated and certified. Also, you have to submit a tuberculosis certificate issued by an approved clinic if you're going to stay in the UK for more than 6 months. If you're under 18, you must present a written consent from your parents or guardian for you to travel to the UK.
You will need two identical photos for your application pack. These photos must be:
45mm high by 35mm wide
New (taken within the last month)
Of professional quality (No selfies, please!)
In colour on plain white photo paper
Taken against a light cream or grey background
A close-up of your full head and upper shoulders
Your expression must be neutral. Plus, you can't wear tinted glasses or a head covering (except if it's for religious or medical purposes) either.
To make sure you get it right, I suggest you head to a photo booth and have your photo taken there. Just tell them that you're applying for a UK visa and they'll usually know what to do.
Visa Application Centre
You will have to go to VFS Global Services Philippines on your scheduled date and time to complete the visa application process. Arrive 15 minutes before your schedule and make sure you have the following: printouts of your appointment letter and application form, your application pack, your photos and your valid ID.
Note: Leave your electronic devices at home or in the car as they're not allowed inside the visa application centre.
Queue to get a token and then wait to be called. You will be asked to submit all your documents before they do a digital finger scan (of all your 10 digits) and get a digital photograph of you. Your appointment shouldn't take long -- about 30 minutes max.
The visa application centre offers a number of optional "user pay services" that you can check out on the their website. These services include priority application processing, VIP premium lounge access, SMS update, passport delivery, among other things. To be honest, the only special service worth getting is the courier service, which costs PHP 500 per application. By availing of this service, your passport and other original documents will be delivered to you instead of you having to go back to the visa application centre to collect them. Just keep the receipt!
Don't get the SMS update, which is PHP 150 (inclusive of VAT), anymore. Anyway, you'll get a notification via email -- for free -- that your application has been processed and released by the British Embassy Manila. You should get your passport back within 15 business days.
You actually won't know if you've been granted a visa or not until you get your passport back as VFS Global Services Philippines has no influence or control over the decision to grant or refuse you a visa. That decision is made solely by the UK Visas and Immigration division of the British Embassy Manila.
There you have it. I know this is a long post but I tried to incorporate everything I can remember to ensure your application for a tourist visa will be as painless as possible. You can apply for a tourist visa as early as 3 months before your intended date of travel to the UK. That should be more than enough time for you to prepare -- financially, physically and emotionally.
How I Travelled 6 days in Taiwan for PHP 34k (All-In)
Willester Yap
A chinito who wanders places that are intruiging and fascinating to both the eyes and mind. He aims to inspire others to captivate what the world has to offer and how to enjoy life through budget friendly travel escapades. Tag along with his blog, it might surprise you where he will go next.
The Queen City of the South is steadily making its mark in having direct international flights. Before, I have to admit it was hard for a Cebuano like me to travel on a budget without being broke at airfare cost alone, since we need to travel to Manila for International flights or do connecting flights. Instead of paying one round trip ticket for our destination, we ended up buying two. Now, we are privileged that there are more direct international flights being carried out.
I always wanted to travel on a budget, but I also make sure that my travel will not be compromised even if it is on a budget. It may not be a super budget travel, but it’s definitely way cheaper than hiring a travel agency. The advantage of it is that you get to customise the places you wanted to go, and not to mention you don’t need to scurry like what happens when you hire a travel agency, and you are obligated to visit factory shops that are brutally time consuming and a waste of time then you are forced to buy their products.
In this entry I would like to share to you how I spent my few days in the Heart of Asia. I visited 4 counties and 1 City in 6 days which covers almost half of Taiwan’s Main Attraction. They say that PHP 35,000.00 budget is actually big but wait until you read everything, then you can say if this budget is more than what it's worth. You can actually have it lowered if you can find promo fares, choose a backpacker’s inn rather than a hotel and choose not to indulge in a bit of luxury.
When I knew that there was a direct flight from Cebu to Taiwan, I did not hesitate to book one for me and my parents. My mother really wanted to go to Taiwan even before but failed to do so because there was no direct flight back then, and airfare going to Taiwan was still quite expensive. I don’t know if it was on Promo fare, but I ended up booking ours at 176 USD/person which includes: a round trip airfare via Eva Airways (Cebu-Taoyuan Intl Airport-Cebu), a complimentary delicious meal, 7 kilos of carry-on luggage and a 20 kilos checked-in baggage in each flight. I think, it was a good deal.
This I can tell you now, I did not have any regret that I visited Taiwan. There are lots of places to visit than I initially thought. The place is rich in culture. The people are well mannered and hospitable (unlike people in Hong Kong that are a bit rude), and of course, they have tons of street food that you can try. You can really tell that it is “The Heart of Asia”. Oh By the way, If you are a Milk tea addict, you might braise yourself as Taiwan is the founder of Bubble Milk tea and Milk Tea Houses can be found anywhere within the country.
Let me sail you through my detailed itinerary from day 1 to the day we departed from Taiwan. I will also make an expense summary on that specific day and how I managed to travel with PHP 35,000 budget.
Buy Chunghwa store simcard for NTD 300 for the SIM with Unlimited 4G data for 6 days and NTD 50 worth of calls/texts. (may buy this in the airport arrival area)
Buy bus ticket around 125 cheapest in Airport to Taipei Main Station
Taipei Main station ride MRT to Ximen Station (blue Lane) bought an Easy Card for the MRT rides for NTD 500 with NTD 400 consumable and NTD 100 Deposit (this can be refunded if not fully consumed)
Go to EXIT 6 and walk 5 mins to hotel @ ECFA Hotel Wan Nian
Our flight from Cebu departed at 12:05 noon time, a little bit delayed than our flight schedule and arrived at Taoyuan International Airport around 2:30 PM. We had our passports cleared at the Immigration area and got our checked in baggage. When you exit at the Arrival area, turn left then go far straight ahead until you will be able to see Chung Hwa Store (you may also ask the Help/Information Desk for the location of the store). It is a telecommunications store where in I advise you to get a tourist prepaid sim card. You will need it, and their internet is fast. This is what I chose: Unlimited 4G data for 5 days with NTD 50 (New Taiwan Dollar) worth of calls and text/s for NTD 300. They will need to ask your passport for your sim card registration. It takes less than 5 minutes to do this.
After having your local sim card, go to the Bus ticketing area. Because, Taoyuan International Airport is far away from Taipei City, you need to take a bus. There are no direct MRT to Taipei City. Riding a taxi is expensive as it will cost you NTD 1,500 good for up to 4 person. The best choice would be to take the bus. Remember when I told you that The sim card station is at the far left side when you get out of the arrival area? Well, the bus ticketing station is at the opposite, so its at the far right side of the building. Just follow the signs or watch this video.
There are lots of bus companies to choose from, but I chose the Kou-Kuang Bus Services as it was the cheapest among others for NTD 125 /person. Tell the cashier that you will alight in Taipei Main Station. You will be given a seat # when you buy the ticket and the bus leaves practically every 15 minutes so you don’t have to worry.
Upon arrival at Taipei Main Station, go inside the building and look for the Information Centre / Ticketing Centre. In here, you will buy your Easy Card (it looks like an ATM, you will need it for your MRT Rides). The reason why I bought this is that when using Easy Card for your MRT Rides you will have 25% discount in each trip you make, which can save you a lot of money. I bought mine for NTD 500 with NTD 400 consumable and NTD 100 deposit. You don’t have worry if you can’t consume it all, you just have to return the Easy card to any information centre inside the MRT station and they will refund to you what is left in your card. To learn how to ride an MRT in Taiwan, watch this video.
After we got our cards, we headed straight to ECFA Hotel Wan Nian for check in.
Address: 6F., No.70, Xining S. Rd., Ximending, Taipei, Taiwan, 108
Contact #: +886223619069
I chose this hotel because of the good feedback, and not to mention it is in the heart of Ximending Night Market. It is only a few minutes away from the MRT Station. I did not regret one bit about booking in this Hotel. Personally, I love the location of this Hotel. The Buffet Breakfast was good enough considering the price. It is definitely a value for money. Trust me!
How to get to the hotel
From Taipei Main station ride MRT to Ximen Station (blue Lane)
Head to EXIT 6 and walk 5 minutes to hotel
You may use Google map to locate the hotel after you have exited the Ximen MRT Station (that’s what I did).
By the way, the Hotel is inside a mall and the lobby is at the 6th floor. Take the lift and press 6.
Checking in was a breeze. It only took 5 minutes for us to get checked in. After that, we went straight to our room to put our bags and freshen up, and headed straight for Din Tai Fung where we had our dinner.
To get there, take the MRT to DongMen –Red Line then exit 5, walk straight for a few metres then you will notice people lining up. The restaurant is located at the right side. You will not fail to notice it! Watch this video for more info about Din Tai Fung.
After Dinner, we went back to our Hotel, explored Ximending, and did some food tripping even though we were a bit full already. After that, we headed back to our hotel and hit the sack for the early tour that we planned the next day.
MRT Easy Card – NTD 500 NTD (PHP 825) but used only NTD 275, the NTD 225 was refunded, so I only spent NTD 275 (PHP 453.50)
Dinner – NTD 250 (PHP 412.50)
Food trip allowance – NTD 100 (PHP 165)
Bubble Tea – NTD 50 (PHP 82.50)
Total: PHP 1,814.75
Day 2
5am-6am - Breakfast, Bathing and preparation
6am-6:30 - Straight to Taipei Main Station to catch our 7:20am HSR Train (Bullet Train) to Taichung County
7:20am - Depart from Taipei City
8:30am - Arrived at Taichung County HSR Station
9am - Sun Moon Lake Tour Began
6pm - Sun Moon Lake Tour ended
8:30pm-9:30pm - Took our Train Ride back to Taipei
Aerial view of Sun Moon Lake via gondola.
We woke up at 5am to prepare for our Sun Moon Lake Tour. Our free buffet Breakfast will start at 7am, and since we did not have the time, I simply purchased food from Family Mart which is just outside our Hotel. Convenient!
After we had our breakfast, we headed straight to Ximen MRT Station to Taipei Main Station to catch our 7:20am HSR Train (a.k.a. Bullet Train) trip to Taichung County.
Sun Moon Lake, being the largest natural Lake in Taiwan, is a must see. It is located at the middle West of Taiwan.
To avoid the hassle I booked a tour by a local Travel Agency in Taiwan, which was fairly cheap enough. Do not worry; this company is legit as evidenced by our experience.
You may contact them via email. We had ours at NTD 2,490 /person with the following inclusions:
Round trip HSR Train (Bullet Train) taipei City-Taichung-Taipei City
Gratifying lunch
Tour
Entrance fees
Land transfers from Taichung County-Nantou-County- Taichung County
Exclusion: Guide/driving tipping of at least NTD 100 /person (still not a bad deal though)
They can speak English so you don’t have a problem communicating with them. They have an English Speaking Guide as well.
After our tour ended, I suggested to my parents to have our late night dinner at Lan Jia Gua Bao, Taipei’s Best Gua Bao.
Although my parents were already tired, I convinced them that it’s a must-eat, that we should not waste any opportunity since we were in Taiwan.
My Gua Bao
Lan Jia Gua Bao (藍家割包) is located very close to National Taiwan University, and within the Gongguan Night Market. Take the MRT to Gong Guan (Green Lane) exit to National Taiwan University. Upon exiting, turn right then head straight until there is an intersection, then make a left turn. You may use your Google Map to locate the restaurant. It is easy!
When my parents tried it, they said it was worth it and did not regret going there. You should definitely try it too!
After we got our stomachs full, we headed back to the hotel. End of day 2.
Day 2 Summary of Expenses:
Sun Moon Lake Tour – PHP 4,108.50
Breakfast – PHP 120
Dinner – PHP 82.50
Food trip allowance – PHP 165
Total: PHP 4,476
Day 3
By this time, you will be a bit familiar with how the MRT Train System works. This will not be as hard as the first day.
Our schedule for this day was:
Eat breakfast at 8:30am.
Left hotel by 9:30am
Go on for Half Day City Tour in the morning.
1st stop: Longshan Temple – Longshan MRT Station: (Blue Lane): exit 1. Upon exiting, turn right and head straight. You will be able to find it already. We just had a quick peak and some snap shots and went to our next stop.
Longshan Temple
2nd stop: Chiang kai Shek Memorial Hall , CKS Memorial Hall Chiang Kai Shek Plaza and Taipei’s National Theater – ride an MRT to Chiang Kai SHek station (green -red lane):– all of these can be found at Chiang Kai Shek Memorial Hall area. They are neighbouring buildings. Take lots of pictures. The area was picturesque.
Entrance of the Park
Chiang Kai SHek Memorial Hall
National Theatre
Chiang Kai SHek Monument
If you want, do witness the changing of guards inside the Chiang Kai Shek Memorial Hall. Changing of guards happens every hour starting at 8am with no lunch breaks and ends at 8pm. It is a 15-minute show. Definitely a must watch!
Lunch: Jin Feng Lu Rou Fan Rice meat or Kinfen – near Chiang Kai Shek (red-green)
Take the MRT to Chiang Kai Shek station, Exit #2, and walk straight for about 50 metres and you’ll see the unique signs of the restaurants with the mountainous landscape background, and a crowd of people outside. That’s the spot. The rice meal cost NTD 60 (PHP 107.25).
We then headed back to our hotel before 12:30pm for the afternoon North and North East Coast Tour which will start at 1pm.
After Lunch: North and North East Tour
For this tour we just hired the Hotel van for 8 hours that costs NTD 5,000 for 7 people. We just divided the rate. You may choose up to 4 tourist spots that you wanted to go.
We chose: Chiufen Village, Yehliu Geo Park, Nanya Rock Formation, Golden Waterfalls and a quick stop at Yin and Yang Sea.
This the Hotel Chartered Tour Services and Pick-up Services
Dinner:
We had our dinner at a local restaurant in Chiufen Village, since it was our last stop before heading back to the hotel. You don’t have to worry about where to eat because there are lot food vendors in the area.
After we had our dinner, the van dropped us back to our hotel.
Optional Dinner: If you want, you can have your dinner at Modern Toilet Restaurant which is just a few blocks away from the Hotel. Again, Google Map will be in good use. Well, me and my parents did not go there since I read a review about the pricey menu and the not so good food. You’re actually just paying for the ambience. That’s it. I just thought it wasn’t worth it.
The morning city tour was free and is located near MRT stations.
Lunch – PHP 107.25
North and Northeast Tour – PHP 1,500
Dinner @ a local Restaurant in Chiufen Old Village – PHP 200/person
Food trip allowance – PHP 200
Total: PHP 2,007.25
Day 4
Eternal Spring Shrine
to Swallow Grotto
Taroko Gorge National Park is located in Hualien County, middle east part of Taiwan.
I initially regretted that I booked this tour from Viator since it was the most expensive tour I made from this trip; I would have saved more if I made a DIY tour in the National Park. But when I got there, I realised that it was difficult to have a DIY tour since there are lots of repair that was going on due to the recent earthquake. There are only few buses/vans that are allowed to enter but not impossible. I just wanted less hassle at that time since my parents tagged along. My verdict was, it may have been pricey, but I think it was worth it!
Upon booking, Viator will send you an email regarding your detailed itinerary and the time you will be picked up at your hotel. Since we will be setting out early again, I just bought our breakfast from Family Mart.
We were picked up at our hotel at 5:20am since one of the inclusion of the tour was the hotel pick up, and the time for pick up depends on the hotel location.
After that, everything was according to the itinerary stated.
We were back in our hotel around 8pm and had our dinner in a local restaurant (more like a local diner/carenderia in Filipino dialect) at Ximeding night market that served one of the best Oyster omelettes we ever tasted. I forgot the name of the restaurant but it was located adjacent to Uniqlo, beside Hot Star Chicken. By the way, Hot Star Chicken is also a must try! I would advise you to buy and eat the food that looks delicious.
After we had our dinner, I went straight to Starbucks, since there was a Starbucks nearby to buy a tumbler. I collect Starbucks tumbler to the places I went to. It costs NTD 450 (PHP 720). It includes 1 Grande size of any Starbucks drink.
Day 4 Summary of Expenses
Breakfast – PHP 175
Taroko Tour –150 USD (PHP 6,900)
Dinner – PHP 200
Starbucks Tumbler – PHP 720
Total: 7,995
Day 5
9am – Breakfast at hotel
10am – left hotel and went to Guang Hua Electronic Plaza (Taiwan’s Largest Electronic/gadget Mall)
1pm – Late lunch at the mall’s food court.
2pm – head to Sun Yat Sen Memorial Hall
3pm – visited Wu Pao Chun Bakery (Home of Taiwan’s Litchi Rose Champion Bread – bagged as the World’s Best European Bread in 2010 of the Bakery World Cup)
4:30pm – went back to the Hotel
5:30pm – went to Taipei 101 for some window shopping
8pm – came home for dinner at our hotel
9:30pm – went to Carrefour to buy last minute Souvenirs.
12 Midnight – had a 3 hour sleep before I woke up for our departure.
On our 5th day, it was just more city tour. My dad wanted to go to the largest Electronic Mall in Taiwan. Taiwan is known for its cheaper electronics / gadget than other Asian countries. We went there to find out if it was really true. Well, it’s not all true. It’s just more or less the same price in the Philippines, bu they just have more options to choose from.
To get there, take the MRT ZhongXiao Xinsheng (blue lane) upon exit. Use your Google map. It’s just a 5 minute walk away from MRT Station.
After we had our window shopping at the mall and had our lunch, we went to Sun Yat Sen Memorial Hall/Park. Take the MRT to Sunyatsen Memorial Hall (blue lane) to get to the park.
Sun Yat Sen Memorial Hall / Plaza also gives you a good view at Taipei 101 where you can have as much photo op as you want. The place is huge for a Memorial Hall. Well, it’s almost the same size as Chiang Kai Shek Memorial hall. I really envy Taiwanese as they really respect their leaders who made a mark in their history, and not to mention they are well aware about the country’s economy.
Since my parents were tired of walking. I left them at Sun Yat Sen Park to enjoy the place while I went off to Wu Pao Chun Bakery. All I did was use my Google Map to locate the bakery which is around 10-15 minutes away from Sun Yat Sen Memorial Hall.
Wu Pao Chun Bakery is located inside the basement area of a certain building. You may ask a local guard on duty to give you directions to the Bakery. It nearly took me an hour to be in the bakery itself, since I was in awe of the abundance of the breads that are displayed, which most of them are award winning. My parents were worried why it took me so long to get back.
My dad wasn’t feeling well at that time so we decided to get back to the hotel to rest for a bit.
After that, me and my mom made a unanimous decision to go to Taipei 101 to have window shopping, but really, ended up buying “ahem” bags, my mom’s weakness. We went back to the hotel and had some take away for our dinner and ate it inside our hotel room.
Since I nearly forgot that I still haven’t bought some pasalubong (souvenirs), I researched if there are any groceries or super markets near our hotel. And I found this Carrefour (家樂福) Xi Men Ding branch online which is open 24 hours. Again, I used Google Map to locate the place. It is approximately 15 minutes away from our hotel. It is quite far but actually very worth it. I was able to find lots of Milk tea products, from powdered form to the whole tea leaves with creamer at a very affordable price! Taiwan is living up to its reputation as the Founder of Milk Teas! Hurraayyy!!! It is heaven for me since I’m a huge milk tea addict.
I bought 5 packs of milk tea with other food souvenirs that my mom asked me to buy for additional give away to their friends when we get back to the Philippines.
Even though I struggled my way back to the hotel because I bought more than I expected, I was happy and got back to the hotel with a smile from ear to ear. Up to this moment, I am drinking the milk tea that I bought from Taiwan. Yum!
Day 5 Summary of Expenses:
Lunch – PHP 200
Wu Pao Chun – NTD 350 (PHP 577.50)
Souvenirs – PHP 500
Dinner – PHP 250
Total: PHP 1,527.50
Day 6
We woke up early for our early flight back to Cebu. Taxi to airport – NTD 1,000 / 3pax = NTD 333.33 (PHP 550)
Miscellaneous:
Airfare Ticket = USD 176 (PHP 8,096)
Philippine Travel Tax = PHP 1,620
ECFA Hotel Wan Nian = PHP 14, 373 for 5 nights / 3 pax = PHP 4,791
Roundtrip Taxi to and from Mactan-Cebu International Airport = PHP 539
Total = PHP 15,046
Summary of All Expenses for 6 Days:
1st day: PHP 1,814.75
2nd day: PHP 4,476
3rd day: PHP 2,007.25
4th day: PHP 7,995
5th day: PHP 1,527.50
6th day: PHP 550
Miscellaneous: PHP 15,046
Grand Total = PHP 33,416.50
Verdict
I urge you to visit Taiwan! I don’t know why I didn’t hear much stories about Taiwan than the usual Asian countries that we visited like Hong Kong and Singapore, to name a few. Maybe because it needs tourist visa in order for us to go there? But Taiwan is LOVE for me. Until now, I can’t get over thinking how good Taiwan was. I want to go back again soon and visit other places that I failed to go. There are more Night Markets to go to. More food to taste, a lot of other cultural history to know about and much more. I cannot gauge how much I missed the trip. It was very short, but definitely I made the most out of the short time.
Tips
Don’t hesitate to ask for directions from locals if you’re lost. Taiwanese may not be able to speak English well but they are very helpful and hospitable and they try their best to help you.
Always use your Google Map. That is one of the reasons why I urge you to buy their local Sim card. It will be very useful
Make use of your internet. It is Unlimited. Download lots of movies while you’re there.
Below are the other alternatives that you might want to try or check out which I failed to visit (another reason to go back):
Raohe night market – take the MRT to (green line-songshan) – Stinky tofu , Pepper cakes
Elephant Mountain – take the MRT to Xiangshan (Red Line) – to have a good view in all of Taipei. It is like TOPS or Mountain View in Cebu City. There will be around 300 steps to reach to the top of the mountain. However there are levels as to where you want to get your shot of the city.
Shih Lin Night Market – take the MRT to Jiantan Red line: B1 – Hot-star large fried chicken (豪大大雞排), pepper pork bun and more street food. By the way their street food area is located at the basement 1 of Shih Lin Market. One of the best night markets in Taipei.
How I Travelled 3 Days in Taipei for Only PHP 9,620 (All-In)
Tristan Jay Correa
TJ is working as a program producer in a radio station but his alter ego “Travel Jock” keeps his feet uncontrollable as if wanting to explore the world with freedom and independence. His heart and mind are currently battling if he should stay on a stable career with limited vacation leaves or embark on a risky journey of travelling the world with no limits. He just started his simple blog Travel Jock.
My first attempt really was to book for Batanes but I struggled to find an affordable airfare so my rebel heart prompted me to look for a nearby country which is Taiwan. Cebu Pacific Air constantly gives promos, and I chanced upon and booked Taipei for PHP 4,000 round-trip!
I really don’t have any expectations since I assume that Taipei is just like Hong Kong or Macau, but I was surprised to find Taipei with much richer culture, delicious food and interesting places.
Let me share to you my day-off escape (3 days/2 nights) to Taipei where I spent a surprising below PHP 10,000 (a little over 200 USD).
I was lucky to have an option of visa-free entry so I didn’t spend anything for visa fees. For Philippine passport holders with valid US, UK, JAPAN, CANADA, AUSTRALIA, NEW ZEALAND and/or SCHENGEN visas, you can just get a travel authorization certificate online for free on this website. Other Philippine passport holders should apply for Taiwan tourist visa thru this website for PHP 2,100 (single entry).
Once you get a visa or travel certificate, you are good to go!
Here’s my itinerary with little budget information: Taipei Itinerary