The Philippine Bucket List: 20 Challenges Every Filipino Traveller Must Complete
Call yourself a true blue Filipino traveller if you've completed this Philippine Bucket List.
Charmaine Acha
Charmaine loves random weekend trips, technology and coffee. Guided by her travel mantra "chill and travel", she enjoys unplanned escapades without compromising leisure. Her free hours are spent reading a book, watching movies or thinking about her next possible adventure.
“Huwag maging dayuhan sa sariling bayan!” (Don’t be a foreigner in your own country!) I’ve always believed in this line so I urge myself to explore at least one local destination I’ve never been to every year.
Yes, it’s quite tempting to travel abroad (I’m even guilty as charged), but wouldn’t it be better if we expose ourselves with the wonderful attractions and interesting culture of our own country before we decide to go out?
To help you get started, I dare you to do these 20 challenges:
1. Conquer Mt. Apo, the country’s highest mountain
Let’s set the bar high for your first challenge. If you’re not into mountain climbing, this is going to be tough so you better prepare physically and mentally. You can’t go out of the country without setting foot on the highest peak of the Philippine archipelago.
After mountain climbing, you must go canyoneering! All you have to do is trek, then jump... after jump... after jump... for approximately four hours! Way too simple, right?
Get wet and wild in Cagayan River. Don’t expect the waters to be kind to you. While you feel safe in your full gear, the strong rapids may knock you out of the raft.
One of the oldest modes of transportation in the Philippines is the kalesa, a horse drawn calash introduced by the Spaniards in the 18th century. You can ride one in historic spots like Calle Crisologo in Vigan, Intramuros in Manila and other old towns in the country.
If you haven’t tried this exotic street food, this is the time to dare yourself. Make sure to try the 21-day old balut egg, when the poor duckling is almost ready to be hatched.
A jellyfish may look so innocent but when it stings, you'll be cursing your way out of the water. So why take this challenge? Well, it makes you look badass. Just don’t tell them that you’re swimming with stingless jellyfish.
Celebrated every February of the year, the Philippine International Hot Air Balloon Fiesta in Clarkfield, Pampanga is the only hot air balloon festival in the Philippines. If you are acrophobic and paranoid like me, riding the hot air balloon will surely be a challenge but I'm pretty sure the view up there is all worth it.
The thought of hanging coffins will surely creep you out, but when you learn about the fascinating history of this ancient burial practice, you’ll never think of these coffins the same way again.
16. Get tattooed by a traditional tattoo artist of Kalinga
I am not a big fan of tattoos but a lot of people think it is badass to have one. To make it even more badass, how about getting a traditional tattoo in Kalinga where artists use thorns and soot to make the markings on your skin. Kalinga warriors had to earn their tattoos. Now, do you feel the warrior inside of you?
It’s definitely more fun in the Philippines in 2016 as there will be 9 long weekends with 4 days leave! Plan your getaways with our cheatsheet & calendar.
Catherine Mirasol
A trader in the world of corporate finance but also a frustrated writer and photographer, Catherine admits to being a walking contradiction. Although born and raised in the Central Business District of the Philippines, this girl actually prefers searching for adventures in remote destinations than urban jungles. Follow her quest to become a "World Traveller" on The Wandercat.
I’m sure you’ve caught a glimpse of the widely publicised slogan, “It’s more fun in the Philippines”, on various TV, print and social media ads over the years. Most of these ads have undoubtedly been coupled with pictures of white beaches, smiling citizens and exotic wildlife.
But aside from the amazing scenery this island country has to offer, I believe this sentence holds true for another reason — the holidays! The Philippines celebrates around 17 to 20 holidays every year, depending on the declaration of the Office of the President.
In 2016, 19 nationwide holidays have been declared, and we’ve estimated a total of 9 long weekends with just 4 vacation leave in the Philippines. These figures easily trump those of the country’s Asian neighbours! So now do you agree with me? Isn’t it more fun to work in the Philippines?
I know it's still 2015 but it wouldn’t hurt to plan early for the next year. And we’re here to help you with that! We’ve plotted and labelled all the 2016 holidays, vacation leaves and long weekends in a special calendar with you in mind.
On top of that, we also have a special long weekends cheatsheet. Grab your off days from work in advance, before all your colleagues do!
Do take note that the additional special (non-working) holidays have yet to be confirmed. Also, the dates for Eid’l Fitr and Eidul Adha are just estimates since the National Commission on Muslim Filipinos (NCMF) have not yet made official announcements for these. For the rest, you can start planning and booking as early as now so you can get great travel deals.
Don’t know where you want to go? Browse through our vast collection of articles for inspiration. How about exploring some beautiful islands in the Philippines? You never know, we might hold the key to unlocking your next amazing adventure!
Before you go, remember to print, post and share the calendar and cheatsheet!
7 Long Weekend Getaway Destinations in the Philippines
With so many long weekends in the Philippines, weekend getaways are in order. Instead of travelling abroad, explore local destinations instead.
Catherine Mirasol
A trader in the world of corporate finance but also a frustrated writer and photographer, Catherine admits to being a walking contradiction. Although born and raised in the Central Business District of the Philippines, this girl actually prefers searching for adventures in remote destinations than urban jungles. Follow her quest to become a "World Traveller" on The Wandercat.
The Philippines consists of 7,107 islands. Yep, that’s right. 7,107! So if the thought of planning a trip to this Southeast Asian archipelago overwhelms you, I completely understand. Heck, I'm a local and when I first thought of “exploring my own backyard”, I got thrown off too! I had no idea where to start. There was just so much to see and do! But I came up with a strategy, which I proudly call, “The 7 Bs of the Philippines”, and I'd like to share it with you.
These 7 Bs -- Batanes, Banaue, Baler, Bicol, Bantayan, Bohol and Boracay -- are great destinations to jumpstart your journey through this diverse tropical country. Here's what you can expect from each of them:
Batanes is the smallest and northernmost province of the Philippines. Its quiet, picturesque charm -- clean air, friendly locals, stone houses, massive cliffs, rolling hills and practically zero crime rate -- makes it a backpacker's haven.
The main challenge of planning a trip to Batanes is booking your flight. Airfare from Manila can be more expensive than flying to Hong Kong or Singapore! If you want to get a good deal -- less than half the regular price, I suggest watching out for seat sales from Philippine Airlines. Although, once you get there, getting around is easy. You can rent a bike or hire a tricycle/van. Most inns/hostels offer affordable tour packages so you can choose that option too. You only need a day each to completely explore its 3 inhabited islands, Batan, Itbayat and Sabtang, but trust me, once you start enjoying the simple life, you'll find it difficult to leave! Plan your trip during the first half of the year so the weather will be pleasant.
A trip to Banaue, an area in the province of Ifugao, is not for the impatient or faint-hearted traveller! That’s because it’s about 9 hours from Manila by bus. I suggest taking one that travels at night so you can just sleep the entire ride. Once you arrive, take it all in — the cool and crisp climate, which is rare in the Philippines, the smiling faces of the indigenous tribes and the beauty of the UNESCO-recognised Banaue Rice Terraces.
If you're an adventure-seeker, take a jeepney with fellow backpackers and head on to Sagada in Mountain Province. Here, you can go spelunking (cave exploration)! Conquering the cave connection in Sagada is a rite of passage for Filipino mountain climbing enthusiasts. So aside from being awed by the enchanting stalagmites and stalactites dotting the caves, surviving this extreme adventure will give you instant bragging rights!
Massive, curling waves from the Pacific crash into the beaches of this municipality almost all throughout the year, undoubtedly making it a surfer's paradise! Intimidated? Don't be! Beginners are very much welcome to learn and practice with professionals. The sheer number of surf shops scattered all over the place is proof of that. To witness the best waves, September to March are the best months to go.
If surfing really isn't your cup of tea or if you happen to visit during off-season, you can try other water activities such as wind surfing, snorkelling and diving. Also, make a pit stop at the 600-year old Balete tree, the largest in Asia, when you go exploring Aurora, Quezon. Climb it, if you dare!
The Mayon Volcano in Albay is the most famous landmark of the Bicol region due to its majestic height and conical shape. In fact, it is often dubbed as the world's most perfectly formed volcano! With its tip usually covered by clouds and fog, the best time to view all of Mayon Volcano's glory is early in the morning when the sky is clear.
Aside from the Mayon Volcano, Bicol is also known as the wakeboarding capital of the country so don’t leave your rash guard at home!
If Manila is the commercial centre of Luzon in the Philippines, Cebu is its counterpart in Visayas. Many visitors usually go to Cebu City on business, sampling lechon (roasted pig), dried fish and dried mangoes along the way, and then, they head south to Oslob to go swimming with whale sharks. They tend to forget about Bantayan Island, Cebu's northernmost municipality, which is a big mistake. This tiny oasis is lined with serene white sand beaches -- great for sunbathing and relaxing -- and is a sanctuary for abundant marine life -- a dream for scuba divers and snorkelers.
I was deeply saddened when a 7.2-magnitude earthquake struck Bohol in 2013. Old churches, a bell tower and the Chocolate Hills observation deck were amongst the structures severely damaged.
I love Bohol because of its uniqueness. It is home to the Philippine tarsier, one of the smallest primates in the world, and the aforementioned Chocolate Hills, dome-shaped limestone formations that strongly resemble rows of chocolate kisses, hence, the name.
The island is currently rebuilding itself and is starting to attract tourists once again so now's a good time to visit. Don't forget to drop by the Bohol Bee Farm between sightseeing tours to indulge on healthy organic dishes that will surely make your mouth water.
No island in the Philippines is as notoriously well-known as Boracay. Even though it takes quite a while to get there from Manila -- you'll usually need to take 3 modes of transportation (plane, tricycle/van and boat), about a million tourists (both local and foreign) still flock to this island every year!
Aside from the fact the Boracay has powdery white sand, crystal clear blue waters and magnificent sunsets, it attracts so many visitors because it has something for every type of traveller. Adventure junkies can go parasailing, helmet diving, fly fish or banana boat riding. Foodies can pig out on yummy eats such as calamansi muffins from Real Coffee and Tea, four cheese pizza and oyster sisig from Two Seasons, fruit shakes from Jonah's and chori burgers from random stalls by the beach while party animals can go dancing and bar hopping from dusk 'til dawn.
Peak season is from December to April. If you want to avoid the crowds but don't want your trip to get ruined by bad weather, October and November are great months to visit.
So, what do you think of my plan? B for BRILLIANT, right? The best part is that you only need 3-5 days in each destination so it's ideal for long weekend getaways! If you don’t know already, we’re having 9 long weekends in the Philippines in 2016! Not as great as the 13 long weekends in 2015, but hey, I ain’t complaining.
There are many other beautiful places in the Philippines outside its capital, but these 5 destinations will let you enjoy weekend trips with great ease.
Ron Cruz
His passion for travel was ignited when he quit art college and decided to live on his backpack for almost a year. After an adventure-filled hiatus, he pursued his university education and eventually graduated with honours obtaining a degree of science in nursing and public health.
Ron Cruz is now based in Singapore juggling his travel writing gigs with his work as a medical officer solving cases from all around Southeast Asia. He is also the author of the no-holds-barred travel blog, Fliptravels.com.
For most of us who are slaves of capitalism and thriving by the help of that magic well of cash that replenishes every 15 days, getting a quality weekend escape is a challenge. Long weekends are truly gems that are sporadically strewed across the calendar year. And if we get the chance to stretch it for an extra day, I know for sure that just like me, you already mastered the art of utilizing that one great employee benefit ever invented—sick leave.
Three days and two nights may not be the best form of vacation in the staycation-ultimate adventure continuum, travel packages are available for hassle free weekends, but this is better than nothing and when I say “nothing” that equates to Facebook browsing with a can of beer and a box of pizza. Which is exactly what is happening to me right now, a weekend of nothingness.
The Philippines is an archipelago and that made the huge problem in terms of getting from one place to another. So you have dream of exploring the off-the-beaten-tracks in the Visayas, chances are, you will temporarily push it on the side for a longer block leave later on in life.
But there are some amazing destinations that will not require you to take long-haul tricycle rides and hours of butt numbing boat trips. Here are our favourites:
1. The towns of Laguna de Bay
Visit the beautiful churches and rustic towns around the biggest lake in the country. The trail is the cultural centre of the colonial town as it has the largest preserved tradition and architecture from the Spanish occupation outside the capital. Start the trip from Angono Rizal and stopping town after town across Baras and Tanay. Cross the provincial border to Siniloan and enjoy the more traditional towns of Pakil, Paete and end the adventure in Pagsanjan. Best experienced by public transport.
2. Road trip to Pangasinan
Drive yourself up north and island hop to the hundred islands in Alaminos and other topnotch beaches like Tondol. Driving will just burn 4 hours of your time.
3. Coron Palawan
The top notch beaches of the unspoiled beaches in Palawan, Philippines can go head to head with the world class beaches of the South Pacific Islands. Last minute deals are everywhere. Book a package and enjoy the typhoon free weekend with an assurance of clear blue skies and turquoise water.
Other than the party shores and LGBT paradise known as white beach, there are other coves and pockets of sandy beaches in this popular destination 2 hours of bus and 1 hour boat ride away from Manila. We stayed in Encenada and it is a quiet refuge hidden from the crowd, a perfect place to read a book while you soak your feet in its calm waters.
5. Cebu City
From one city to another, Cebu is the biggest city in the southern part of the country. It boasts a good selection of gastronomic gems and the cultural flavour is leaning towards the more colonial identity. Flights are on regular schedule giving you time flexibility and options from budget to first class.
A good weekend destination should have four important elements: Availability of transportation, readily available accommodation, safety and variety of cultural flavours. There are a lot of other good and perhaps better destinations for your weekend escapade from Manila, but believe that these five will offer you the best experience with an assurance that you will have a bed to sleep on even if you book at the last minute and transportation that will bring you back to the capital on a set date without the possibility of delays.
Visa-Free Countries for Philippine Passport Holders
Not sure if you need to apply for a visa before you fly? Here is a list of visa-free countries for Filipino travellers that you may find useful.
Charmaine Acha
Charmaine loves random weekend trips, technology and coffee. Guided by her travel mantra "chill and travel", she enjoys unplanned escapades without compromising leisure. Her free hours are spent reading a book, watching movies or thinking about her next possible adventure.
How far can your Philippine passport go? Here’s a list of visa-free countries for Filipino travellers out there!
ASEAN (Association of Southeast Asian Nations)
Brunei Darussalam – 14 days
Cambodia – 21 days
Indonesia – 30 days
Laos – 30 days
Malaysia – 30 days
Myanmar – 14 days
Singapore – 30 days
Thailand – 30 days
Vietnam – 21 days
Asia
China – Filipino citizens may travel without a visa to Hainan (15 days), Hong Kong (14 days), Macao (30 days)
India – e-tourist visa for 30 days
Iran – 15 days visa on arrival but must obtain an e-visa pre-approval code from the Ministry of Foreign Affairs: www.mfa.gov.ir
Israel – 90 days
Maldives – 30 days visa on arrival
Mongolia – 21 days
Nepal – 90 days visa on arrival
South Korea – 30 days visa-free to Jeju Island
Sri Lanka – 30 days Electronic Travel Authorization
Timor-Leste – 30 days visa on arrival
Africa
Cape Verde – visa on arrival
Comoros – visa on arrival
Djibouti – visa on arrival
Gambia – 90 days; must obtain an entry clearance from the Gambian Immigration prior to travel
Kenya – e-tourist visa for 90 days
Madagascar – visa on arrival 30 days (free of charge)
Morocco – 90 days
Mozambique – 30 days visa on arrival
Seychelles – 30 days visitor’s permit on arrival
Tanzania – visa on arrival
Togo – 7 days visa on arrival
Uganda – visa on arrival
Zambia – 90 days visa on arrival
North America
Dominica – 21 days
Haiti – 90 days
Saint Vincent and the Grenadines – 30 days
Central America
Costa Rica – 30 days visitor’s permit on arrival
South America
Bolivia – 90 days
Brazil – 90 days
Colombia – 90 days
Ecuador – 90 days
Peru – 183 days
Suriname – 90 days
Oceania
Fiji – 120 days
Marshall Islands – 90 days visa on arrival
Micronesia – 30 days
Palau – 30 days visa on arrival
Papua New Guinea – 60 days visa on arrival
Samoa – 60 days visitor’s permit on arrival
Tuvalu – 30 days visa on arrival
Vanuatu – 30 days
Things to note:
Some countries do not require a visa upon departure but may require one upon arrival.
Most countries require passports that have at least 6 months validity before entry.
Prepare documents that show proof of sufficient funds, return tickets, invitation letters, clearance forms and etc., depending on country of destination.
Countries may change their respective visa policies without prior notice.
Remember to check with the respective embassies before you travel.
Now that you know you can go to these destinations without going through the hassle of applying for a visa, check out some tour packages to jumpstart your travel plans.
Boracay All-in-One Travel Guide For Your Last Minute Escapade
Hailed as one of the world's best island getaways, Boracay is never short of treats for everyone. Here's how you can get the best Boracay experience. Read this before you start planning your itinerary!
Evans Tang
Evans Tang is an idealist who is deeply passionate about life. He loves good food, travelling, reading philosophy, writing, playing music, exercising, and hanging out with loved ones. He is the co-founder of Eat and Travel With Us, a Food and Travel website based in Singapore.
Boracay is a small island located in the Philippines. With its spectacular beaches, emerald-green waters, brilliant sunshine, and dreamy white sand, Boracay is considered to be one of the best island getaways in the world. Below is a useful Boracay travel guide that covers all aspects of planning a trip to Boracay. Enjoy :)
Boracay is a small island located 2km from the mainland of Caticlan, Philippines. See this map to get a clearer idea. Below are three simple steps to get to Boracay.
Step 1A. Caticlan Airport to Caticlan Port. Take a direct flight to Caticlan Airport. Due to the small runways, propeller planes are used in this airport. Currently, only Philippine Airlines and Cebu Pacific offer direct flights to Caticlan Airport. From Caticlan Airport, take a five-minute motor tricycle to the Caticlan Jetty Port. The trip will cost around PHO 50 (approx. SGD 1.4).
Step 1B. Kalibo Airport to Caticlan Port. Alternatively, you can fly to Kalibo Airport, which is a 90 minutes bus/van ride from the Caticlan Jetty Port. Click here to see the route. The airlines that offer flights to from Singapore to this airport are: ZestAir, Cebu Pacific, Philippine Airlines, Tiger Airways, SilkAir and AirAsia. The cost of a one-way trip ranges from PHO 200 to PHP 300 (approx. SGD 5.7 to SGD 8.5). I would recommend taking a bus with Southwest Tours Boracay Inc, which is a reputable bus company that has many good reviews online. They even have packages which will bring you directly to your resort in Boracay. The prices are very reasonable as well.
Step 2. Caticlan Port to Boracay Port. From the Caticlan Port, catch a Bangka pump boat to Boracay. The trip costs PHP 30 (approx. SGD 1), but foreigners have to pay an additional PHP 75 (approx. SGD 2) environmental fee and a PHP 100 (approx. SGD 3) terminal fee. The trip will take about ten minutes. Porters are available to assist you with your luggage at PHP 20 (appox. SGD .50) per item.
Step 3. Boracay Port to Your Resort. Depending on the season, you will arrive at either Cagban Port or Tambisaan Port on Boracay. From the port, you can catch a motor tricycle to your resort. If your resort is located near White Beach (roughly between Station 1 and 2), the trip should cost about PHP 100 (approx. SGD 3) per tricycle. Remember to bargain!
2. Best time to visit Boracay
High Season (October to May) – The best time to visit Boracay is during the high season, which starts in October and ends in May. During this period, there is brilliant sunshine, little to no rainfall, humid weather, and temperatures range from 25-32°C (78-90°F).
Low Season (May to October) – The low season starts in May and ends in October. During this period, rainfall is frequent and there are less tourists. On the positive side, prices of accommodations are usually lower during this period.
3. Things to do in Boracay
Other than revelling in the splendour of the beaches, there are a number of other fun activities on the island too. Below is a list of ten fun things to do in Boracay. Check out 10 Boracay Experiences to Complete Your Beach Getaway for more details of these activities.
Stroll along White Beach
Sunset Paraw Sailing
Watch the Glorious Sunsets
Kayaking
Snorkeling
Food Hunting
Island Hopping
Parasailing
Sea Walking
Stay at Shangri-La’s Boracay Resort & Spa
4. Things to eat in Boracay
If there is one thing in Boracay that can compete with the splendour of its beaches, it is the amazing variety of restaurants on the island. From Chinese to Japanese to Thai to Indian to Mediterranean to Italian to Mexican, there is definitely something that will satisfy your tastebuds. Check out our full review of 10 Irresistible Treats You Shouldn’t Miss in Boracay.
5. Where to stay in Boracay
A. White beach
Most tourists visiting Boracay will stay near the 3.5km long White Beach. The beach is divided into three parts: Station 1, 2, and 3.
Station 1 – This station houses upscale luxury resorts and is slightly quieter than Station 2. This stretch of White Beach is better than Station 2 and 3′s because it has the best and finest sand.
Station 2 – If you prefer to stay in a lively area with lots of restaurants, shops, and a vibrant nightlife, Station 2 is for you. The famous D’Mall (a popular area with many restaurants and shops) is located here as well.
Station 3 – This is the station for budget travellers. Most of the island’s budget resorts are located here. Compared to the first two stations, this is the quietest area as it has fewer restaurants and shops. At night, it is very peaceful because the nightlife scene is mainly in Station 1 and 2.
B. Other areas in Boracay
Apart from White Beach, you can also stay on other areas such as Diniwid Beach, Lapuz-Lapuz Beach and Punta Bunga Beach, which will be more peaceful than the popular areas of White Beach. See this map. We stayed at Shangri-La Boracay Resorts and Spa near Punta Bunga, and the only people on the beach were the hotel guests. It was a serene place for a relaxing getaway.
6. Amazing Boracay travel video
You can also watch our Boracay videologue below. In this video, you will see footages of the ten activities mentioned above and it will give you a clearer idea of how much fun we had in Boracay. We captured some amazing footages.. you will love it!
This basically covers everything you need to know before hitting the shores of Boracay. We hope you found this guide useful.
Korea Tourist VISA Guide for Filipino Employees and Married Couples
For Filipinos, applying for a South Korean tourist visa is pretty easy. Here's a step-by-step guide on how this married couple did it.
Jayson Concepcion
Jayson Concepcion is a programmer by profession but has a soul of a traveller. Aside from his ultimate dream of travelling around the world, he loves to eat, drink, listen to music, talk about aliens and indulge in his occasional secret guilty pleasure of singing love songs in videoke. His favourite superpower is to teleport from one place to another. I guess you know why. Follow his latest pursuits on his blog, Facebook and Instagram.
Travelling to South Korea was always a dream for us, ever since my wife and I were college sweethearts. We were just drooling over the country’s beauty in K-Dramas back then, but 12 years later, it finally happened!
So after months of preparation, finally, we got our South Korean Visas! And it’s not just for Single Entry but Multiple Entry for 3 years! Let me share with you how we did it -- our strategy, how we prepared and lots of tips. Read on!
Our Profile
Nami Island
Me: Employed and has not been issued a South Korean VISA before.
Wife: Housewife, unemployed and has not been issued a South Korean VISA before.
The plan is, I sponsor my wife’s travel expenses and make use of BDO’s credit card promo to avail both of us a multiple entry visa. I contacted BDO to upgrade my BDO classic card to Gold credit card to avail the promo.
Address: 122 Upper McKinley Road, McKinley Town Center, Fort Bonifacio, Taguig city 1634, Philippines
Schedule:
VISA Application - 8:30 am to 11:00 am
Releasing of passports - 1:30 pm to 4:00 pm
Parking: You can park in Tuscany just near the British embassy where the restaurants are at.
Tip: Arrive early! At least 30 minutes before. Upon entry, the guard will inspect your documents and hand you over a number and on what window you will submit your documents. Processing is fast and efficient! Only took us 30 minutes.
A representative or one in your group can submit your documents and claim your passports after. No need for personal appearance.
Processing Time
3 working days (for those who have been to OECD member countries within 5 years as tourist)
3 working days (for those who are BDO Gold/Elite cardholders, BPI Gold/Platinum cardholders and BPI Gold Express teller debit cardholders)
5 working days (for those who have not been to OECD member countries within 5 years)
Visa Fee
59 days (or less) stay in Korea -- GRATIS
60 to 90 days stay in Korea -- PHP 1,800
The Requirements
Please note that this guide will focus on the VISA requirements for employees and for housewife/househusbands. For other types, kindly check the requirements on South Korea’s embassy website here.
Original Passport (should be valid for more than 6 months)
Photocopy of Passport Bio-page (page 2)
Original & Photocopy of valid visa/s and arrival stamps to OECD member countries for the past 5 years (If applicable only).
Original Certificate of Employment (must include applicant's position, date hired, compensation, office address, HR landline number [cell-phone number is not allowed], and HR e-mail address)
Original Personal Bank Certificate (must include account type, current balance, account opening date, and Average Daily Balance - ADB)
Bank Statement (original or certified true copy of bank statements/passbook for the last 3 months)
ITR (Income Tax Return) or Form 2316 Copy
Copy of PRC Card or IBP Card (If applicable only)
Visa Requirements for Housewives / Househusbands
Same as numbers 1 to 5 for employee requirements above with additional requirements below:
Additional documents
If spouse is employed: Husband's Employment Certificate Original (must include position, date hired, compensation, office address, HR landline number [cell-phone number is not allowed], and HR e-mail address)
If spouse is self-employed: Business Registration from SEC or DTI (Copy), Business Permit or Mayor's Permit (Copy)
Original Personal or Spouse's Bank Certificate ‘(must include account type, current balance, account opening date, 6 months average balance - ADB)
Personal or Spouse's Bank Statement (original or certified true copy of bank statements/passbook for the last 3 months)
Spouse's Copy of Income Tax Return (ITR)
Copy of NSO Marriage Certificate
Other Information
If personally invited by Korean (authentication not required):
Invitation Letter
Photocopy of invitor's Passport or Identification Card
If invited by Company in Korea (authentication not required):
Invitation Letter
Photocopy of Korean Company Business Permit
*Frequent travellers who have travelled as tourist to OECD member countries within 5 years are exempted from submitting ITR.
Click here for the application form. Print the form and fill it up completely with no erasures! Don’t leave a field/item blank. Put n/a or Not Applicable instead. I will try to explain some of the fields in the new form but most are self-explanatory.
1.7. National Identity no. – We Filipinos don’t have this, so just put n/a (Not Applicable).
9.4. Address in Korea / 9.5. Phone No. in Korea – You can put undecided if you haven’t decided yet where to stay in Korea. But for me, I advise you to put a place where you intend to stay like the name of a Hostel in Seoul even though you haven’t booked a reservation yet. There are also Hostels/Hotels in Korea that accept reservations with no down payment, so if ever you get denied, you can just cancel your reservation. Easy as that!
9.7. If you have visited more than 5 countries in the last 5 years (as there are only 3 spaces in the application form), write the other details on a separate sheet of paper. If the stamps of these countries are in your old passport, then bring your old passport too. It won’t hurt if you photocopy the stamps and bio page as well.
9.8. If you are travelling with any member of your family, then write it down in this section. I think this is for the embassy to check easily who is sponsoring who in case there is, like me and my wife where I am sponsoring our trip in terms of funding.
10.1. Write here the estimated travel cost (in USD) of your whole trip in S. Korea. Be realistic and maybe increase it a little, but make sure that what you write here is equal or lesser than the fund in your bank statement or bank certificate. For example, if your fund in your Bank is PHP 50,000 (reflected in the Bank Statement), then put around USD 857 (PHP 40,000). I subtracted PHP 10,000, assuming that the maintaining balance in your account is PHP 10,000.
10.2 Who will pay for your travel related expenses. Write here the person or company who will pay for the expenses of your entire trip. For the Type of Support here, you can write Financial support or a particular expense like airfare, accommodation. If you are funding yourself, then put ‘myself’.
2. 1 piece of Passport size coloured picture
We got our picture taken at Great Image for a more professional look. We paid PHP 370 each (PHP 740 total) for 8 pcs of passport size coloured picture with white background. Just tell them it’s for a S. Korea VISA application and they know the size for it.
3. Original Passport (should be valid for more than 6 months)
Make sure your passport is valid for 6 months.
If female, married and your expenses are sponsored by the husband, be sure that your name in your passport is your married name, not your maiden name.
Bring your old passports too if there are any. The consul did look at our old passports (maybe skimmed a bit on the stamps) but quickly gave it to us on the day of the application.
4. Photocopy of Passport Bio-page (page 2)
It should be a clear one but not necessarily coloured. Just enough to see the details.
5. Original & Photocopy of valid visa/s and arrival stamps to OECD member countries for the past 5 years
(If applicable, and Korean Visas will not be counted)
6. Original Certificate of Employment
(must include applicant’s position, date hired, compensation, office address, HR landline number [cell-phone number is not allowed], and HR e-mail address)
Request for a COE with your HR Department at least a week before your VISA Application as this needs to be recent.
Request for additional copies if you are travelling with a dependent. In my case, I requested two. One for me and one for my wife.
7. Original Personal Bank Certificate
(must include account type, current balance, account opening date, 6 months average daily balance or ADB)
You request this at your branch of account. I requested mine at BDO where I paid PHP 100 for each certificate (I requested two, one for me and one for my wife). Just tell the staff at your bank you are requesting such for a Korea VISA Application.
8. Bank Statement
(original or certified true copy of bank statements/passbook for the last 3 months)
This is different from the Bank Certificate. It is a list of your transactions with your Bank (credit, debit items) for the past 3 months just like what is shown in your passbook.
If you are travelling with a dependent, then you must request a copy for each dependent.
9. Photocopy of ITR (Income Tax Return) or Form 2316
You will request this from your HR and you only need to submit a photocopy or photocopies for your dependent(s).
Make sure your TIN number appears in this document.
If you don’t have an ITR yet because you are fairly new to your job, then I think you can prepare a letter stating your situation.
10. Photocopy of NSO certified Marriage Certificate (For Spouse category only)
You can request a certified true copy of your Marriage Certificate in NSO on their e-census website. No need to go personally in their offices. This is a proof that you are married to each other.
You only need to submit a photocopy.
How much cash do you really need in your bank account?
This is not set in stone. I guess you should also ask yourself first. If you are staying in Korea for around 5 days, how much pocket money do you need then for your expenses? If you say your budget is PHP 10,000 a day, then PHP 50,000 is enough to have in the bank account. But if you are staying for 30 days, then logically, you should have a bigger amount in your stash.
Also, since they ask for the ADB (Average Daily Balance) for 6 months, make sure that the amount you estimated to spend in Korea matches or close to the ADB in your account. In my case, since I’m also sponsoring the expenses of my Wife, I have to double the estimated expenses per individual. I also steadily increased my BDO Savings for the last 6 months and I seldom withdraw large amounts. Basically, if you are just staying around 5 to 7 days, I think PHP 50,000 is a safe bet (I heard that others were approved by only having PHP 30,000). Just make sure you don’t withdraw that P50,000 for 6 months before your VISA application.
Credit Card Promos
If you are a BDO Gold/Elite, BPI Gold/Platinum or a BPI Express Teller Debit cardholder then you are eligible for a 3-5 years Multiple entry visa and are exempted from submitting a Bank Certificate and ITR when applying. For more information on this promo, go to the Visa Announcement section in the Korean Embassy’s website.
Bring your credit card with you, photocopy of the front of the card and 2 months of the most recent credit card statements. In my case I only have 1 month statement on my BDO Gold card but they still accepted it anyway.
The reason why I still submitted my ITR and bank certificate is to show proof that besides having the credit card, I can support my wife’s travel expenses in Korea through my financial capacity.
You will line up at Window 3, and you will claim your passport 3 days after the application.
More Tips
No need to submit your itinerary, plane tickets, hotel bookings, tickets to Everland/DMZ, etc, just submit what is required in the application.
Bring a Valid ID (aside from your passport). You need this to enter the Embassy.
How can I be exempt from securing a VISA? Read from this link or see screenshot below:
If using Philippine Official and Diplomatic Passport
If transiting only and going to the U.S., Canada, Australia, or New Zealand. But must not stay beyond 30 days and with confirmed onward ticket to the 3rd country
If the individual has been to Korea for four (4) times within the past two years with a C2 or C3 visa. Or has been to Korea for more than ten (10) times already
If Nationality is among the list of those exempted from securing a visa. For information, or list of these nationalities, you may visit the website.
For other visa information, you may also refer to this site.
Reasons why the embassy denies an application:
The reasons of the denial of visa application are as follows:
Your passport is invalid;
You are prohibited to enter Korea as per Korean Immigration law no.11 sec. 1 (Prohibition of Entry);
Our record shows that you have previously violated the Korean law;
You failed to submit the required document completely;
The documents you have submitted cannot be verified;
You failed to prove the purpose of entry to Korea;
You failed to prove strong economic and family ties to the home country;
Your inviter is not qualified to invite you;
You failed to prove the relationship with your inviter.
In addition, the reasons of the denial of spouse visa application are as follows:
You failed to give prima facie evidence of your marriage validity according to the Philippine law and regulation;
You failed to give the correct information about your spouse;
You and your spouse failed to prove keeping a normal marital life.
If your application is denied, you have to wait for 6 months to re-apply.
Conclusion
So guys, it is advisable to check the Korean Embassy’s official website from time to time for new announcements. You can avail the credit card promo if you want for less hassle and more chances of approval. Be sure to prepare all the documents, arrange it in the order listed above and hope it gets approved so you can enjoy South Korea in no time!
How Filipinos Can Get a Nepal Tourist Visa on Arrival
Did you know you can get a visa on arrival in Nepal? Here's a quick guide on getting one.
David Lozada
David Lozada is a journalist and community manager for Rappler. When he's not reporting on disasters and development issues, he travels the world – chasing sunsets, praying in Buddhist temples, and eating street food. The 24-year-old has been to 24 countries and counting. Follow his adventures at David Lozada Travels.
Getting a visa is the bane of Filipino travellers. Coming from a developing country like the Philippines, it’s really hard to get travel permits to other countries outside the ASEAN region. Aside from preparing various documents months before your travel, you have to go through the tiresome application processes of embassies and consulates.
In my experience applying for a visa for South Korea, Taiwan, Japan, and Europe, the process takes time, effort, and resources that could’ve been used for your travel. So naturally, it’s a great relief when we have the option to get a visa on arrival.
I decided to get a tourist visa on arrival (TVOA) for my trip to Nepal in July 2016 for two reasons – I did not have time to apply for one before leaving Manila and I heard from my friends who have been to Nepal that the process was very easy.
And it was! I arrived in Kathmandu Tribhuvan International Airport on a Friday night and immediately proceeded to the immigration area. Travellers have the option to either fill up a printed form or input your information in a machine.
I chose the machine option just to experience the process. I was asked to scan my passport before filling up some basic information about my stay in Nepal. Afterwards, the machine took my photo and the process was done in 5 minutes.
However, I was not asked for any of these documents since I filled up the machine form. Maybe the immigration officers will ask for this if you choose to fill up the printed form. I simply paid the $25 fee in the bank counter and showed the receipts to the immigration officer. There were no questions asked – he simply stamped my passport and welcomed me to Nepal.
The entire process was over in 20 minutes. It was very efficient and speedy compared to the TVOA I got when I went to India.
The visa fees for TVOA in Nepal are as follows:
15 days – $25
30 days – $40
90 days – $100
Tourism is the largest industry in Nepal so it has a fairly liberal visa policy. Almost all countries can avail of the visa on arrival option for tourism, business, and official visits. It’s great that the government actually makes the process smooth and easy for tourists. It makes travelling to the country a lot easier.
The same, however, could not be said on the baggage claiming process. The time I saved in getting a visa, I lost in the baggage arrival area. I spent almost an hour looking for my baggage and I found it outside the baggage belt on the far side of the hall. I think someone tried to take it home but left it there when they found out that the guards actually check the boarding passes to see if what people are taking out are actually theirs.
I was welcomed by the driver from my guesthouse when I stepped outside the airport. We made our way through the streets of Kathmandu for about an hour before we arrived at Stupa Guesthouse, which would be my home for the next six days.
Taipei Travel Guide, Tips & Itinerary for Filipino Travellers
Pinoys travelling to Taipei, read this detailed guide from someone who's just been there.
Carla Feria
Carla is a free spirited individual that has a lifelong conquest to travel the world. Wanderlust consumes her. She makes sure her travel dreams turn into plans and her plans turn into reality. Follow her as she wanders the world at Tigerwanders.
Taipei is a lovely city in the north of Taiwan. You can see a great mix of old and new architecture, from ancient temples to modern buildings. The food choices are superb from Michelin restaurants to street food stalls. This beautiful country in East Asia is worth a visit.
Last September 2016, Taiwan Economic Cultural Office (TECO) made an announcement that citizens of the Philippines and other Asian countries like Cambodia, India, Indonesia, Laos, Myanmar and Vietnam can have a visa-free entry to Taiwan – with conditions.
BUT as of today, April 19, 2017, TECO announced a new policy for Philippine passport holders. Starting June 1, 2017, Filipinos can go to Taiwan – VISA FREE. This visa exemption is valid for one year (trial basis). For more info on new visa rules, CLICK HERE.
Going to Taiwan will be easier and affordable – no need to pay for visa and processing fees. Want to save more? Here are some tips when traveling in Taiwan:
Airfare
Philippine Airlines, Cebu Pacific Air and Air Asia have direct flights to Taiwan from Manila, Philippines. Air Asia just launched a direct flight from Cebu to Taipei. Now, Taiwan just became more accessible to Filipinos. 😉
You just have to be patient and wait for a seat sale to save some bucks.
Visa
Filipinos who have expired visa (less than 10 years) of Australia, Canada, Japan, Korea, New Zealand, UK, USA or any of the Schengen countries can just apply for a travel certificate. Check Taiwan Embassy Website for other conditions. The travel certificate is valid until May 2017, because again, Filipinos can enter Taiwan visa free starting June 1, 2017.
If you need to apply for a Taiwanese Visa (if you will travel April – May 2017), seek help from a trusted agency – International Journeys. The visa processing fee is ₱2,800 and processing time is 5-7 days. Note that the recommended show money (stated in the bank certificate) is ₱50,000.
Taiwan (Tourist) Visa Requirements for PH Passport Holders
Passport (valid for 6 months)
Accomplished Application Form
2 Pieces of Passport Size Photo
Photocopy of Passport Bio-page
Original Birth Certificate
Original Personal Bank Certificate
Photocopy of Income Tax Return or Form 2316
Original Certificate of Employment
Transfers
There are 2 international airports in Taipei: Taoyuan and SongShan Airport. SongShan is in Taipei city and there’s an MRT (Brown) Line outside the airport so it’s easy to transfer to another district. Taoyuan Airport is 10-30 minutes away from Taipei City. Instead of getting a taxi that costs NT$1,000-NT$1,200, just take a bus and pay NT$90-NT$145.
There are 5 MRT lines that are connected from each other. Bus stops are right next to MRT so transfers are very easy. Also, some landmarks are walking distance from MRT stations.
There are 2 main cards you can choose from when travelling in Taipei – Easy Card and Metro Pass.
Easy Card costs NT$100 / ₱156 (non-refundable). You need to top up so you can use it at MRT, some buses and convenience stores like 7/11 or Family Mart. The good thing about Easy Card is that you can refund the excess amount left in your card. You can also have 20% discount per MRT trip.
You can buy and load the card at the airport, MRT stations or convenience stores.
Metro Pass has different types of passes: good for 24 hours (NT$180/₱281), 48 hours (NT$280/₱437), 72 hours (NT$380/₱973). You can use the pass for unlimited MRT travel within the validity of your card. You can buy the metro pass at any metro station information counters.
There’s also Taipei Pass and iPass. Check Metro Taipei for more info.
Tip: Download Go! Taipei Metro application for free. The application has Taipei MRT Map and can help you plan your MRT journey. The application also suggests nearby attractions near MRT stations.
Accommodation
Hostels in Taipei cost around ₱1,500-₱3,000. Shared/ dorm type rooms costs around ₱700-₱900.
You can also try Couchsurfing. It’s an online community of travellers where you can request for a couch/place to stay for free. It’s not all about free accommodation though; it’s more of an exchange of culture, like an immersion. You stay at a local’s place to know them and their country deeper – way of living, perspective, etc.
View from my host’s balcony
Communication
Sim Card costs around NT$250-500 (₱390-780). You can have unlimited data for 3, 5 or 7 days; depends on what sim card type you choose.
If you can survive not being online 24/7, you can always take advantage of free wifi at the airport, MRT stations and shopping malls. Register at ITaiwan so you can connect to the internet for free.
MRT Xinbeitou
Food and drinks
Taipei boasts its variety of delectable food. It’s always nice to try a Michelin Restaurant like Din Tai Fung. If you are on a budget and want to have a gastronomic feast, you can always run at food courts and street food stalls.
Street foods costs around NT$20-70 (₱31 – 109).
Bubble Tea originated in Taiwan and it’s definitely a must try. One regular cup costs around NT$30-50 (₱47-78)
Other must-try foods are beef noodles, oyster omelet, stinky tofu, pork sausage, dumplings and many more!
Tip: There are water fountains at MRT stations, refill your bottle and save NT$15 (₱23)/bottle.
Tours
Most of the landmarks are free like temples, parks and night markets. Going around Taipei is easy so you can make a DIY itinerary instead of booking a tour package which is pricey. All you have to do is get a Taipei Travel Map and you can explore Taipei free and easy.
When in Taiwan, one must see Taipei 101. To get a good view of this iconic skyscraper, you can hike at Elephant Mountain or go to Sun Yat-Sen Memorial Hall.
Should you decide to go and see the cityscape at Taipei 101, admission fee costs NT$600 (₱936). You can buy online tickets at Klook and pay only NT$523 (₱815).
Museums should always be in one’s itinerary. The place will feed your mind with history and culture of a country. National Palace Museum is rich with artefacts, paintings and other historical things. The entrance fee costs NT$250 (₱390). English guided tours are free every 10:00 AM and 3:00 PM, but you have to book in advance because it’s limited to 30 participants only.
Souvenirs
Magnets and key chains cost around NT$85 (₱133) each. Try to haggle at night markets and buy it for NT$70 (₱109).
One of Taipei’s famous treats is pineapple cake. One box (12 pieces) usually costs around NT$150 (₱234). The finest pineapple cake according to my Taiwanese host is Chia Te.
Other delicacies that you can bring back home are nougat candies, meat jerky, milk tea powder and mung-bean cakes.
More tips
Check the Weather. Always check the weather so you’ll know what to bring and wear -- sundress or rain jacket, hat or umbrella, etc.
Know the plugs/sockets. Taiwan has a Plug Type A and B with 110 volts.
Get lockers. If it’s your last day in Taipei and you need to check out by 12.00 in your hostel/hotel but your flight is at night, it’s better to put your bag in a locker than carrying it half day for last sightseeing.
Lockers are located in Taipei Main Station, M3. The initial fee is NT$10 (₱16) good for 1 backpack/luggage. In order to retrieve it, you have to pay NT$10 (₱16) for the succeeding hours.
Our initial plan was to wake up very early in the morning so we can visit lots of places but we ended up staying in bed a bit longer. Blame it on the weatherman! :p
Even though we were not able to achieve our planned itinerary, it was okay. It’s a reason to come back to Taipei soon. 😉
It's possible for Filipinos to get a South Korea Tourist Visa even without an Income Tax Return (ITR).
Charmaine Acha
Charmaine loves random weekend trips, technology and coffee. Guided by her travel mantra "chill and travel", she enjoys unplanned escapades without compromising leisure. Her free hours are spent reading a book, watching movies or thinking about her next possible adventure.
So here it is! After writing my South Korea Tourist Visa Guide for Filipinos, I received a couple of enquiries about how I got approved without an Income Tax Return (ITR). If you’re someone who gets income from online sources like me, mind you, it’s really daunting and tedious to file for your own taxes here in the Philippines. Not that I have no plans of filing but a crazy idea came to my mind.
What if I try my luck in applying for a South Korea Tourist Visa even though I don’t have an ITR just yet? What are my chances of getting approved? I challenged myself to do it last Oct 2016 and I’m so glad I did. I’m sure you’re already curious about it. So here, let me share with you some tips.
Disclaimer: Although I was granted a single-entry tourist visa without ITR, this doesn’t mean that I’m encouraging you to do the same. It is still best that you complete the requirements set by the Korean Embassy to increase your chances of approval. After all, it’s still a case-to-case basis.
If you don’t have an ITR yet (like my case) when you apply for a visa, the very first thing to do is to compose a letter of explanation stating your intent to travel to Korea and why you lack an ITR. Sorry to disappoint but I won’t show you the exact copy of my letter as the details are too personal. Instead, I made a template below to guide you in writing your own letter.
October 28, 2016
Embassy of the Republic of Korea in the Republic of the Philippines
122 Upper McKinley Road, McKinley Town Center, Fort Bonifacio, Taguig city 1634, Philippines
Dear Sir / Madam:
I am personally writing this letter to explain why I failed to present an Income Tax Return (ITR) as part of my requirements to obtain a Tourist Visa to South Korea.
1st paragraph: State your reason/s why you don’t have an ITR yet and the target date you are planning to file for it. If you’re fairly new to the job, explain when you were hired and how long you’ve been working with your present company.
2nd paragraph: If you’ve travelled to other countries before, state your trip details including the destinations, the dates, reasons for travel and who you were with.
3rd paragraph: Explain why you’re interested in travelling to Korea. If you have a travel blog or if have contributions to online travel media platforms, put the URLs or links to your posts or contributions to show proof that you're someone who loves to travel and share stories to others.
Tip #3: Make a checklist and set a target date to complete all your documents
This is pretty self-explanatory. If you plan to travel to Korea during winter (like I did) say December, then by October, you should have completed all the needed documents. I suggest that you apply for a visa at least two months prior to your travel date to give yourself enough time to plan for your trip.
My South Korea Tourist Visa Approved: 5 Easy Steps for Filipinos
Your GUIDE to applying for a South Korea Tourist Visa in the Philippines in 5 easy steps.
Charmaine Acha
Charmaine loves random weekend trips, technology and coffee. Guided by her travel mantra "chill and travel", she enjoys unplanned escapades without compromising leisure. Her free hours are spent reading a book, watching movies or thinking about her next possible adventure.
My heart skipped a beat when the releasing officer in the Korean Embassy handed over my passport. “Will I be APPROVED or DENIED?” One deep breath… I flipped open my passport and…
Thank God I got approved! Woohoo! I couldn’t contain my happiness that day.
You see, getting a tourist visa is not a piece of cake for most Filipinos, especially for those who get income from online sources like me. Not to brag about it, but I was granted a single-entry South Korea tourist visa despite not having an ITR yet. (I shall elaborate more on this on a separate post soon). First, let me just share with you some easy steps and personal tips to make your Korean visa application smooth and successful.
There are different visa requirements for South Korea. Check your respective visa requirements here. As for me, I applied for a tourist visa For Employees. See requirements below:
1 piece of Passport size coloured picture (Tell the studio that you’re applying for a South Korea visa, and they already know the size. Paste your photo on your application form.)
Original Passport (should be valid for more than 6 months)
Photocopy of Passport Bio-page (page 2)
Original & Photocopy of valid visa/s and arrival stamps to OECD member countries for the past 5 years (If applicable only)
Original Certificate of Employment (must include applicant's position, date hired, compensation, office address, HR landline number (cell-phone number is not allowed), HR e-mail address)
Original Personal Bank Certificate (must include account type, current balance, account opening date, ADB)
Bank Statement (original or certified true copy of bank statements/passbook for the last 3 months)
ITR (Income Tax Return) or Form 2316 Copy
Copy of PRC Card or IBP Card (If applicable only)
If personally invited by a Korean
Invitation Letter
Photocopy of invitor's Passport or Identification Card
(authentication not required)
If invited by a company in Korea
Invitation Letter
Photocopy of Korean Company Business Permit
(authentication not required)
Note: Frequent travellers who have travelled as tourist to OECD member countries within 5 years are exempted from submitting an ITR.
This is the tricky part. Although you can get an application form from the Korean Embassy, I suggest that you print out the application form in advance to save time and to minimise errors. Print it in an A4 size bond paper.
Erasures are a BIG NO-NO so write all information carefully. Note that you must write in BLOCK LETTERS (ALL CAPS). If the information needed is not applicable to you, put N/A.
Tip 1: If you’re like me whose handwriting sucks, you can download the .docx format of the application form. You can find it here under Application for Visa. Type all the needed information and print away. It’s cleaner to look at and saves you time and effort in writing. That’s what I did and it’s totally fine.
Tip 2: If you want to save on paper, you can print on both sides but make sure the sequence of pages is correct. Page 1 (front), Page 2 (back) and so on.
Some important fields you need to take note of:
1.7 국가신분증번호 National Identity No. --> N/A because Filipinos don’t have this
9.8. 동반입국 가족 유무 기재 Are you travelling to Korea with any family member?
Note: Family Member means your spouse, father, mother, children, brothers and sisters. Your fiancée, boyfriend / girlfriend and best friends are NOT considered a family member so don’t put them on the list.
10.2 경비지불자 Who will pay for your travel-related expenses? (any person including yourself and/or institute)
a) 성명/회사(단체)명 Name of Person/Company(Institute) --> WRITE YOUR NAME if you are funding your travel. If not, provide the name of the person or institute who will fund you
b) 관계 Relationship to you --> SELF or your relationship to the person or entity funding you
c) 지원내용 Type of Support --> FINANCIAL SUPPORT or indicate which part of your trip is being funded (eg. flights, accommodation, tours, etc.)
Step 3: Submit your documents to the Korean Embassy
Put all your documents in a secure envelope or folder and submit them personally to the Korean Embassy.
How to get there
Address: 122 Upper McKinley Road, McKinley Town Center, Fort Bonifacio, Taguig City.
By jeepney: From Guadalupe MRT Station or Market-Market, take the FTI-C5 jeepney. It will take 20 minutes from Guadalupe MRT Station and 7 minutes from Market-Market.
By shuttle: From the Venice Piazza at Mckinley Hill, there is a free shuttle bus that will take you to Upper McKinley Rd. The ride will take about 10 minutes. The Embassy is within walking distance from the last Bust Stop at McKinley Rd.
By cab/taxi: Ask the driver to drop you off at the Korean Embassy at Mckinley Hill along C5 road, beside the British Embassy.
By car / Uber / Grab Car: Simply use Waze and key in the location as shown on the map below.
File your application from 08.30am to 11.00am ONLY. I suggest you go there before 8.00am as it is on a first come, first serve basis. No appointment is needed.
You will be guided accordingly by the personnel manning the entrance. Someone will initially check your requirements and will give you a priority number to your designated window.
Window 1-2: For First-time applicants; those who have no previous tourist visits within 5 years to OECD member countries; and holders of confirmation of visa issuance number
Window 3: For frequent travellers who have been to OECD member countries within 5 years; those who have at least 2 tourist visits to Korea; and seafarers who plan to transit to Korea
For those who are in Cebu, you may apply at the Consulate in Cebu:
Address: 12th Floor Chinabank Corporate Center, Lot 2, Samar Loop Cor. Road 5, Cebu Business Park, Mabolo, Cebu City
Visa fees
59 days (or less) stay in Korea -- GRATIS
60 to 90 days stay in Korea -- ₱1,800
Reminder: Pay attention to your priority number. When your number is called, go to your window immediately. The application officers won’t wait for you. If no one is there for about 5-10 seconds, they will call the next number. So always be alert to avoid inconvenience.
FYI: You can also ask someone who’s travelling with you to file the application on your behalf. No need for a consent letter.
Step 4: Keep calm and wait for the release date
After filing, you will be given a slip where the release date is indicated. You must return to the embassy to personally claim your passport (visa granted or not).
Processing period:
3 working days (for those who have been to OECD member countries within 5 years as tourist)
5 working days (for those who have not been to OECD member countries within 5 years)
Step 5: Claim your passport from the Korean Embassy
This is it! The day you’ve all been waiting for!
Claim your passport at the Korean Embassy from 1.30pm to 4.00pm ONLY. Though you can still ask someone to claim your passport, I suggest that you claim it yourself because they might need additional info from you, and in some cases, you might be interviewed.
Just a friendly advise: Worrying doesn’t change the outcome so just hope for the BEST! If it’s your time to go to Korea, it’s really your time and you deserve it! If not, there’s always a next time. You can apply again after 6 months.
Disclaimer: Although I was granted a South Korea tourist visa, this doesn’t mean that I’m already an expert on this matter. It’s still best to refer to the Korean Embassy in the Philippines for your personal queries and concerns.
How Filipinos Can Enter Korea Without a Tourist Visa
Good news to Filipinos! Do you know you can travel to Korea without visa in some cases?
Kevin Tsai
Kevin is a multilingual travel industry professional from Manila who is currently based in Tokyo. He has so far fulfilled over two-thirds of his goal of travelling to 30 countries before turning 30 years old in 2017. Follow his adventures at The Travel Guy Shops and @thetravelguyshops.
THIS IS KOREA! At the set outside of Seoul where Korean period dramas are filmed.
See the confirmed update to this post here! Subject to certain conditions below:
Travelling and Visas
One of the most bothersome concerns prior to travelling is getting a visa. This policy between states affects everyone regardless of citizenship. An applicant needs to provide an employment certificate or business registration, income tax return and most importantly, a bank certificate with a significant balance among other things -- essentially documents to prove strong ties to one's country of origin and plans of returning and not overstaying.
One of those at the bottom of passport hierarchy is a Philippine passport, with visa-free access to less than 60 destinations, not only because of the country's poverty but also because you can find Overseas Filipino Workers (OFWs) anywhere in the world, leaving other nations to have a reason to place strict measures against illegal immigration especially by the OFWs' relatives. This is one reason why it is highly unlikely, if not completely impossible, that Japan will allow visa-free entry to Filipinos, contrary to previous speculations.
Thankfully, embassies are increasingly starting to become more open-minded and less paranoid, and by that I mean considering the fact that most individuals or families who apply for visas are established middle-class citizens at the very least who just want to go on a holiday. Recently, the Japan Embassy has become more lenient in issuing single entry tourist visas to Filipinos who are first-time visitors (as long as requirements are complete) and multiple entry visas for those on their subsequent trip.
Me at the Canola Flower Festival in Jeju Island in April 2014
You may or may not be aware but Filipinos, like Mainland Chinese, who although need a visa to enter Mainland Korea through Seoul, Busan or other ports, have visa-free access if they are flying directly to Jeju Island, Korea's popular summer, nature, island and wedding photography destination in the south.
In the absence of charter flights, Filipinos can take advantage of this by flying from Hong Kong and taking a flight to Jeju via Cathay Pacific/Dragonair. But recently, just as the Japan Embassy has become more lenient in issuing visas, so has the Korean Embassy, but better!
THAT VIEW from sunrise peak Seongsan Ilchubong, Jeju Island
According to a notice posted at the Korean Embassy Manila (see below), Philippine passport holders can now enter Korea VISA-FREE if they meet EITHER of the following conditions:
1. Having visited Korea at least 5 times in 2 years, or at least 11 visits in total.
Okay, maybe the first condition is a bit difficult to achieve. I imagine you'd have to be at least 40 years old for that to happen. I believe most people can better take advantage of the second one:
2. In possession of a) a valid visa or entry permit to the USA, Canada, Australia, New Zealand or Japan, and b) a confirmed ticket leaving Korea for any of those countries within 30 days.
This implies that travelers get 30-days visa-free entry to Korea prior to their departure to those countries. Wouldn't you agree that this option is far easier than the first? Requirements for getting a Japan tourist visa are simpler than those for the other four countries. This now makes the Japan Visa even more powerful than it already is, since you can also use it to enter Taiwan visa free simply by registering online.
MAJOR UPDATE (14 Apr 2016): Starting from 1 May 2016, Japan visa is no longer accepted for transit to Korea.
This means, you can now enter more countries in one trip using just one Japan visa, as opposed to applying for separate visas. This saves you time in preparing requirements, money in expensive visa fees and costs of some flights; not to mention having to pay for the ₱1,620 Philippine travel tax and ₱550 NAIA Terminal Fee each time you leave the country.
Trendy ladies shopping in Myeongdong, Seoul
A typical itinerary I have in mind would be as follows:
Manila to Taipei (at immigration, present unused Japan visa and online form)
Taipei to Seoul/Busan (at immigration, present unused Japan visa and ticket to Japan)
Seoul/Busan to Tokyo/Osaka (use Japan visa)
Tokyo/Osaka back to Manila (with a used Japan visa, passport stamps from 3 countries and wonderful experiences in East Asia)
Sure, such a trip might entail saving up much more than for your usual trip, but for those of you who have limited time (or vacation leaves) on your hands, combining two or more countries in one trip is truly something to take advantage of. After all, there are a lot of budget airline options among those countries (I've tried one: Japanese airline Peach Air from Taipei to Osaka.) You can probably skip Taiwan (and miss out on all the delicious, affordable street food at Shilin Night Market!?) or Korea (and miss out on all the shopping extravaganza and K-pop madness in Myeongdong!?) and head straight to Japan, but it's totally your call.
After dinner at chilly Suwon City near Seoul in September 2013
Should you wish to have an actual South Korean visa take up one precious page of your passport, it may as well be a multiple-entry one right? The Korean Embassy has now also made this easier if you meet the following condition:
Bonus: 3. The Korean embassy now also allows BPI Gold and Platinum Credit Cardholders to easily get 1 or 3-year multiple-entry visas (respectively), and are exempted from submitting a bank certificate and ITR. They just need to submit their most recent original billing statement in place of those requirements, but still need to submit an employment certificate or business registration. Easy peasy!
My Winter Holiday in Korea: 7 Days with Just ₱15k Budget (All-In)
7 days winter holiday in Korea with a budget of ₱15k -- here's how I did it!
Chedric Angeles
Chedric has a strong desire for food, photography, baking, travel, theater, and classical music - as strong as his favourite coffee mix. When got nothing to do, he stares at a wall brainstorming his next exploit. He also likes to view different travel blog posts and ends up extremely jealous.
To witness the snowfall is everyone’s dream especially to the ones residing in a non-four season country (e.g. me lol). Add to that, the fascination for wearing chunky, stylish winter staples. It has been a dream I could only fulfil through gliding on ice in a skating rink in our town’s shopping mall. It is sort of a “winter feel” albeit not seeing a real snow drop on my head. I couldn’t wait for that rare moment. Thus, I planned out an itinerary, packed my bags, and then flew to Seoul last December 2015.
Join me as I finally witnessed the freezing cold weather in the Land of the Morning Calm. Through this post, I will share with you my exciting 7-day winter season trip to South Korea on a tight budget.
Thanks to the birth and proliferation of low-cost carriers, travelling to the K-Pop nation is not anymore an option, it’s a must! I booked 9 months before my flight and luckily opened the web browser with a surprise. Without any hesitation, I reserved my ticket to South Korea via Cebu Pacific.
Cost: ₱6,510.31/$138.34 (inclusive of round-trip meals on-board, 20-kg baggage allowance, seat selection, terminal fee, Fly Me Next privilege)
Quick tip: The technique doesn’t change at all. Scoring a wallet-friendly airline ticket fare entails a simple effort; make it part of your daily or weekly grind. Always check! Or better yet, subscribe to their newsletter!
In my post about Hostel Maru, I mentioned all the inclusions of a ₱441/$9 per night stay. To cite some, an unlimited American breakfast, high-speed Wi-Fi, showers, etc. Book it to stay cheap and stay hip!
Cost: ₱3,085.00/$65.55 for 7 days
Quick tip: I discovered that when reserving your accommodation, booking late is a good thing this time. Which contradicts the hack in booking an airline ticket. Based on my experience, I booked my stay 2 days before the check-in date. It was by accident when I realised that most of the hostels I was browsing through the previous weeks, obviously cheapen their prices to almost 70%-80%! I was then indecisive of which guesthouse to stay at, which brought me to a late but cheaper reservation. Cool right?
Food
With a budget of ₱400/$8.5 per day, surely you can find a decent and delicious meal without getting your wallet run on empty. You can opt for store-brought ramyun, cheap meals in subway stations, restaurants like the Food Cafè, and of course, street food!
Cost: ₱2800/$42 for 7 days
Quick tip: Since breakfast is the most important meal of the day, always do a run through the inclusions when booking your hostel/guesthouse. It’s best when there’s free breakfast; it’ll save you up a bunch of money. Plus, you can bring with you whatever breakfast is served, placed in a plastic container. That’s what I did and trust me, it’s the best tip ever.
Transportation
The fastest way to get you to your favoured tourist attractions is through the subway. Upon arrival at the airport, you can already purchase your T-money card. Convenience stores, all subway stations, and other dealers (with the T-money logo) sell these cards as well.
Costs:
T-money card – ₱1,566.10/$33.11 (loaded up with ₩40,000, good for 7 days)
Bus – ₱236.04/$5.02 (Gapyeong shuttle bus that will take you to Nami Island and Petite France)
Ferry – P314.73/$6.7 (ferry to Nami Island)
Quick tip: The advantages of the T-money card is overwhelming; it can also be used when riding a bus, some taxi cabs, public telephones, and when making a purchase at convenience stores and vending machines. Works just like your debit card!
Listed here are the fees to different attractions in my DIY 7-day Itinerary.
Costs:
Gyeongbokgung Palace – ₱118.02/$2.5
Deoksugung Palace – ₱39.34/$0.83
Namsan Seoul Tower (one-way cable car) – ₱236.06/$5.02
Trickeye Museum – ₱590.15/$12.56
Petite France – ₱314.70/$6.7
Quick tip: Don’t consider going to Nami Island and Petite France on a Sunday, these two places are a bit touristy. Another thing, the four major palaces in Seoul (Changdeokgung Palace, Changgyeonggung Palace, Deoksugung Palace, Gyeongbokgung Palace) have an Integrated Palace Ticket for ₩10,000/₱392.87/$8.35 valid for 1 month of unlimited use.
Fortunately, the Philippines is given a lenient process in terms of visa application. On top of that, a 59-day tourist visa can be availed for free!
Quick tip: It’s better to include your round-trip itinerary receipt (if you’ve booked already) for a higher chance of getting your visa application approved; although that’s not listed as one of the requirements. It will serve as a strong supporting document. The price of visa processing through a travel agency ranges from ₱800-₱1,000.
A Filipino Traveller’s Guide to Visiting Korea for the First Time
Heading for South Korea soon? Here's a nifty travel guide for Filipinos travelling to the Land of the Morning Calm for the first time.
Jane Galvez
Jane is a homebody, but the promise of an adventure of a lifetime inspires her to spend her weekends travelling. When she's not on the road travelling, she's writing about the places she's been to or planning her next exploit at Oh My Janey.
Image credit: Chris Anderson
For Filipinos, South Korea sounds like an expensive travel destination. Being one of the leading economies in Asia, its high cost of living and visa requirements often make Filipino travellers think twice before booking a flight to the country.
Believe it or not, you don’t have to be rich to explore the Land of the Morning Calm. For Filipino first-time travellers to Korea, here’s a little guide to make the experience worthwhile.
How to apply for a visa: Lax rules and easy application process
Applying for a Korean Visa is almost hassle-free if you have the necessary requirements and enough time to accomplish it. Though a travel agency can help you when applying for a Visa, it’s something you can do yourself.
Luckily for Philippine passport holders, a single entry 59-day South Korean tourist visa comes for free! Though there are requirements, accomplishing one is no rocket science.
Step 1: Compile the necessary requirement for a tourist visa
Complete all the necessary requirements needed for the visa application. It varies from one individual to another, but there are general requirements that every applicant needs to submit.
General requirements
Application form
Philippine Passport valid for more than 6 months (original and photocopy of Bio page)
If applicable, original and Photocopy of valid visas and arrival stamps to OECD member countries for the past five years.
NSO-certified Birth Certificate
Original Personal Bank Certificate
Original Bank Statements
Original or Photocopy of Income Tax Return (ITR) or Form 2316
1 passport-sized picture
Travellers with OECD member country visas and arrival stamps within the last five years are exempt from submitting an ITR. A recently revised condition also exempts from submitting an ITR frequent travellers who have been to Korea at least once for the last five years .
Supporting documents
Invitation letter from a Korean or a company in Korea
Roundtrip airline ticket
Hotel booking
Aside from the requirements mentioned above, some applicants are required to submit other documents.
For employees
Original Certificate of Employment (COE) including applicant’s position, compensation, address, date hired, office landline or mobile number, and email address
Certificate of Leave of Absence
For businessmen
Copy of an SEC or DTI-issued Business Registration
Copy of Business or Mayor’s permit
(Optional) Electricity bill statements for the past three months
For students
Since they do not have an ITR and probably a bank account, they’re required to submit the following instead:
Original School Certificate
Photocopy of School ID
Parent’s Documents:
Original Employment Certificate
Or Business Registration from DTI or SEC & Business Permit or Mayor’s Permit
Original Bank Certificate
Original or Certified True copy of Bank Statement
Copy of ITR
Copy of NSO Marriage Certificate
For a more comprehensive list of visa requirements, visit mofa.go.kr.
Step 2: Accomplish the visa application form
The visa application form can be downloaded from the embassy website, but it’s also available when you go to the embassy to submit your requirements. However, it’s advisable to finish filling up the form before going to the embassy.
You can download the new visa application form here.
Step 3: Head to the South Korean embassy to submit your requirements
The South Korean Embassy is located at McKinley Town Centre in Taguig, and filing of visa application is available from Monday to Friday, 8:30 AM to 11:00 AM only. However, you must arrive there early, because they accept applicants earlier than 8:30 AM. I made the mistake of arriving at exactly 8:30 AM and had to face a terrific queue of applicants.
There’s no need to make an appointment as it’s on a first come, first served basis. You will be directed to a specific window, depending on your traveller type—first time travellers, frequent travellers, seamen, travellers with OECD-member country visa, etc.
Though the single entry visa valid for 59 days or less is free, other types of visa comes for a price. A 60 to 90-day length of stay costs PHP1,350.00, while a multiple entry visa sets you back to PHP 3,600.
It’s also possible to submit the application for someone else. When I travelled with my family, I am the one who submitted their visa application forms and requirements, with no additional charge at all.
Step 4: Return on your scheduled date to claim your passport and visa
Processing time varies—3 working days for those who have been to an OECD country within the last five years and 5 working days to those who haven’t.
Claiming of passport can be done from Monday to Friday, 1:30 PM to 4:00 PM only.
If applying for a visa is too much hassle for you, then great news! Jeju Island requires no visa for Philippine passport holders. The island has enough charm in itself that it’ll already be a perfect destination for a 3 to 4-day visit.
Yes, you’ve read that right. It’s possible to automatically be granted a free multiple entry visa valid for a year or two years, even if you didn’t apply for it! However, the only way to be granted this kind of Visa is if you applied for one within two years after your last visit.
Since it’s your first time, you’re still not eligible for this. It’s still a nifty information, because once you’ve visited Korea, you’ll be planning to return as soon as possible.
Don’t forget to check out the South Korean embassy website, and read it again and again so you won’t miss out anything.
Getting around Korea: A guide to buses, subways, taxis, and trains
Getting around Seoul is easy enough. South Korea has one of the most efficient transportation systems in the world, and tourists will definitely find it easy to navigate the country.
The T-Money Card
If you plan to use the public transportation consistently during your stay, then it’s best to get the T-Money Card. It’s a transportation card that also functions as a discount card and can be used in select convenience stores. The rechargeable T-Money Card is used in subways, buses, and taxis, and it’s honoured in Seoul, Gyeonggi-do, Daejeon, Incheon, Busan, and Daegu.
One of the advantages of a T-Money Card is that travel fare is KRW 100 (PHP 4) cheaper compared to paying with cash. Transferring from one subway line to another, from bus to bus, or bus to subway is also free with T-Money. But of course, the transfer must be done within a limited time.
Though the card itself costs KRW 2,500 (PHP 100), a card with KRW 20,000 (PHP 800) or less credit can be refunded with KRW 500 (PHP 20) service fee. The refund can be done at partner convenience stores with a T-Money logo.
You can buy a T-Money card from a vending machine or a convenience store inside subway stations. I remember buying mine from a convenience store in Anguk Station, and another one from a vending machine in Hongdae.
There’s also the M-Pass card, which offers 20 rides per day for the user. There are 1-day, 2-day, 3-day, 5-day, and 7-day passes, and it can also be used in subways, buses, and taxis. I honestly don’t recommend getting this. A 1-day M-Pass card is worth KRW 10,000 (PHP 400), but there’s no way you can use up that much just on transportation. Even with multiple transfers, we didn’t spend more than KRW 6,000 (PHP 240) on transportation in a day.
Check out Visit Korea’s page to see the full list of cities that use T-Money.
The Seoul Metropolitan Subway makes travelling around the capital not just easy but cheap and comfortable. It has 18 rapid transit, light metro, and commuter rail lines that extend to a number of nearby towns and cities, such as Incheon and Yongin.
If you’re DIY-ing your South Korea trip, then it’s best to familiarise yourself with the subway lines. I often plan my itinerary based on the attractions’ nearest subway lines. Be prepared to make a lot of transfers, but learning how the subway lines connect can make planning a lot easier. I suggest downloading a mobile app of Seoul’s subway system. You can also save a guide of the Seoul subway.
Be prepared for a lot walking, because most subway stations don’t have escalators. You’ll also be walking a lot, especially when you make a transfer. Walking from one subway line to another can already take 10-15 minutes, depending on foot traffic.
Aside from Seoul, the other big cities with subway lines are Busan, Daejeon, Daegu, and Gwangju. Instead of using single journey tickets, use your T-Money to save time and money.
Another affordable way to explore cities is to ride the buses. The buses in Seoul are frequent and inexpensive, but they travel at a limited time period. We didn’t know this so when we arrived in Seoul from Busan at around one in the morning, the buses going from Seoul Station to Hongdae already stopped its operation for the day. We resorted to riding a cab.
Bus stops in Seoul have route diagrams in English, so you can check whether your bus passes that way. Most bus stops also have a LED sign signalling the arrival of a bus. Keep watch for your bus number, because if the sign says it will arrive in 5 minutes, it will.
In the province, buses follow a schedule. It usually arrives every hour or 30 minutes. Timetables, names, and destinations are rarely written in English, so look for the nearest tourist information centre to help you with the Hangul (Korean language).
While you can use the T-Money when riding buses, bank notes are also acceptable, but only coins are given as a change. So save your KRW 1,000 (PHP 40) notes for bus rides if you don’t plan to use the T-Money.
Taxis
Despite being a developed country, South Korea boasts of affordable taxi fare. Depending on the destination and the size of the group, commuting via taxi can be cheaper than riding the subway. We sometimes resort to riding the taxi, with no worry whatsoever of the cost, because we know that the taxi drivers wouldn’t charge us heavily.
Regular taxis charge around KRW 2,400 (PHP 100) for the first 2km, but there’s a surcharge of 20% from midnight to 4:00 AM.
Though taxi drivers are not that good in English, they try their hardest to communicate with you. The drivers who know English will be chatty, so be friendly and introduce them to the wonders of our country as well.
Many Korean drivers cannot read phonetic alphabet, and most of them wouldn’t understand your pronunciation of a place with a Korean name. Chances are, you’d be misunderstood.
Here’s a tip: Have someone—your host or a hotel receptionist—write out your destinations for the day in Korean, which you’ll show to the driver. It’s also good to have the address of your hotel written in Korean, just in case you’ll need to get home via taxi one lost night.
Travelling around Korea
Though not the cheapest mode of transportation, the Korea Train Express (KTX) makes moving around the country faster and easier. Operating at 300 km per hour, the express train can take you from Seoul to Busan in less than three hours. It’s a fast, safe and easy way to travel, but it can also cost you a lot. But if your goal is to travel more than one city, you must definitely consider this mode of transportation.
Reservations can be made via travel agents, ticket counters at the station, the internet, and automatic ticketing machines. You can check train schedules and book tickets online a month in advance. You can do so here.
When to use the discount pass
The Korail Pass is a great way to travel from one destination to another, without burning a hole in your wallet. You can ride the KTX for unlimited times on your chosen number of days—1, 3, 5 or 7 days.
The catch is, you’re required to use it on consecutive days. But if you’ll be frequently travelling via the KTX, then it’s an ideal option for you.
My friends and I used the KR Pass for a two-day trip to Busan. We purchased a 3-day KR Pass, even though we’ll only be spending overnight in the city. It’s still a lot cheaper compared to buying two separate tickets.
Upon arriving in South Korea, you’ll be welcomed by the grand Incheon airport. You’re still far from Seoul, but numerous modes of transportation are available to reach the capital.
Airport Rail Express
Taking the AREX is the quickest and cheapest way to reach Seoul. Depending on the traveller’s needs, there’s the Express Train and All Stop Train. Both stop at Seoul Station, which is right where you want to go if you need to head directly to KTX.
The Express Train, which travels non-stop to Seoul Station, operates with 25 to 40-minute interval, with KRW 14,000 (PHP 560) fare for adults. The rates are adjusted to KRW 8,000 (PHP 320) for adults and KRW 6,900 (PHP 280) for kids, until December 31, 2015. You can use your Express Train ticket to get a discount when purchasing a KR Pass.
On the other hand, the All Stop train costs KRW 4,250 (PHP 170) for adults, KRW 3,040 (PHP 120) for the youth, and KRW 1,900 (PHP 80) for children. It stops at 11 subway stations, 6 of which allow passengers to transfer to other subway lines.
If you decide to take the AREX, be prepared for a lot of walking and heaving luggages up multiple flights of stairs. Many subway stations do not have an escalator.
The airport bus is one of the easy ways to reach Seoul from the airport. Just ask the contact person of your hostel or hotel which Airport Bus Number you should take to your accommodation.
No matter where you’re going in downtown Seoul, the travel fare of the Deluxe Limousine Bus, which makes fewer stops, and the Standard Limousine bus are KRW 14,000 (PHP 560) and KRW 9,000 – KRW 10,000 (PHP 360 - PHP 400), respectively. Ticket booths are right outside the passenger terminal, while the bus platforms are right outside the gates.
Taxis
Though not exactly a budget-friendly way to travel, riding a cab offers the convenience that neither a bus nor a train can offer. This is ideal when you’re travelling with kids and the elderly.
Riding a standard taxi from Incheon airport to Seoul can set you back KRW 60,000 - 100,000 (PHP 2,400 - 4,000), and the KRW 8,000 (PHP 320) toll is the passenger’s responsibility.
What to wear in Korea: Four seasons of fashionable dressing
My friends and I always joke that Korea is the place where we can unleash our inner fashionistas. The country has four seasons, which means there’s a lot of room to experiment on clothes. However, as someone from a tropical country, it can get pretty cold! I make sure to check the weather at least two weeks in advance to plan out what I would wear on the days I’d be in Korea. This makes packing easier.
Being from a tropical country, winter can be the harshest weather condition we face on our travels. But winter clothes and thermal wear can be your best friend in navigating the winter wonderland. My cheapskate self will tell you to visit your favourite ukay-ukay for parkas and jackets, but a quick visit to a mall can also direct you to international brands carrying an affordable winter line.
Though it’s mostly chilly throughout the day, the days are tolerable compared to the nights. While coats and thick jackets are necessary when roaming the streets at night, it’ll be bearable to wear only long-sleeved shirts or thin cardigans during the day. But the temperature can drop to an almost freezing level when it rains.
Summer
Just think of a regular hot day in the Philippines, minus the humidity and the threat of rain every minute.
Fall
The temperature of spring and fall are almost similar, but autumn nights can get a little colder. It’s when the temperature drops almost everyday as it slowly approaches winter. Wear thick coats over long-sleeved shirts, and warmers under your pants. Boots are also applicable.
Where and what to eat: A brief introduction to Korean food
Breaking news: Not all Korean food is spicy! And it’s not just vegetables either.
As pork lovers, Filipinos are often terrified at the sight of a Korean food-filled table. At first glance it may look either very green (veggies) or very red (chili), but Korea has a wide selection of Filipino-friendly dishes.
The famous samgyupsal may be best enjoyed with ban chan (side dishes) wrapped in lettuce, but it can also be eaten as a viand with rice. Speaking of rice, Koreans probably put magic on their rice because it tastes really good! My mother who’s not fond of Korean food is very fond of Korean rice. It is also often served with beans.
When eating at Korean restaurants and you’re not into spicy food, don’t hesitate to specify that you don’t want gochujang (chili paste) on your food. Emphasise this especially when you order bibimbap. Also, you can ask the servers which food on the menu isn’t spicy. They’ll happily point it out to you.
There are also a lot of fast food chains in Korea, with a little twist from what we’re used to. If you’re uncomfortable experimenting with the local food, you can always resort to the tried and tested international fast food chains like McDonald’s and KFC or the obscure Popeye’s and Lotteria.
But if you’re willing to introduce yourself to the charming and addicting world of Korean cuisine, I recommend the following:
For non-veggie lovers: Omurice, Hotteok, Cup Toast, Pork Cutlet (donkasu), Samgyeopsal
For non-spicy lovers: Bulgogi, Mandu, Patbingsoo, Kimbap, Galbitang
For spicy lovers: Jjamppong, Korean fried chicken, Ramyun, Odeng, Bibimbap, Kimchi jjige
Must-try Korean restaurants
Though I highly suggest trying small-scale restaurants serving home-cooked Korean cuisines, there are restaurant chains that you must try:
From a university project to an established restaurant chain in Seoul, The Fry Pan serves one of the best Korean fried chickens you’ll ever taste in your life. A plate of boneless chicken breasts fried to perfection served with a side of potato wedges will make you love and crave the fried chicken culture in Korea.
You can find it in Hongdae, Myeongdong, Itaewon and more.
2. Hello Kitty Café
Decorated with anything pink and Hello Kitty, even the food and coffee served in the Hello Kitty Café are definitely cute. There’s already a Hello Kitty museum in Jeju, but if you’re stuck in Seoul, you can visit any of the cafés in Hongdae, Hyehwa, or Sinchon.
3. School Food
Korean food with a twist! This restaurant chain takes the ordinary Korean homey food and puts a spin on it. A kimbap is not just a kimbap, because their fillings range from beef teriyaki to bacon to fried shrimp. School Food is already scattered around the country, and there’s one in almost all tourist hubs.
If the Japanese has the bento, Koreans have the doshirak! Miss Lee Café specialises on the lunchbox meal that consists of rice, egg, spam, kimchi, and seaweed. The trick is to shake, shake, shake the box to mix all the ingredients inside.
5. Lotte Mall Food Court
Probably the fanciest food court I’ve ever tried, the Lotte Mall Food Court is adjacent to the supermarket. You can pass it on your way to Lotte World. They have a wide selection of food, that it’ll be impossible not to pick one that’s good and fits your budget.
Where to stay: Hostels, hotels, home stays, temple stays
Growing to be one of the hottest destinations in Asia, South Korea has a booming hospitality industry. There’s a wide selection of accommodation perfect for every budget.
A stone’s throw from Haeundae Beach, Hi Korea Hostel offers affordable accommodation with free breakfast. Their shower is top-notch and their dorm-type rooms still offer a sense of privacy to the guests. Read my review here.
2. K Hostel in Seoul
Conveniently located at Dongmyo station, K Hostel is within walking distance of Dongdaemun and the Seoul Flea Market. Any KPOP fan will also appreciate its decoration. Read my review here.
3. Koreastay (homestay)
If you want to learn more about Korea and befriend the locals, homestay might be perfect for you. It’s available in pretty much all provinces in Korea. Though not necessarily cheaper, homestay is a great way to learn about the culture directly from the source and not the guidebook.
A unique way to experience Korea is through its lifestyle and beliefs. It’s not just an accommodation, it’s a cultural experience. Here, you can learn and practice Buddhist teachings during your stay. Visit templestay.com for more info.
5. J Hill Hotel
Though not a 5-star hotel, J Hill Hotel has everything you need for a satisfying and comfortable stay in Seoul. From buffet breakfast to coin-operated do-it-yourself laundry, it’s conveniently located in Myeongdong—the shopping mecca of Seoul.
And if all else fails, you can always spend the night in a sauna.
What (not) to do: Customs and traditions to keep in mind
I always think that Korea and the Philippines have similar values. However, there are still striking differences. Check out these customs and traditions that you must always keep in mind when in the country:
They have great respect for the elderly. No matter how tired you are, do not sit at the subway and bus seats provided for the seniors and pregnant women.
It’s a complete taboo to wear shoes inside the house or a room. When we stayed at a hostel in Seoul, we were scolded on our first day for bringing in our boots inside the room. Do not let the same thing happen to you.
Absolutely no jaywalking!
When handing money or cards when paying, try to use both hands as a sign of respect.
Bowing is common. When you end up meeting the gaze of the locals, especially the elderly, bow your head a little as a sign of acknowledgement and they will gladly do the same.
Tipping is uncommon in Korea. Don’t feel obliged to give tip to your taxi driver or to leave tip at a restaurant.
Be respectful at all times, because they will definitely show you hospitality and kindness.
Let’s keep our corny jokes to ourselves for awhile, and at least try to understand their language.
When in Korea, it’ll go a long way if you know a little Hangeul (Korean). The country has become incredibly tourist-friendly in just a couple of years, but it’ll still be good to show the locals that you’ve made an effort to greet them in their language.
Of course, you can’t learn a language just a month before your trip! Here are some words, phrases and sentence that you can find useful in your travel:
An-nyong-ha-se-yo! – It’s both hello and bye in Korean.
8 Visa Free Destinations Every First Time Filipino Traveller Must Visit
Want to travel abroad? Start at these visa free destinations near the Philippines.
James Aquino
After visiting more than fifty international cities in three continents (and still counting), James is on a quest to visit at least two new countries each year. A registered nurse, a stage father, and a grumpy husband, he has always believed that travelling offers something that you will never learn from school. His best advice is to always take pictures along the way, but never forget the stories behind them. Read more of his travel stories and his passion project at The Panoramic Soul.
We all have that dream destination to visit one day, and I’m sure you've been itching to tick that box off your bucket list. Most Filipinos would like to visit the romantic Paris or the exotic Sao Paulo. Some may want to check out the island paradise of Madagascar or the hidden gems of Morocco.
But before we head on to the big leagues of travelling, it is important to initiate this passion with closer destinations. These destinations should be your training ground in preparation for jet lag and culture shock, especially if you are still learning the ropes of travelling. There are also advantages to visiting these destinations as part of your "orientation to the world." You also don't have to worry about processing your papers, because these destinations are VISA-free.
These destinations can be reached in less than four hours of flight time. This means that these destinations are easier to reach than when you go on a land transfer from Manila to Northern Luzon. If you are quite anxious, especially on your first international flight, you can simply watch a movie as a distraction, and before you know it, you've already landed.
These destinations are sometimes significantly cheaper to visit compared to major local cities in the Philippines. If you are keen with airline seat sales and other discount promos, you can visit these places at more affordable rates. Since these are considered as short trips, you don't need the excess cost of upgrading or getting a premium seat, which gives further savings.
Visiting these places increases your chances of having a VISA to another country approved. It is quite an informal prerequisite, but those stamps that you get from visiting these destinations increases your chances of getting a VISA for such countries as South Korea, Japan, and China. The stamps from your travels are proof that you are capable of travelling the world and that you are financially able to go places.
These destinations do not require you to travel with a lot of luggage. This is because the weather is quite relative, with the exception of Hong Kong, which offers the coldest temperature range in the list. When you travel light, you focus more on the experience and not on the excess baggage.
Known as one of the most basic international destinations for Filipinos, the Hong Kong–Macau route showcases numerous points of interest, including Ocean Park, Hong Kong Disneyland, and Noah's Ark. Some travellers opt to have a quick day tour to the adjacent Macau to visit the ruins of Sao Paulo while acquiring an additional stamp on their passport.
Kota Kinabalu is known for its natural parks and serene panoramas. This is one of the closest destinations for budding travellers, as it only takes a few hours of travel from Manila. Enjoy a laidback appeal as well as an adventure with nature once you visit this area.
3. Singapore & Johor Bahru
Average flight time: 3:35 hrs
The cosmopolitan island nation of Singapore is probably one of the most popular destinations in this list. Home to Universal Studios Singapore, as well as a wide array of shopping districts and interesting locations, such as Little India and Arab Street, Singapore is a mainstay when it comes to the first couple of international destinations that a Filipino can go to. Johor Bahru, on the other hand, gives you a glimpse of Malaysia without the exhausting travel time. It is the home of Legoland Malaysia and Hello Kitty Land, and it is just a bus ride away from Singapore.
4. Kuala Lumpur
Average Flight Time: 3:40 Hrs
Kuala Lumpur is constantly gaining popularity among Filipino tourists. It offers numerous places of interest, great food choices, and a reasonably priced sojourn. And don't forget to have a selfie at the iconic Petronas Towers.
Considered as Manila's twin city, Bangkok is quite a busy locale that will give you familiar sights, especially if you've been staying in Manila for quite sometime. This place is bursting with several attractions, lots of malls, and other unique destinations. You can also get your fill of majestic and awe-inspiring temples and pagodas. The street food and traditional Thai cuisine are also worth a try.
The peaceful city of Ho Chi Minh (or Saigon) attracts travellers who would like to experience the right dose of a laidback vibe and great nightlife combined. It has an industrialized section where buildings and the cosmopolitan experience await, and a more traditional scene that is quite distinct on this side of Indochina.
The largest city in the Sultanate of Brunei, Bandar Seri Begawan (also called Bandar or BSB for short) showcases colourful mosques and mausoleums of the royalties. You can also check the museums that offer a deep historical view on how the country evolved into what it is today. Also, it can be the access point to adjacent major cities of the Malaysian Sarawak, such as Miri.
Siem Reap is known for the iconic Angkor Wat, but it has so much more to offer its guests. With influences from Chinese-style architecture, Siem Reap is filled with great panoramic scenes of fishing villages, rice paddies, temples, and even handicraft shops and a bird sanctuary. It has been one of the most sought after destinations by photographers and casual travel bloggers because it offers a holistic experience of culture, adventure, and food trip.
My Early Winter Experience in Hokkaido: 5-Day Schedule & Trip Highlights
Experiencing winter in Hokkaido is truly bucket list-worthy! Read this definitive travel guide.
Irene Maligat
Irene Maligat falls in love easily - with people, with places, and with experiences. Her main goal in life is to inspire and empower a lot of people through travel and the value of gratitude. She gratefully writes inspiring articles at Inspiring Grateful Travels.
Are you looking for a new winter destination? Check out my early winter experience in Hokkaido.
View of Mt Yotei from Grand Hirafu mountain
This was the 5-day schedule during my stay in Hokkaido:
Day 1
Day 2
Day 3
Day 4
Day 5
Jetstar Flight to Sapporo (via Nagoya)
Hokkaido Resort Liner to Niseko
Ki Niseko
Ki Niseko
Go Snow Snowboarding
Grand Hirafu Mountain
Hokkaido Resort Liner to Sapporo
Guesthouse Yuyu
Nijo Fish Market
Shiroi Koibito Park
Snow Cruise Onze
Odori Park
Guesthouse Yuyu
Otaru Canal
Le Tao Otaru
Stellar Place – Nemuro Hanamaru
Daimaru Department Store
Cross Hotel Sapporo
Cross Hotel Sapporo
New Chitose Airport
Jetstar Flight to Manila (via Nagoya)
Flights to/from Hokkaido
As of December 2016, there are no direct flights from the Philippines to Hokkaido. Most flights from Manila arrive at Tokyo (Narita), Nagoya (Chubu), Osaka (Kansai), and Fukuoka. From there, you would have to board another plane to reach Hokkaido.
I flew with Jetstar through a connecting flight to New Chitose airport via Nagoya (Chubu). Through research, Jetstar is the only low-cost carrier that provides connecting flights from Manila to Hokkaido.
The only airlines that usually have seat sale promos to Japan that would cost as low as ₱5,000 for a roundtrip flight are Jetstar and Cebu Pacific but the latter does not have any connecting flight to Hokkaido yet. From random checking through discounted travel booking websites, flights to Hokkaido from Japan cities mentioned above can cost at least ₱5,000 for a roundtrip flight. If you watch out for seat sales, a connecting flight from Manila to Hokkaido would cost at least ₱10,000.
My Jetstar flight was a pleasant experience. I left Manila at 12 midnight and arrived at Nagoya (Chubu) at around 6am. I had a 2-hour wait and had breakfast at the airport. My flight to Hokkaido took around 2 more hours and I arrived at the New Chitose airport at 10.30am. Japan is only ahead by an hour so there were no red eye or jet lag effects. Transits of the flights were good as I had enough time for departure and arrival processes. Flight attendants were lively and accommodating as well to make sure all the needs of the passengers were supported.
Snow shower outside New Chitose Airport
Please do note that if you decide to take this flight during the winter season, expect delays due to snow showers. During my flight back to Manila, there was a continuous snow shower from morning to afternoon. I was lucky enough that my flight was only delayed for an hour. My 2-hour transit in Nagoya (Chubu) was able to compensate for the delay plus the Jetstar crew from both the New Chitose airport and Nagoya airport made sure that I would be able to make my connecting flight on time.
In my 5 days in Hokkaido, I was able to visit 3 cities (Sapporo, Otaru, Chitose) and a very popular town (Niseko). No matter how short my stay was, Hokkaido was really amazing and I really maximised every experience I could in every place I was in.
1. Niseko
Niseko was definitely the highlight of my Hokkaido trip. Scratch that, Niseko was definitely the travel highlight of my 2016. I am not sure why not a lot of Filipinos write about this place because Niseko is really a must-see, must-experience destination in Japan during winter. It is known by winter sports enthusiasts from around the world for its quality powder snow and has been credited as one of the best ski resorts in Japan and Asia.
How I got to Niseko
From the New Chitose Airport, I travelled to Niseko via the Hokkaido Resort Liner. One way costs ¥4,000 (₱1,693+). The buses leave and arrive on time so make sure you are at the boarding gates 15 minutes before your scheduled departure. There is one stopover where you can take a bathroom break or buy food or supplies at a store. The bus took around 3 hours until it reached my Niseko stop (Hirafu Welcome Center).
The view of snowy forests and vast seas made the bus ride worth it. There were points of 0 visibility because of a snow shower but the driver knew how to handle it. The bus was a safe ride overall and I would definitely recommend the company as a choice for your transport to/from Niseko. Visit Hokkaido Access Network for more information.
Where I stayed
I was only in Niseko for 2 days and 1 night so travel activities were limited. I got to explore the surrounding areas of my hotel, was able to explore the biggest ski resort in Niseko United– Grand Hirafu mountain (other resorts are Hanazono, Niseko Village, and An’nupuri), and have a snowboarding lesson.
I stayed at Ki Niseko, one of the best ski-in ski-out hotels at Grand Hirafu. This hotel is very convenient as the Grand Hirafu mountain slope is just right behind it. The Hirafu gondola which brings you up the mountains is also just a 30-second walk away.
Ki Niseko is a very luxurious hotel. It provides you with the best amenities and comprises a very proactive team that supports you during your entire stay. Their concierge can provide you with all the things that you need to know about Niseko. Ki Niseko is definitely the best hotel I’ve stayed at in my entire life so far.
A hotel room at Ki Niseko
Where I ate
Since I was in Niseko for a limited time, I only had 3 full meals – 2 at Ki Niseko and 1 at the Grand Hirafu mountain café. If I was hungry in between those meals, I bought snacks beforehand at the New Chitose airport. There are convenience stores and restaurants around Grand Hirafu which is a 10-15 minute walk from the hotel I stayed at but I just decided to have my meals at Ki Niseko for convenience.
I had a signature course meal and a breakfast buffet at Ki Niseko’s An Dining. Both these meals comprised of Western and Japanese variety.
Ki Niseko’s breakfast buffet was the best breakfast I have had in my entire life so far. Everything was just of quality and heavenly. I cannot remember a time when I wanted to eat more than I could handle in one seating. Make sure you try the Hokkaido butter and bread selection as well as the gluten free desserts. Everything was just really good that I cannot really pinpoint a favourite.
Breakfast at Ki Niseko’s An Dining with a view of Mt Yotei
For the signature course meal, the meals had hits and misses. The misses were meals that had acquired tastes. The overall experience was really good as each dish served will be properly explained to you so you get to learn more about the dish you are about to eat. If you want to cap off your amazing stay in Niseko with a luxurious dinner, An Dining is definitely the place to be.
Kutchan Tofu with Pumpkin Puree from An Dining’s signature course meal
The breakfast buffet is ¥2,000 (₱851+) and the signature course meal is ¥8,000 (₱3,404+). Even if you’re not staying at Ki Niseko, you can still eat at An Dining.
I also had lunch at the Grand Hirafu mountain café. To reach this place, you have to ride the Hirafu gondola. The food here is a bit expensive but the serving is huge. I ordered a ramen here for ¥950 (₱404+). It was really delicious.
Experiencing Niseko
Coming from a country with only 2 seasons, visiting Niseko was really a winter wonderland dream come true for me. Everything was just so white and pristine. The weather complemented the views and its surroundings. It was simple but extravagant at the same time.
Winter activities are a must in Niseko so make sure to try the different winter lessons being offered if you’re a first timer. In my case, I decided to try snowboarding. The night before my lessons, I got my snowboard equipment and gear at Rhythm Sports. The 1-day rental rate for my snowboard, boots, jacket, and pants cost me ¥7,363 (₱3,116+).
With our Go Snow instructor at Grand Hirafu
At Grand Hirafu, winter lessons are provided by Go Snow. The cheapest snowboard lesson you can get is a half day one for ¥9,000 (₱3,809+). My snowboard lesson was definitely a fun and challenging experience. I was one in a group of 5 adults. Our ski instructor was from Poland and he made the lesson really fun and interactive.
Go Snow Lessons Slope
He taught basic skills and included a few games. It was really an amazing experience. The view of the mountain slope was a bonus as well. The Go Snow lessons slope was surrounded by all white snow that at some points it really took my breath away – literally from the lesson and metaphorically from the view.
After my snowboard lesson, I had a few more hours before I had to get on my bus back to Sapporo so I maximised my time at the Hirafu mountain. I bought a Grand Hirafu lift pass (5 consecutive hours) for ¥3,400 (₱1,439+).
View of Mt Yotei from the Hirafu gondola
The Hirafu gondola ride was an experience in itself as you’ll see an amazing view of the mountain slope and Mt Yotei – one that can be likened to Mt Fuji. You’ll definitely see a breathtaking view of the whole Grand Hirafu area.
At the top, you’ll find more lifts to bring you higher points of the mountain, the café, forests, and a lot of fresh snow! Aside from food, the café is also a resting area with bathrooms and Wi-Fi. You can stay here during the afternoon with your friends or kids. Kids can play in the snow. You can have photo or video shoots.
You can also walk around – kind of like a snowshoe experience. If you do not plan on doing any winter sports when in Niseko, you can definitely just stay at the top of this mountain and maximise your stay there.
When in Hokkaido during the winter season, Niseko is definitely a MUST!
2. Sapporo
How I got to Sapporo
From Niseko, I took the Hokkaido Resort Liner to Sapporo. The stopover during this bus ride was only a bathroom break. The area consisted of a parking area and toilets only. One way still costs the same – ¥4,000 (₱1,693+).
Where I stayed
I stayed at two accommodations during my stay in Sapporo – a guesthouse/hostel and a hotel.
During my first 2 nights, I stayed at Guesthouse Yuyu. This just opened last August 2014 so everything is new. All the amenities are complete and very clean. I availed a bottom bunk bed in a female dormitory of 8. A locker and key are provided to keep important belongings safe. You can also rent towels and other amenities for cheap prices. The bed and pillows were really soft and comfortable as well. The bathroom was really clean. The showers and toilets are separated into individual rooms and the sinks are in a common area. Everything is very clean and toiletries like shampoo and soap are provided. Rates through Agoda for one night at Guesthouse Yuyu cost ¥2,700 (₱1,149+).
Bunk beds inside a dorm room at Guesthouse Yuyu
The common area has that wood cabin feel to it so it was very cosy. The Guesthouse Yuyu team was really friendly and provided everything that you needed to know during your stay. During my last night at the guesthouse, a few Chinese guests hosted dinner and we were all there talking and getting to know each other. It was really a fun night! The team is really amazing.
Common Area at Guesthouse Yuyu
Some significant distances to note when you book this hotel – 3-minute walk to/from Nijo Fish Market, 10 to 15-minute walk to/from JR Sapporo Station, 5-minute walk to/from Odori Park, and a 30-second walk to/from 7 eleven.
If you’re a solo traveller or with a group of friends travelling to Japan on a budget, stay at Guesthouse Yuyu! The amenities are great and you’ll meet some of the best people from around the world.
A small store at Cross Hotel Sapporo’s lounge area
During my last night, I stayed at Cross Hotel Sapporo. If you book through discount hotel booking websites, one night can cost as low as ₱3,500 during low season and ₱5,500 during peak season. These estimated amounts are for 2 people already.
The amenities are complete and clean. The bed was really comfortable. Toiletries provided are from expensive beauty brands like Acca Kappa and L’occitane. You also have complimentary water bottles and a pack of Hokkaido local coffee beans.
The hotel promotes local art and music as its theme. They house a café & bar and a restaurant and they also sell local Hokkaido products at the lounge. One of the highlights of this hotel for me was the large public bath at the top floor. You will have an onsen (spa or bathing facility) like experience with an amazing view of Sapporo city.
Large Public Bath at Cross Hotel Sapporo (Outdoor)
Some significant distances to note when you book this hotel – 5-minute walk to/from JR Sapporo station, 8-10 minute walk to/from Odori Park, and seconds away from convenience stores, malls, and restaurants.
If you’re travelling with kids or want an accommodation of convenience and comfort, I highly recommend Cross Hotel Sapporo.
Sapporo sightseeing & food hopping
Most places I visited in Sapporo involved food. And of these places, most were near my accommodations so it only required walking.
The farthest place I visited which required a few subway rides is Shiroi Koibito Park. This park is one of the most popular attractions in Sapporo as it showcases one of the most famous desserts in Hokkaido – Ishiya. I am sure that most Filipinos who travel to Japan buy this as a gift to bring home as you can find this at most airports and shops around the country.
The park features a chocolate factory walk where you can find the products’ history, facts, and a viewing room where employees make the actual desserts. The walk costs ¥600 (₱254+).
Outside the factory, you’ll find different statues and entertaining figures that kids would definitely love. There is also a restaurant and a candy store where you can buy food and the park’s products. Most people visit this place and try the Ishiya cookie turned ice cream.
Eating Ishiya ice cream outside the factory
The ice cream was really creamy and tasted like the chocolate filling of their best selling cookies. If you do not have time to visit this place, the ice cream can be bought at certain convenience stores at the New Chitose airport.
Fresh seafood at Nijo fish market
A 3-minute walk away from my accommodation is Nijo fish market. As I have been to Tokyo before, I can say that this is like a mini Tsukiji fish market. There are a lot of fresh produce and so many photos of sushi bowls. People were trying out raw oysters and other seafood near the stalls.
Walking through the market, I saw an inner street that had a long line. Curious as to what it was, I fell in line with them. Nearing the front, I saw that it was “Donburi Chaya” – a sushi bowl restaurant I read a few times on the internet while searching places to eat in Sapporo. I waited for about 30 minutes before I was seated. One small sushi bowl was worth ¥1,650 (₱704+). The seafood was very fresh and the rice tasted so good. I still prefer our meal at Tsukiji market but this sushi bowl is a good try as well.
Sushi bowl of tuna sashimi, salmon roe, and Hokkaido crab at Donburi Chaya
Odori park is a very popular destination in Sapporo especially during the Snow festival in February. But since I was there in early December, there were no snow sculptures yet. Instead, I got to experience the Sapporo White Illumination.
This can be likened to the Ayala lights show in Makati but a bit more grand. The night features a lot of Christmas figures illuminated by different colours of lights. It may start or end at the Sapporo TV tower where you’ll find an Eiffel tower-like figure as your guide while walking through the night.
There is also a Munich Christmas market during the night where different European brands sell food and merchandise. The crowds and lines were a bit long as I went on a weekend night so I didn’t get to try any of the food.
It was a really beautiful sight and a good cold stroll at night. During the morning, when I passed by Odori park it felt a little bare with all the lights off and all brown ground so during this time, it is better to visit it at night.
Odori park in the morning
The best place I ate at in Sapporo is Nemuro Hanamaru – a conveyor belt sushi restaurant at Stellar Place. This is just beside the JR Sapporo station. The restaurant can be found at the 6th floor. I went on a weekday because people online said that it had really long lines. When I went at around 1pm, I was surprised to see that the line was very long.
Line outside Nemuro Hanamaru
I got my number and I waited for 1 hour and 30 minutes before I was seated. It was a good wait though because the sushi tasted so fresh and amazing! I tried all the tuna fat selections and it was so heavenly. The waiters provide you with a menu where you can find the rates of each coloured plate. You can opt to write all your orders down and indicate if you want wasabi or not.
The plates running through the conveyor belt all have wasabi in them so writing your orders down is a good option if you don’t like wasabi. The cheapest plate costs ¥120 (₱50+) and the most expensive plate I tried was priced at ¥430 (₱183+). My total bill was ¥1,800 (₱764+). The line was worth the wait! If you have patience and want good sushi, this restaurant is definitely a must try!
Heavenly! Medium fat tuna sashimi at Nemuro Hanamaru
There are so many more places to see in Sapporo. I got sick on my last day so I missed out on visiting Susukino and Mt Moiwa ropeway but all the places I experienced were good enough for me. Sapporo is a great city and there is so much more to explore! This is a city that I will definitely come back for.
3. Otaru
I explored two places in Otaru – Otaru City and Snow Cruise Onze.
How I got to Otaru City
At JR Sapporo station, I availed the Sapporo-Otaru Welcome pass for ¥700 (₱297+). It is an unlimited pass on all trains between Sapporo and Otaru plus all subway lines in Sapporo. You need to present your passport when you avail this pass. I liked the train ride from Sapporo to Otaru as the train passes by the sea. You’ll be met with a vast sea view and a few rock formations. Even if the ride took a little less than an hour (I rode the semi rapid line), the train was an entertaining ride overall.
Visiting Otaru City
I only spent a few hours in Otaru city as the cold became unbearable for me. I took photos at the Otaru canal which is a very popular attraction during February as the snow envelopes this whole river making it a winter spectacle. During my visit, there was no snow. But I liked the view of the canal and the walkway beside it was good for a stroll.
One of the most popular cheesecakes in Hokkaido is made in Otaru city at Le Tao. A 20-minute walk from the train station, I arrived at Le Tao Pathos. The restaurant showcased the most scrumptious looking desserts. I got to try their bestseller platter which comprised of the Double Fromage cheesecake, Chocolate Double Fromage cheesecake, and an egg custard. Everything was really tasty. If you do not have time to visit Otaru, these cheesecakes can be bought at the New Chitose and Nagoya airports.
Exploring Snow Cruise Onze
Niseko was not included in my initial plan for my Hokkaido trip so I looked for different ski resorts near Sapporo that would be open as early as the first week of December. I found Snow Cruise Onze, a ski resort in Otaru, which is only a 40-minute bus ride away from Sapporo.
Snow Cruise Onze is a ski resort that is open as early as November. They produce artificial snow and mix it in with fresh snow when it falls weeks later. This is one of the most affordable ski resorts near Sapporo that I canvassed during my research. It provides winter activity lessons, rentals, and lift passes. Adult lift tickets start at ¥3,100 (₱1,338+) and Ski & snowboard set rental starts at ¥4,100 (₱1,769+) for 1 day. Snow Cruise Onze is open daily from 9am to 11pm.
The information centre houses lockers, bathrooms, a food court, food stalls, Wi-Fi, and rest areas. The resort also provides free shuttle buses to/from Sapporo so you don’t have to worry about your budget on transportation in getting to Snow Cruise Onze.
The ski resort also has an amazing view of the ocean. Since I was able to snowboard at Niseko already, I decided to just explore this ski resort. I used the lifts and had a snow hike down the slopes. It was definitely a workout but a breathtaking experience overall because of the ocean view.
If you do not have time to visit Niseko and just looking to experience a short winter activity at a ski resort, Snow Cruise Onze should be on your list of places to visit!
4. Chitose
I did not really explore Chitose but I included this because the New Chitose Airport is an attraction by itself. It has shops, restaurants, amusement rides, onsens, famous character stores, and even a Royce Chocolate world.
How I got to the New Chitose Airport from Sapporo
I took the airport train from JR Sapporo station to get to Chitose. A one-way non-reserved ticket costs ¥1,070 (₱455+). The train took around 45 minutes. Since there was a snow shower that day, the train to the airport was mesmerising! The tracks were just filled with white pristine snow falling to an already filled ground. It was definitely a grateful moment for me.
Prior to my trip, I was really anticipating my visit to Royce’s chocolate world as this was one of my favourite chocolate brands in the world. When I got there, I was really happy to find different Royce chocolate varieties – different from the ones I have already seen in Japan airports and Manila malls. I really loved that there was a BAKERY here! Imagine a ROYCE BAKERY! My favourite chocolate infused with different baked goods was a heavenly sight for me. There was also a museum of its history and culture which provided images, fact boards, and short video clips. You also got to see some chocolate products being made from a small factory viewing window.
Aside from the chocolate world, you can find a lot of discounted shops and characters like Hello Kitty, Pokemon and Doraemon.
In the amount of time I was in this place, it felt so big. Make sure you’re at the airport maybe 5-6 hours before your flight, so you have ample time to explore this place.
Weather
Having experienced the coldest weather I could possibly imagine during my trip to Korea in 2015 and survived, I thought I could handle the weather in Hokkaido. I experienced temperatures ranging from -3oC to 6oC. When I first arrived at the New Chitose Airport, the cold was similar to the weather we experience in Baguio in the mornings – cold with a bit of sunshine. I was not wearing thermals yet during this time. I was just wearing a long sleeved shirt, a normal jacket, a pair of pants and boots.
View of snow shower from my hotel room during my last day
It got a bit icy cold when I got to Niseko where the place was surrounded by snowy slopes. When I changed to thermals, the cold was bearable but still very cold. I had to cover my face with my scarf and put the hood of my jacket over my head from time to time.
Otaru was the coldest place for me as this was near an ocean. The winds were very strong and the winter cold just became so unbearable at a certain point. I was wearing 3 layers of tops and 2 layers of bottoms plus thermals through this. I had to enter convenience stores and different stores to heat up while I was exploring.
Feeling super cold at the Grand Hirafu mountain slope
Sapporo had the most bearable weather during my stay wherein I did not have to wear a lot of layers. This was not the case during my last day as there was a continuous snow storm. The wind was strong and there was a lot of snow fall.
Layers and thermals are really important if you plan to visit Hokkaido during the winter. Some roads are slippery so make sure you buy shoes or boots that can ground you more. Wear thermal or layers of socks and thick boots. My boots were really thick and made my feet warm even though I could see how wet it got from the snow. I get cold feet easily so it was really a big help during the weather.
Even with all of these preparations, during my last tour day (Day 4), I got sick. I was having too much fun during my first 3 days that I did not notice that I stayed out in the cold too long or wore fewer winter clothes that I should have. During my 4th day, I was supposed to visit Susukino and the Mt Moiwa Ropeway but my body could not take the cold anymore during the afternoon. My throat got that rough scratchy feeling and had a fever that night. Good thing I brought medicine with me so the symptoms subsided and I was able to get through my last Hokkaido day which was also my flight days.
View of Odori park from the Sapporo TV tower
Hokkaido has a lot to offer during the winter season. From ski resorts to chocolate factories to fresh sushi bowls, Filipinos will definitely be left overwhelmed by the number of activities and places they can do and visit when they travel to this part of Japan.
Have you been to Hokkaido? Share your experiences by commenting!
Note: Philippine Prices may vary depending on exchange rate. As of December 2016, ¥1 = ₱0.42
How I Travelled Solo in Japan for 5 Days: Budget & Tips for Filipinos
Travelling solo in Japan soon? Here's a detailed journey you might want to follow.
Willester Yap
A chinito who wanders places that are intruiging and fascinating to both the eyes and mind. He aims to inspire others to captivate what the world has to offer and how to enjoy life through budget friendly travel escapades. Tag along with his blog, it might surprise you where he will go next.
I never imagined the day would come when I would be travelling to Japan. There are few reasons why Japan wasn’t in my bucket list:
I heard things about Japan being an expensive place to visit, and probably the most expensive place to travel in Asia, especially for someone coming from the Philippines.
I haven’t travelled solo outside the country. We all know that Japan isn’t as easy to travel solo as any other Asian countries, especially to those who are on a tight budget.
I heard and I read about the complicated railway system of Japan due to a few private companies operating the railways.
Lastly, I thought that there’s nothing much to experience in Japan but the cherry blossoms and shopping for gadgets and electronic stuff.
I’ve had a few people telling me that all I thought about Japan weren't really true and that it’s not that expensive travelling there, that if you just follow the guidelines in the railway, you wouldn’t get lost, and that there is so much to see and do other than cherry blossoms and shopping.
I admit, I am not a super budget traveller. But I do budget when travelling. It’s just that I don’t have the patience to book for a seat sale. As long as I think that the airfare is worth it, then I book for the trip. That’s why, in this Japan trip, my round trip airfare from Cebu to Kansai International Airport (Osaka) costs almost ₱12,000 already. Although, if you’re based in Manila, the airfare will be way cheaper and could save you a lot of money and if you’re patient enough to wait for a seat sale.
So, it came to a point that I challenged myself to travel solo outside the country for the first time and Japan is the destination of choice. Admittedly, I almost gave up in pushing through with this trip because when I researched about the places to go to and the transportation I needed to use, all seemed indeed complicated. But I told myself “I can do this. It’s going to be an adventure.” I guess getting lost will also be an adventure. Hahaha! I just needed time to research all the necessary things that I need to know about Japan -- the places I want to visit, where to stay, the mode of transportation and what to eat. Those are the basic things that I needed to know to get me started.
My first decision was to travel to Tokyo then Hakone to see the Mt.Fuji. But it all changed when I found out that I have a small chance of seeing Mt. Fuji without the clouds blocking its grandeur. I made further research then I read that Kansai Region has a lot of sightseeing spots and not to mention tons of food to eat. (Exciting! Hahaha!) Not to mention the bowing deer in Nara. So I opted and decided that I’ll travel to Kansai Region. Visiting 3 cities: Kyoto, Nara and Osaka respectively. Since those are the places that seemed to have the things that I wanted to see and do.
I finally managed to put everything up, piece by piece, and made the best itinerary I can possibly make.
I had mine processed at Friendship Tours in Cebu. They are the only accredited agency to process the Japan visa directly in Cebu. Friendship Tours is located in the Oakridge, Banilad, Cebu.
₱11,536 – Total round trip airfare from Cebu-Manila-Osaka-Manila-Cebu including 15kgs return check- in baggage (Cebu Pacific)
₱4,696 – Hostel (3 nights in Kyoto, 1 night in Osaka). Booked my hostels in Agoda.com
₱3,000 – Total transportation allowance (train and bus)
₱1,670 – Tourist Data SIM card
₱4, 000 – Total food allowance for an all-out Japan Food trip.
₱500 – Entrance fee allowances to temples
₱1,620 – Travel tax
₱2,000 – Souvenir allowance
₱450 – Taxi fare round trip Mactan-Cebu Int’l airport
Total = ₱30,672
Notes and tips
Travel costs can still be reduced, especially the airfare. I am from Cebu so I still needed to book a flight from Cebu to Manila since there is no direct flight from Cebu to Osaka (Kansai International Airport).
The food allowance can also be reduced if you’re not the foodie type. I went all out in eating all the Japanese food that I wanted to try. That’s the reason for the big cost. Food cost in Japan ranges from ¥100-500. You can stick with convenience store food which is cheaper (7/11, Family Mart, Mini Stop).
For my souvenir allowance, I was able to buy an Airport Limited edition Starbucks Tumbler, 1 Uncle Rikuro cheesecake, 1 Pablo cheesecake, 1 bottle of sweet sake, 1 Japanese transparent umbrella and a few boxes of Royce Chocolate and Matcha Kitkats.
You can change your USD to JPY in the Airport. I had mine changed in NAIA 3.
Ask when in doubt. The Japanese are very hospitable, honest and helpful. Although most Japanese don't know how to speak English, they will do their best to help you.
Buy a tourist SIM card with data. This is very crucial as you will be using Google Maps and Hyperdia always in order for you to know what to ride and the timetable of your mode of transportation.
Use Google Maps and Hyperdia in your mobile every time you ride a train or bus. These apps will tell you or advise you the best route to your destination, what to take and the train time schedules. Google Maps will be very useful especially in locating the tourist spots. Google Maps is pretty accurate in Japan.
The budget does not include shopping. I’m not fond of shopping when travelling outside the country. I’m a foodie and a sightseer.
Flight details
Departure date from Cebu: 6 Sep 2016 –> 3.05pm-7.55pm
Departure date from Japan: 10 Sep 10,2016 –> 8.40pm- 11.50pm
So let’s get the details started!
6 Sept 2016 - Arrival at Kyoto
I headed straight to Kyoto.
If you are travelling from Kansai International Airport to Kyoto, then your first stop may be the Travel Desk of Kansai Tourist Information Center. This is located on the first floor of the Terminal 1 building. Inquire where you can buy the ICOCA Card + 1 way Haruka Express train going to Kyoto.
Upon exiting to the arrival hall, buy a data tourist SIM card in a vending machine located at the right side of the wing when you get out of the arrival area. It costs ¥3,500 for 30 days with 1.5 GB data. This will be more than sufficient in your 5-day tour. Be sure to read the instructions carefully in activating the card. You need an internet to activate the card. Just use the airport’s wifi or the JR Station’s (the station is on the 2nd floor adjacent to the Kansai Airport. You may ask the Travel Information desk for direction) wifi.
After registering your Sim card, go to the 2nd floor and head to the other building (this is the JR Train station). Get ICOCA card + Haruka One way pass in the JR Office (one way only to Kyoto) for ¥3,600 (1,600 for the Haruka, 1,500 credit on your ICOCA and 500 deposit). Just have your card charge an additional ¥2,000 in advance. A total of ¥5,600. There will be signs leading you to the JR Office.
After getting your ICOCA Card, ride the HARUKA TRAIN to Kyoto. Train station entrance is in front of the JR Office. Try to look for the TV Screen outside the office for the Haruka train departure schedule. You may also ask the attendant in the JR Office.
When you arrive at Kyoto, check in at your hostel/ hotel. Mine was K’s House Kyoto – Backpackers Hostel. I chose to stay in this hostel mainly because of the good feedback it had from Agoda.com. Address: 418 Nayacho, Shichijo-agaru, Dotemachi-dori, Shimogyo-ku, Kyoto, Japan
This hostel can easily be reached on foot from Kyoto Station. Just go out from the Central exit of JR Kyoto Station, cross the street towards Kyoto Tower and walk along Karasuma-dori (the street on the east side road of Kyoto Tower, near Starbucks). Turn right at the intersection of Shichijo-dori and Karasuma-dori and walk for about 5 minutes until you reach Kawaramachi-dori. Cross a signal and then turn left on the first street along Kawaramachi-dori. You will find K’s House (white building) and Zen Café on the road to your right. Or you may just use your Google Maps to locate your Hostel/Hotel.
Kyoto Tower
After checking in, tell the receptionist that you want to get a one-day unlimited bus Pass for ¥500. This bus pass is all you need for your Kyoto Tour the next day. Ask for any advise for your next day’s itinerary, specifically about what bus to ride. This will help you get started. Also, ask for a bus map and Kyoto City map.
7 Sept 2016 - Arashiyama Bamboo Forest, Arashiyama Monkey Park & Temple Run, Nijo Castle & Dinner at Menbakaichidai Fire Ramen
I woke up early and proceeded to Arashiyama Bamboo Forest. I woke up around 6.30am and left the hostel around 7am. I want to be early to avoid the crowd of tourists who might spoil my photos with lots of photobombers. Lol.😁
Access: Go to Kyoto Station by taking a bus just beside the hostel and take the JR Train (San-In Line). After alighting, it will be a 10-minute walk from Saga Arashiyama Station on San-In Line
After I loaded my self with tons of photo ops, I walked to Arashiyama Monkey Park Iwatayama. This is the place where you get to see the Japanese macaque, the only monkey species you could find in Japan.
Access: Around 10 minutes walk from bamboo forest. Just follow your Google Map
If you had enough of the place already. You may now proceed to temple run.
Temple Run –all temples can be reached via bus.
My first stop was, Ninna-ji Temple, World Heritage pagoda – free entrance
Address: 33 Omuroouchi, Ukyo Ward, Kyoto City, Kyoto Prefecture 616-8092
Access: Take the city bus from JR Kyoto Station and get off at Omuroninnaji-mae bus stop. 2-minute walk from Keifuku Omuroninnaji Station. If you are coming from other parts of the city, just follow the bus route and check which numbers are stopping at the same bus stop
Second is, Kinkakuji temple (golden palace) – ¥400 entrance fee
Address: 1 Kinkakujicho, Kita Ward, Kyoto, Kyoto Prefecture 603-8361, Japan
Access: Take bus numbers 101 or 205 from Kyoto Station to the Kinkaku-ji Michi bus stop. If you are coming from other parts of the city, just follow the bus route and check which numbers are stopping at the same bus stop
I headed to Nijo Castle after Kinkakuji Temple. Refer to your bus map or Google Maps to get there. To my dismay, the castle was closed at that time due to some reconstruction. Oh well, just don’t forget to include this in your itinerary. I read that its wonderful inside the castle. By the way, on regular days, the castle ticket office closes at 4pm. So be sure to go there before it closes.
The temples look pretty much the same for me that’s why I only opted to visit two temples and the castle. Also, my feet were getting tired from all the walking.
After visiting Nijo Palace, I walked to Menbakaichidai Fire Ramen for dinner then went back to the hostel and called it a day.
8 Sept 2016 - Fushima Inari Taisha, Nara Half day tour & Gion District
Still the same routine. I woke up early in order for me to have good photo ops at the location as this place gets pretty crowded when it’s getting late just like the bamboo forest.
First stop was Inari shrine or Fushimi Inari Taisha in Google Maps.
Access: Go to Gion Shichijo Station (keihan Line) à Keihan Railway Fushimi Inari Station. It’s a 5-minute walk after getting off at Keihan Railway Fushimi Inari Station - ticket price ¥150
It was raining that day and I was just lucky that some foreigners offered to take me back to the main entrance because I was stuck in the restroom area for nearly an hour, waiting for the rain to stop. And yes, when we arrived back at the entrance, the rain stopped. Darn! I was very thankful for her. Thank you, Christine. That was her name.
Because I don’t want to get wet anymore, I bought an umbrella. And guess what, after I bought the umbrella, it didn’t rain ever since then. Darn again! Hahaha. Well, I just carried it with me and brought it back home to remind me of that day.
After that, I rested for a while and ate a king crab meat in a stall. Then, I went my way off to Nara.
I’m excited that I’ll be seeing free-roaming deer!!! Weeeeh!!😜
Visiting Nara: How to get to Nara from Inari Shrine
From Keihan Railway Fushimi Inari Station (keihan Line-Yodoabashi) - à Tambabashi Station, transfer to Kintetsu-Tambabashi Station using Kintetsu-Kyoto Line, NOT THE LIMITED EXPRESS as it is not applicable to your ICOCA Card (kintetsu Nara), and arrive in Kintetsu Nara Station.
Once in Nara, you’ll most likely start this itinerary at Kintetsu Nara Station. Get yourself to the fountain just up the stairs from Kintetsu Nara Station to begin this walk.
Start from Kintetsu Nara Station and walk up Nobori-oji Street. You’ll start to encounter Nara’s famous sacred deer as you go.
Use the underground crossings to get to the northeast corner of the Nobori-oji/Route 169. Walk from there to Isui-en Garden. — cost ¥900 entrance
Walk from Isui-en along the backstreets to Todai-ji Temple. Before entering the Daibutsu-den Hall to see the Great Buddha (Daibutsu), walk a little south to check out the Nandai-mon Gate, with its two huge guardian figures.
Take your time marvelling at the Daibutsu and then exit Daibutsu-den. Walk along the east wall of the Daibutsu-den and then go up the path that turns up to the right just past the small pond to reach Nigatsu-do Hall.
Check out Nigatsu-do and then walk in the direction of the base of Wakakusa-yama.
Follow the narrow pathways through the forest to Kasuga-Taisha Shrine.
Follow the main path from Kasuga-Taisha all the way west until you reach Kofuku-ji Temple.
Cut through the precincts of Kofuku-ji Temple to get back to Kintetsu Nara Station or JR Nara Station.
Note that if you’re really, really pressed for time, you can cut out the visit to Kasuga-Taisha Shrine. In this case, after visiting Nigatsu-do Hall, simply return the way you came to Kintetsu Nara Station.
Kofuku-ji TempleNandaimon GateTodai-ji TempleDaibutsu Hall
You may have lunch in between your walk. I recommend you eat at Kamameshi Shizuka. The location is just adjacent to Nara Park, you will know it's the one as people queue outside the restaurant.
My Kamameshi Nara Special
After visiting Nara, proceed to Gion neighbourhood & Yasaka Hall Gion Corner. Now, it's time to hunt for some geisha!
Access: 1-minute walk after getting off at Keihan Gion Shijo Station.
Upon arrival in Gion Shijo Station, there will be Tourist Information Center. You may ask some details where you might spot an actual geisha and visit other sites or where you can have the best Okonomiyaki in Kyoto or where the best place to have some dinner. The attendant is very knowledgeable so take it from her.
A ¥680 okonomiyaki may seem pricey at first but the generous amount of ingredients in this savoury pancake fully justified its price and should be on your must-eat list! Exploding with ingredients, the okonomiyaki resembles a huge overflowing pancake.
Cost: ¥680
Opening hours: 11.00am – 3.00am (except Sundays which closes at 10pm)
This time I woke up at 8.30am. A bit late since I needed a bit of rest from a fully packed itinerary and since my plan was just to stroll along Nishiki Market and have a good time eating freshly made/cooked foods.
I checked out and left my luggage in their storage room before I went to Nishiki Market. I walked my way to Shijo Station which was about a five-minute walk from the hostel then hopped on a train to Gion-shijo station (the nearest station to Nishiki Market). Alighted at Gion-Shijo Station then walked my way to the market after which I started my quest for good food.
After I had a very good gastronomic activity, I went back to my hostel to freshen up a bit, got my luggage and went on my way to Osaka.
Afternoon: Going to Osaka
I booked a one night stay in Osaka at Khaosan World Namba Hostel. I have read good feedback about this hostel and it is surprisingly near to subways and even JR Bus Station going to the Airport. Though this hostel is pricier than the average, I think its location is an added bonus.
How to get to Khaosan World Namba Hostel from Kyoto
Google Maps will show you the fastest route going to your hostel from Kyoto, just carefully follow it.
Upon arriving at the hostel, I checked in and then asked the receptionist for some advise on places to go. You may ask for an Osaka map from them for free. I went up to my room, rested for a bit before I went on strolling around Dotonburi / Shinsaibashi.
After I rested, I started my walk to Dotonburi. Dotonburi area might be the centre kitchen of Japan. The area has tons of restaurants, food stalls and everything about Japanese food is there. Go in an all out food spree!
Along the neighbourhood are Shinsaibashi and Umeda where there are tons of boutiques to shop in. If you want to buy some souvenirs, go to Tenjinbashi.
What to eat: Creo-Ru Takoyaki, Japanese Dango, Taiyaki, Tako Tamago in karamon market, Kura Sushi etc.
What I ate when I was there:
2 kinds of Takoyaki, a Korean-inspired ramen, Fugu, Piere Lotti Ice Cream and lots of ready to eat foods in convenience stores.
I went back to my hostel almost midnight just when my feet was like falling apart from all the walking, but it was fun! Really fun!
10 Sept 2016 - Check out, Osaka Castle, Shinsaibashi, Dotonburi, back to hostel & depart to Airport
I woke up at around 8am and had breakfast at the hostel. I just bought food from Family Mart the night before and placed it in the fridge and have it heated up by the morning.
I had an early checkout and left my luggage at the hostel while made a last minute strolling in Osaka. I visited Osaka Castle. Again, just use your Google Maps for the fastest route for you to get there.
After I was done wandering around Osaka Castle, I went back to Dotonburi area for some last minute souvenir shopping and food trip.
I went back to my hostel before 2pm and collected my luggage, then headed to OCAT JR Namba Bus Station for a limo bus to the airport. It is located just one block away from the hostel. It’s very near. You may ask the receptionist for the detailed instructions to locate the building, but it’s very close. The bus station is on the 2nd floor of the JR Building.
After getting on the 2nd floor of the JR Station Building, you will be able to see a ticketing area where you can buy your bus ticket going to the airport.
In a flash, I was already going back to the Philippines. It was a pretty short five-day trip with actually just four whole days to explore Kansai Region, but it was definitely a one-of-a-kind experience. Yes, in my experience it may be a bit more expensive to travel in Japan than in any other Asian country I’ve been to but you would be amazed not just because of the scenic spots or the food but you can also appreciate how rich their culture is, how they value and preserve it. I made lots of great memories and tons of checked items off the bucket list. I hope I will be able to go back to Japan, and this time, it will be Tokyo and the famous Mt. Fuji.
Seoul, Jeju Island & Busan for 5 Days Under ₱7k Pocket Money: Here’s How I Did It
5 days in Seoul, Jeju Island & Busan with less than ₱7k pocket money, learn how this Filipino did it!
AC Almelor
AC is a backpacker who travels to experience new culture, places, cuisine and especially meet new friends around the world. Follow his adventures through his Instagram @ac.almelor.
Seoul, South Korea
South Korea, also known as the Land of the Morning Calm, boasts a work hard, play hard culture that you can’t easily find in any other places. It is well-known for its rich culture, the delicious Korean BBQ, food markets with fresh vegetables and spices, and historic temples.
Admittedly, planning a trip to South Korea might be expensive, but the country is still budget-friendly and an enduring favourite among backpackers and thrifty travellers. By knowing this, with the right research and budgeting, there are several options that can suit your budget.
Considering a trip to South Korea? Add these tips to your itinerary!
I have booked a multi-city flight (MNL-ICN & PUS-MNL) via Cebu Pacific Air, three months before my travel date for only ₱6,334; the cheapest airfare compared to other low-cost airlines.
Gimpo International Airport
There are many low-cost airlines in South Korea that offer flights to Jeju and Busan. So I booked a multi-city flight (ICN - CJU & CJU - PUS) in Jeju Air one month before travel date, and yes, I got it cheaper by only ₱3,800. There are pretty good deals as long as you do the research.
Gwanghwamun Gate
So upon arriving in South Korea, my prepared itinerary helped me save time identifying the places that I need to see and visit because I only have 5 full days to explore Seoul, Jeju and Busan. Good thing, I was able to compress everything. I know my itinerary was short and tight, but it actually depends on your phasing. I initially thought this jam-packed itinerary would kill me, but I was wrong, every moment was worthwhile.
As other travellers would always say, enjoy the beauty of one country – and minimise your travel expenses, too! So here are my tips on how you can save in South Korea:
Food
In Korean cuisine, all the dishes are served at the same time. A typical meal normally includes rice, soup, and several side dishes, the number of which vary. One meal costs about ₩3,000 - 13,000 (₱130 - 550). Take note that their meals usually come in big servings.
There are many affordable restaurants, just ask the locals where to find a good one. I normally ask my hostel for their good recommendation for nearby restaurants. They also have a lot of Convenience Stores (7-11, Mini Stop, GS25, CU Mart, With Me, Storyway, Buy the way) to grab some lunch-to-go or snacks if you’re in a hurry. My favourite convenience store snacks are Kimchi and Spam Fried Rice, they were delish!
Kimchi Fried Rice with Soup for only ₩5,000 (₱210)
Most Korean BBQ restaurants require 2-3 persons to dine in. Since I’m a solo traveller, they didn’t allow me to go even though I said that I will buy 2 platters.
Transportation
Seoul
Inside the train
Seoul City's subway is one of the most convenient and fastest systems to get around the city. It currently consists 19 lines and the good thing is, it is connected to their 2 major airports (Incheon International Airport and Gimpo International Airport). Subway fare is calculated based on the distance travelled and the basic fare is ₩1,150 (₱50) for distances less than 10km. You can purchase a Single Journey Ticket or a T-Money Card (which you can purchase at convenient stores). Since I only had 5 days to explore South Korea, I just bought a Single Journey Ticket. T-Money card is more advisable for those who are staying longer in South Korea.
Most of the tourist attractions in Seoul are close to each other so you can walk your way to your next destination. I walked from Deoksugung to Gyeongbokgung Palace and up to Insa-dong. One time, when I got tired of walking, I asked the tourism officer on what line I should get to Dongdaemun Design Plaza from Jongmyo Shrine and the officer said that if I take the train, it will take longer time because I need to transfer 3 lines in order to get there. Instead, she advised me to walk because it will only take 10-15 minutes.
Jeju Island
Sunrise Peak
Jeju-do isn't as small as you might think. The island is huge and most tourist attractions are about an hour from each other. Since Jeju doesn’t have a subway system, the bus is the cheapest and most convenient way to explore Jeju. The buses travel to most tourist attractions and it covers most of the island. Don’t forget to get a copy of the bus schedules in terminals or here. Take note that the first bus leaves at 5.40am and the last bus at 9.00 PM. The bus fare ranges between ₩1,300 up to 3,300 (₱55 - 140) depending on the distance. If you have T-Money, you can also use it.
Jeju also offers Jeju City tour bus for only ₩1,200 (₱50) that allows you to ride the bus all day around Jeju City. Take note that this is only for Jeju City, not the whole island
Busan also has a good subway system. It currently consists of 5 lines and also connects to Gimhae International Airport. I bought a one-day pass for ₩4,500 (₱190) and it allows unlimited rides on the same day of purchase for all subway lines except for the light rail service (Airport Line).
Accommodation
Seoul
Tourist in Traditional Hanbok
Rates of hostels in Seoul range between ₩9,500 - 30,000 (₱400 - 1,300) per night for a dorm room depending on how artsy it is. The good thing is most of the hostels offer free breakfast. Usually, they serve Bread & Jam, Cereals, Milk, Coffee or Tea.
I stayed in Hongdae area and it is just a 3-minute walk from the metro station and a 5-minute walk from Hongdae street which is known for cafes, bars, wall murals, indie music culture and youthful vibes. It is also a station away from the tourist attraction and is connected with AREX (Airport Railroad Express)
Jeju Island
Rates of hostels in Jeju range between ₩14,000 - 28,000 (₱600 - 1,200) per night for a dorm room. Most of the hostels in Jeju also offer free breakfast. I stayed in Ildo-Dong, Jeju City which is near the shopping districts and night market. It is only 30 minutes from Jeju International Airport and 15-minutes from Jeju Intercity bus terminal.
Busan
I didn’t book a hostel in Busan because I only had 13 hours to explore. But rates of hostels in Busan range between ₩9,500 - 30,000 (₱400 - 1,300) per night for a dorm room and includes free breakfast as well.
Entrance Fees
Seoul
Most of the palaces and shrines have entrance fees which range between ₩1,000 - 5,000 (₱40 - 200). If you plan to visit all of them, (Gyeongbokgung, Deoksugung, Changdeokgung, Huwon Secret Garden, Changgyeonggung, Jongmyo Shrine) I suggest you buy Integrated Palace ticket which only costs ₩10,000 (₱420). Purchasing the pass will save you ₩4,000 (₱170).
Inwangsan overlooking Namsan and N Seoul Tower
Hiking a mountain in Seoul is definitely free and you don’t need a tour guide to get around the mountain, you will just follow the trail or ask locals for the direction.
Entrance fees in Jeju usually cost ₩2,000 (₱80) for nature attractions (Seongsan Ilchulbong Peak, Jeongbang Falls, Jusangjeolli) and ₩9,000 (₱380) for museums and other attractions.
Busan
Gamcheon Cultural Village
Most of the attractions in Busan are free like Haeundae Beach, Gwangalli Beach, Gamcheon Cultural Village.
Budget breakdown
Accommodation
₱2,751
Transportation
₱1,518
Food
₱2,185
Entrance Fees
₱509
TOTAL
₱6,963
Travel Tax
₱1,640
Airfare (MNL-ICN & PUS - MNL)
₱6,334
Airfare (ICN - CJU & CJU - PUS)
₱3,800
TOTAL
₱11,774
Total cost for my SK trip = ₱18,737
How much do you need?
South Korea isn’t that much expensive at all, it depends on how you spend and utilise your money. If you’re staying in a hostel, buying a train/bus pass, eating in local restaurants, you can actually spend around ₱1,000-1,500 per day.
Download an offline map or save your places in Google maps so you can navigate with your phone even without internet connection.
South Korea is Wifi Friendly. They have wifi in bus stops and some of the tourist attractions.
Compute your transportation cost for a day and buy train/bus pass if you think you can save more.
If you will go to all palaces in Seoul, buy the Integrated Palace ticket which costs ₩10,000 (₱420).
Book a hostel that includes free breakfast. This will save you a lot in terms of money and time.
Buy T-Money if you will stay longer in South Korea.
Watch the Royal Guard-Changing Ceremony in Deoksugung Palace. Performance Time: 11.00 -11.40am, 2.00 - 2.40pm, 3.30 - 4.30 p, (excluding Mondays)
Watch the opening and closing of the Royal Palace Gates and Guard-Changing Ceremonies:
For Sumunjang Changing Ceremony, the performance time is 10.00am & 2.00pm.
For Gwanghwamun Gate Guard-on-Duty Performance, the performance time is 11.00am & 1.00pm.
For Sumungun Military Performance located outside Hyeopsaengmun Gate, the performance time is 9.30am & 1.30pm.
My itinerary
Day 1
8pm - Arrival in Incheon
Day 2
Seoul City Hall
Cheonggyecheon Canal
Deoksugung (Watch Guard Changing)
Gwanghwamun Square
Gwanghwamun
Gyeongbokgung Palace
Bukchon Hanok Village
Changdeokgung
Changgyeonggung
Jongmyo Shrine
Insadong
Dongdaemun Design Plaza
Hangang Citizen's Park
Banpo Bridge
Day 3
Hike Inwangsan
N Seoul Tower
Namsan Park
Day 4
Seoul Museum of Art
Departure in Seoul
Arrival in Jeju
Day 5
Seongsan Ilchulbong Peak
Jeongbang Falls
Jusangjeolli
Yeon dong Street jeju
Day 6
Departure in Jeju
Arrival in Busan
Gamcheon Cultural Village
Gwangalli Beach
Haeundae Beach
Departure in Busan
Follow my adventures as I explore the world on budget-friendly travels. You may check out my Instagram account (@ac.almelor) and feel free to ask questions. Thank you and cheers to more adventures!
Top 10 Budget-Friendly Destinations Outside Southeast Asia for Filipinos
Pinoys, pack your bags and enjoy these affordable getaways outside Southeast Asia.
Catherine Mirasol
A trader in the world of corporate finance but also a frustrated writer and photographer, Catherine admits to being a walking contradiction. Although born and raised in the Central Business District of the Philippines, this girl actually prefers searching for adventures in remote destinations than urban jungles. Follow her quest to become a "World Traveller" on The Wandercat.
Filipinos love Southeast Asia (SEA). The region is visa-free, cheap and exciting. But once you've "been there and done that", you'll start asking yourself, "Where can I go next that won't break the bank?"
Lucky for you, frugal Pinoys, I've got a few destinations in mind for quick, affordable getaways.
Hong Kong is one of the two non-SEA cities near the Philippines (a little over 2 hours from Manila by plane) that's visa-free for Philippine passport-holders (for a maximum stay of 14 days). This means you can easily come back if you want to. And trust me, you will want to!
Despite being a global financial centre, this city is considerably affordable -- for food-tripping, partying, shopping and sightseeing -- compared to its rivals, London and New York. Here, you'll find the world's cheapest Michelin-starred restaurant, Tim Ho Wan. Their barbecue pork buns are to-die-for! Not to mention, you can travel from one district to another -- like Tsim Sha Tsui to Central -- by ferry for as cheap as HKD 2 (PHP 12) whilst getting a fantastic view of Victoria Harbour!
One visit is definitely not enough to explore this vibrant city. You'll get so addicted that you'll want to return 2, 3 or maybe, 10 more times!
Just a ferry ride away from Hong Kong is the other visa-free city that Filipinos can visit -- Macau, also known as "the Las Vegas of Asia". And just like the real Sin City, larger-than-life hotels, glittery lights and top casinos dot this gambling region of China.
Not to worry! You don't have to be a high-roller to set foot in Macau. There are other things to do that don't involve throwing away your life savings on a game of roulette. This includes searching for the original Lord Stow's Bakery for mouth-watering egg tarts, window-shopping at the Venetian and climbing up a hill to get to the Ruins of St. Paul's Cathedral.
Airfare: Can go as low as PHP4k+
Visa Required? No
3. Taipei, Taiwan
Taiwan is the closest country to the Philippines but many Filipinos tend to overlook this tiny island. Could it be because of the visa restrictions? Perhaps! But obtaining one is easy so don't let this minor inconvenience stop you.
Taiwan is a gorgeous country! And its capital, Taipei, is just perfect for penny-pinchers. Night markets and cheap eats are in abundance! You can't go wrong with the free attractions too, such as the Chiang Kai-shek Memorial Hall and the Lungshan Temple. You need NTD 500 (PHP 700) to be able to enter the Taipei 101 observatory, though. But if you don't want to ride up to the top of one of the world's tallest skyscrapers, you can still admire it from afar -- at no expense!
Airfare: Can go as low as PHP6k+
Visa Required? Yes (unless currently holding a valid visa/permanent residence card from the US, Canada, Japan, UK, Schengen, Australia and NZ)
Yes, it's possible to visit Seoul on a tight budget despite the fact that it is considered as one of the most expensive cities in the world. You just need know a few tricks -- starting with booking cheap flights and accommodations. Monitor airline promos from Cebu Pacific and Philippine Airlines to be able to book your airfare at the lowest possible price. As for accommodation options, go for 3* hotels or hostels. Their amenities are pretty much equivalent to the ones you can get from 4* hotels of other countries. Buying attraction tickets online as well as getting a T-money card (public transit card) will also save you money.
Finally, the freebies! The best things that you can get at no cost in Seoul are A.) make-up (from all the samples beauty stores give away in markets like Myeongdong) and B.) super fast Wi-Fi (from their 1,000+ free hotspot zones).
Airfare: Can go as low as PHP6k+
Visa Required? Yes (except if travelling to Jeju Island only)
Although they say you need to have an Average Daily Balance (ADB) of at least PHP100k in your bank account to secure a Chinese tourist visa, you don't need to spend that much when you're actually there. You can survive with way less in major Chinese cities like Shanghai.
How? By simply walking around! Yes, a lot of Shanghai's top attractions are best viewed/explored on foot, such as the Bund, the Pudong District, the Shanghai World Financial Centre, Century Park, and many more! So skip the expensive cab ride. You don't need it!
The Japanese yen depreciated quite a bit in recent years. Couple that with low-priced direct flights from local airlines plus newly relaxed multiple-entry visitor visa policies from the Japanese Embassy and you've got a very affordable Japan.
Japan has a number of cities worth exploring but I suggest you start with Osaka. Why? Because of these magic words -- The Wizarding World of Harry Potter, located at Universal Studios Japan. Okay, while it is true that a day pass to the theme park will set you back around JPY 7,200 (PHP 2,800), you can scrimp on other things like food and souvenirs.
Osaka has a thriving street food scene. Thus, you mustn't leave without trying takoyaki and okonomiyaki, which you can get for only JPY 400 (PHP 160). Also, its main shopping district, Shinsaibashi, is overflowing with great deals on clothes and accessories. Need I say more?
Airfare: Can go as low as PHP9k+
Visa Required? Yes (now grants 5-year multiple-entry visitor visas)
Thinking of flying to Hawaii? How about putting that off for a while and heading to Guam instead? For those of you, who have never heard of Guam, it is the closest US territory to the Philippine islands, which makes flying there fast and cheap.
Thus, this begs the question: Why would I go to Guam? Well, aside from the fact that the beaches, water parks and sunset sessions are fantastic, Guam is also a shopper's paradise. It's home to the largest K-Mart in the world as well as Guam Premier Outlets (GPO), where you can get amazing bargains on US brands like Nike, Calvin Klein, Tommy Hilfiger and Nine West. I guess being a Pacific island under the US jurisdiction has its perks!
Kathmandu is a backpacker's haven. Meaning: Accommodation, transportation, food and tours are generally inexpensive. Prices are even lower now that the country is still rebuilding and recovering from the 2015 7.8-magnitude earthquake that killed thousands of its residents and destroyed a number of its UNESCO World Heritage sites.
Tourism is Nepal's main source of income and you can play a small part in reviving it by visiting this year. And despite the destruction, Kathmandu is still magical and enchanting. If you're into the outdoors, then you’re in luck as there's no shortage of activities to try in this old town.
Airfare: Can go as low as PHP18k+
Visa Required? Yes (upon arrival as long as the traveller has a return ticket)
Palau is a tiny speck of land in the Pacific Ocean, not far from the Philippines, that's famous for its Jellyfish Lake in Rock Islands. This lake got its name because it’s filled with stingless jellyfish. So yup, you can swim and snorkel with them! Of course, since this is Palau's main attraction, it does come at price -- USD 100 (PHP 4,800) for a Jellyfish Lake permit, to be exact. However, this will be one of the most unique experiences you'll ever have so I think it will be worth it. Besides, you can offset your expenses on food (burgers and rice meals can be as cheap as USD 3 / PHP 140) and lodging (guest houses can go a as low as USD 50 / PHP 2,300 a night). So what are you waiting for? Head to Palau for your next summer vacation!
Airfare: Can go as low as PHP19k+
Visa Required? Yes (upon arrival as long as the traveller has a return ticket)
You wouldn't normally think of Dubai as budget-friendly, given its love for opulence and excess. But you can skip the 7* hotels, luxury rent-a-cars and designer shops in favour of inexpensive experiences.
Take the Dubai Metro to get around. It's one of the cheapest public transport systems in the world. But don't fret. It's world-class! I mean, come on! You can't expect anything less from Dubai. For free drinks, be on the lookout for promos (ladies' night and gentlemen's night) from bars and clubs. For a bit of retail therapy, head over to the spice and gold souks and haggle like a pro. As for seeing what this over-the-top city has to offer, you have a ton of low-priced options -- Dubai Miracle Garden, Jumeirah Beach, Jumeirah Mosque and desert safari tours! Staring in awe at the Burj Khalifa and the Burj Al Arab from a certain distance doesn't come with a hefty price tag too!
Airfare: Can go as low as PHP19k+
Visa Required? Yes
For more budget-friendly trip ideas, browse through more articles at the TripZilla homepage. We’re overflowing with guides and stories for you!
For a spontaneous Filipino traveller, countries granting a Visa on Arrival is a blessing. Here's what you need to prepare and do to be granted VOA to India.
Quez V
Quez is a Pinay blogger of the world. She is an ambassador of positive change whose main goal is to empower people thru self-discovery while travelling. She writes her travel experiences to become an instrument in transforming people to find the importance in everything including the beauty of the world and the language of the universe. Read more of her adventures at Anatomy of the Awesome.
I just realised that I failed to write about my previous experience of getting a Tourist Visa from the Indian Embassy in the Philippines, which I think is already obsolete. Instead, let me make up for it by sharing my first-hand experience of applying for an Indian Tourist Visa on Arrival in India. If you are like me who makes impulsive decisions of booking a ticket to see an online friend or wants to do side trips while backpacking, this post might help you.
Visa on Arrival in India is available for the citizens of these countries: Finland, Japan, Luxembourg, New Zealand, Singapore, Cambodia, Vietnam, Philippines, Laos, Myanmar, Indonesia. See updated list of countries here.
Indian tourist visa on arrival are being issued in four major Indian airports: Delhi, Mumbai, Chennai and Kolkata.
The single entry visa that will be given is going to be valid for 30 days from the time of entry.
Application should be a maximum of 2 times in a calendar year with a minimum gap of 2 months between each visit
Who are eligible for tourist VOA:
The purpose of visit to India should only be for tourism (recreation, holiday, vacation, sight-seeing, visiting friends and relatives)
Should not have a residence or occupation in India
Not a person-non-grata to the Government of India
What to prepare:
Passport should have a minimum of 6 months validity
Has a good financial standing which is shown by production of return ticket and availability of sufficient money on the duration of stay
Photocopy of the first page of your passport
1 passport sized photograph
Completed application form which is provided by VOA immigration officer
Go straight to the visa on arrival desk which is before the immigration counter. In Kolkata, I did not see a VOA desk so I approached an immigration officer regarding my concern and they gladly escorted me to their office.
You can present supporting documents like bank certificate, itinerary and hotel bookings if you are not confident with the documents that you have.
In some websites, visa application will cost 60 USD, but I highly recommend that you pay the exact amount of 3,300 INR instead to avoid hassle of causing a scene in the immigration counter and going out to exchange money in the airport arrival area. I don’t know what is up with the increase of VOA fee but IO told me that the updated amount they should receive is 3,300 INR.
Immigration will ask you basic questions. They asked me what my purpose of visit was and I mentioned that I will be visiting an acquaintance and also I want to experience the Holi Festival (which I didn’t really experience since I came a day after it). They also asked me how many days I plan to stay, where I will stay, do I have plans of marrying an Indian and what my religion was. It is important to only give out the specific answers they are looking for when they ask you questions. Do not give out any other unnecessary information because this will only lead to further interrogation.
Do not be surprised if the days of visa validity issued to you is not exactly 30 days like what is usually expected. The Immigration officer explained to me that I have roughly 28 days for my visa but then I frankly told them that I don’t need that much amount of time, and I only need 4 days since I have to head back to the Philippines because I have to report back to work ASAP.
One should take in consideration that tourist visa on arrival depends on the discretion of the authorities. Rules and regulations change from time to time. It is still advisable and appropriate to get a tourist visa before travelling to India to avoid any problems.
Do not leave without being issued an official receipt from the VOA you purchased.
If you were able to submit everything they need, then it is very unlikely that Immigration officers will not give you a visa on arrival.
Until now, I cannot imagine the anxiety I had when I was applying for an Indian tourist visa. I was really scared because I did not have anybody to ask about it. Also, I came from Kuala Lumpur and I thought immigration officers will question me of my previous consecutive whereabouts (I went to a lot of places before I got in my connecting flight to KL). Being a solo female backpacker travelling to India is scary, but it will definitely make you a better person. I have learned that India is never for the fainthearted so make sure to plan your travel ahead of time. As for me? I have plans of going to India in the near future but this time, I'll probably go to see the Taj Mahal. I want to do a golden triangle tour—travel to Delhi, Agra and Jaipur and I think this is going to be an exciting experience of a lifetime.

 Image credit: Kryzzler
 Image credit: Highland Adventures
 Image credit: riverraftingcdo.com
 Image credit: boholgateway.com
 Image credit: Georgyishere
 Image credit: Bingbing
 Image credit: Marshall Astor
 Image credit: Janna Lua
 Image credit: orientwind.com.ph
 Image credit: Jojoscope
 Image credit: travelphilippinesnow.com
 Image credit: Philippine International Hot Air Balloon Fiesta
 Image credit: Bernardo "Berniemack" Arellano III
 Image credit: Thresher Shark Divers
 Image credit: Captaincid
 Image credit: traveltourismblog.com
 Image credit: chillandtravel.com
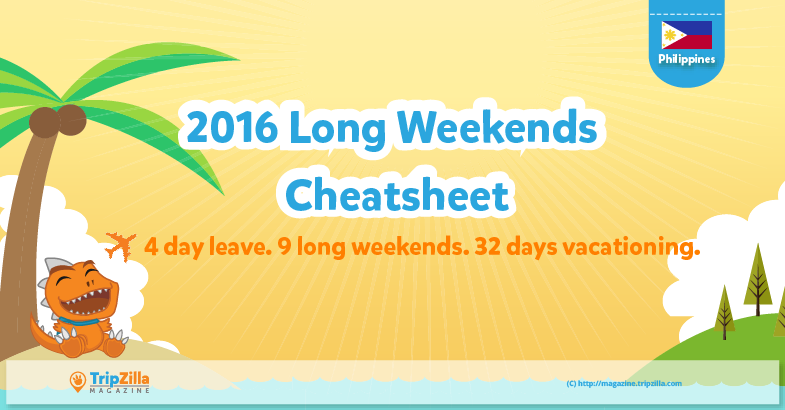


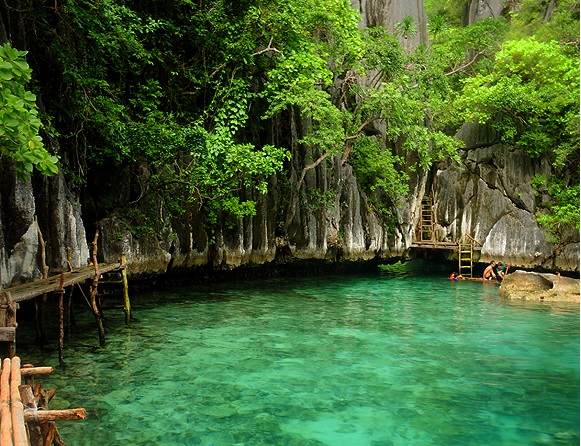


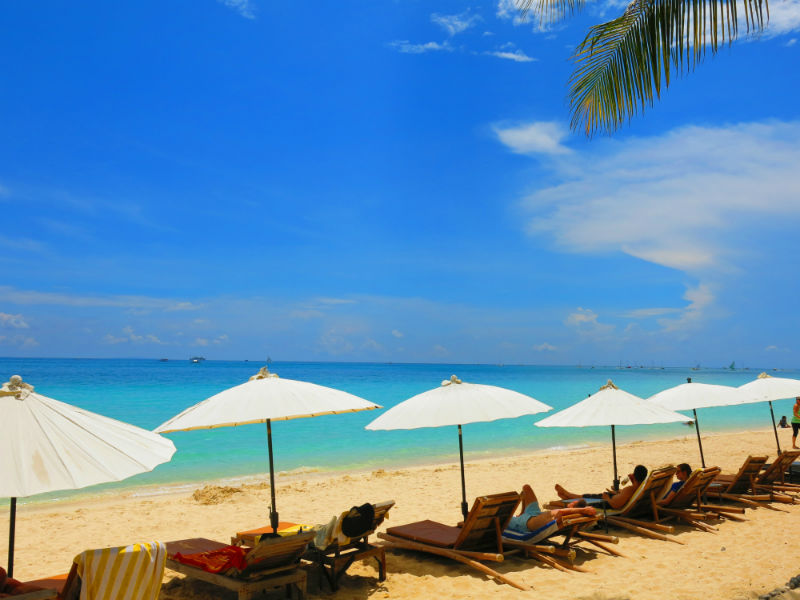


 Nami Island
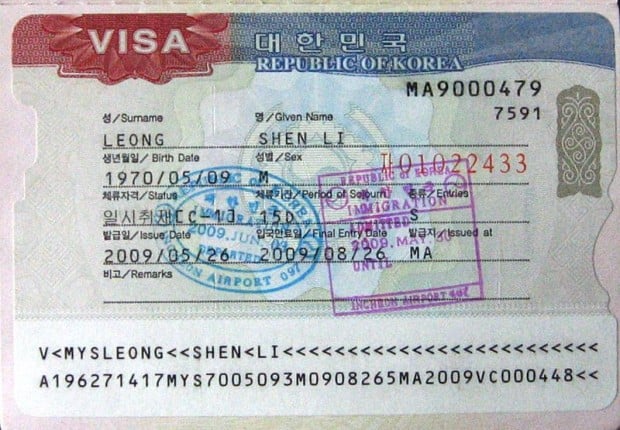 Image credit:


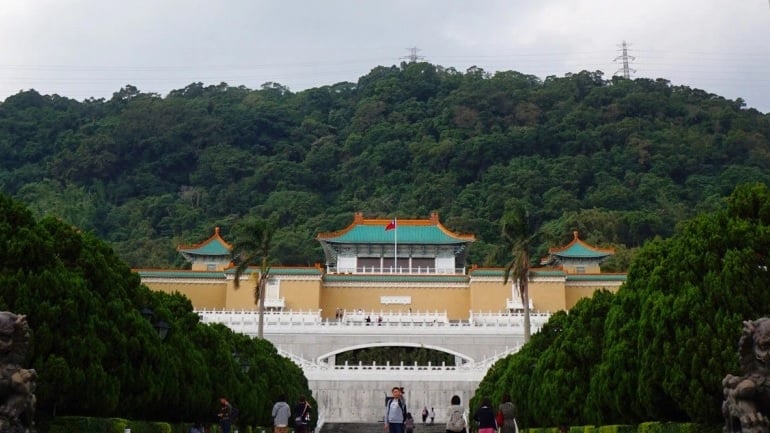


 View from my host’s balcony
 MRT Xinbeitou


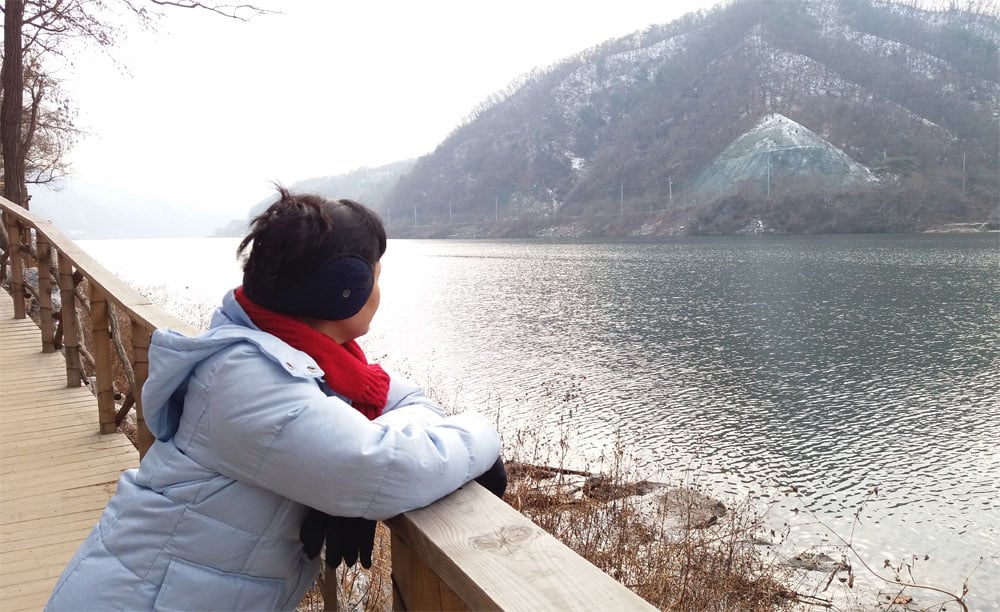


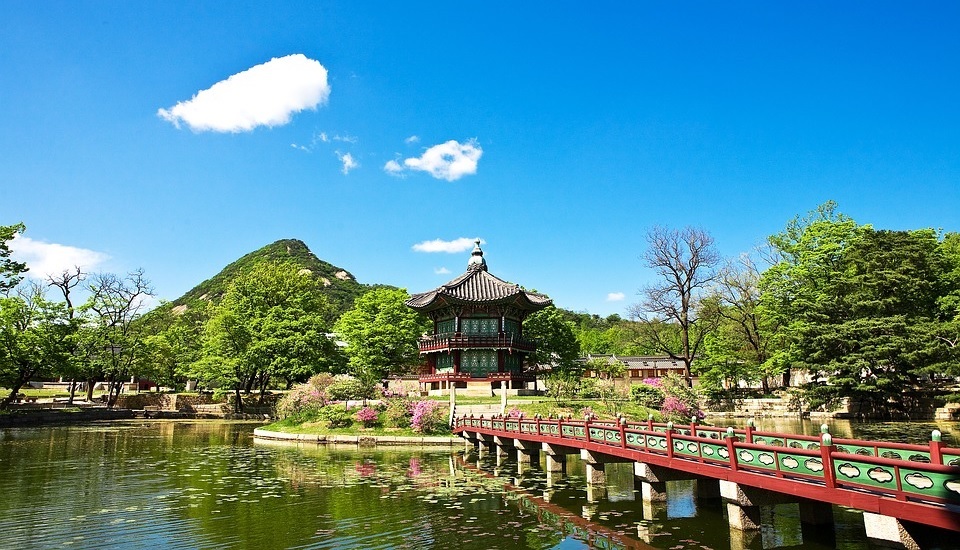


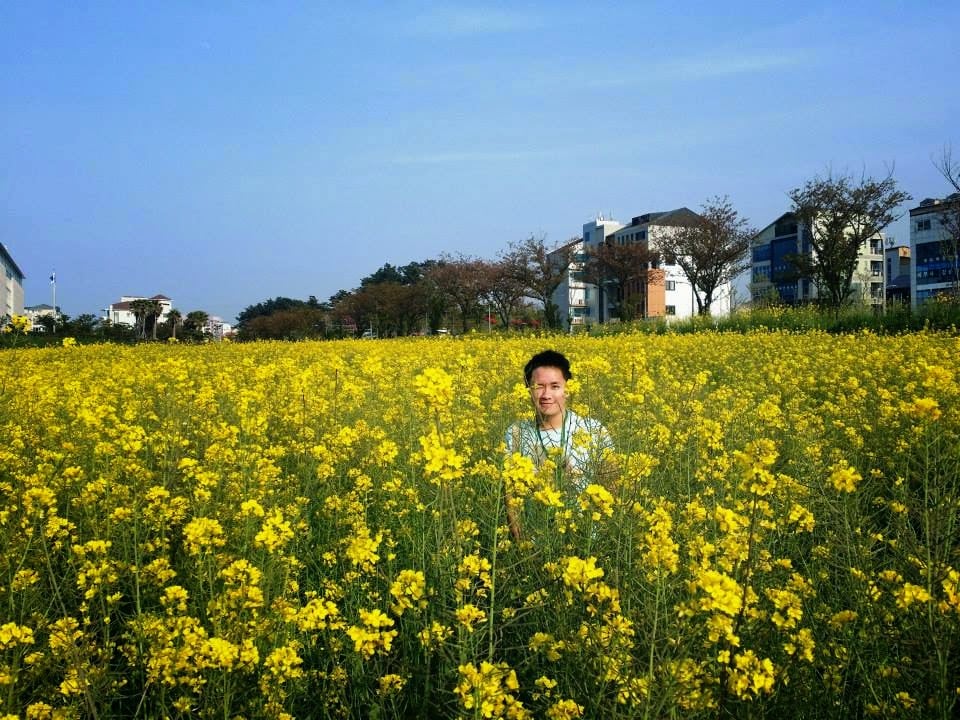
 THIS IS KOREA! At the set outside of Seoul where Korean period dramas are filmed.
 Me at the Canola Flower Festival in Jeju Island in April 2014
 THAT VIEW from sunrise peak Seongsan Ilchubong, Jeju Island
 Credits to the person who took this photo
 Trendy ladies shopping in Myeongdong, Seoul
 After dinner at chilly Suwon City near Seoul in September 2013
 A BIG THANK YOU to the Korean Embassy Manila for its new visa policies. Photo taken at Nami Island.
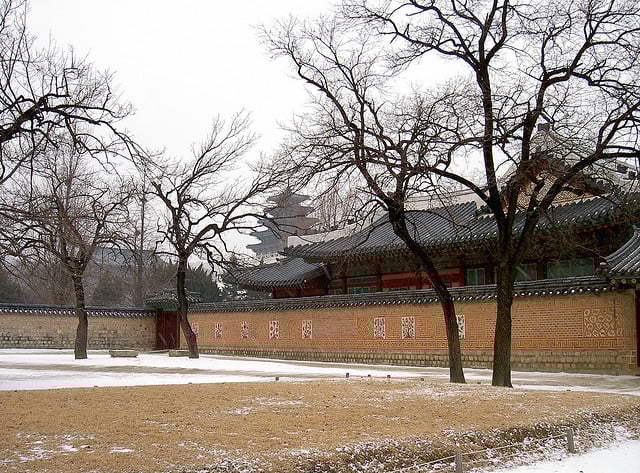


 Gyeongbokgung | Image credit:
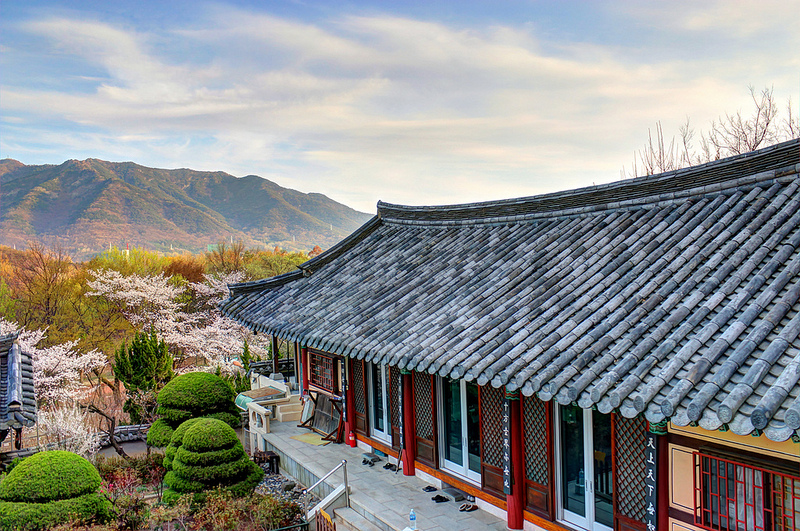
 Image credit:
  Image credit:
 Image credit:
  Image credit:
  Image credit:
  Image credit:
  Image credit:
  Image credit:
  Image credit:
  Image credit:
 Image credit:
  Image credit:
 Image credit:


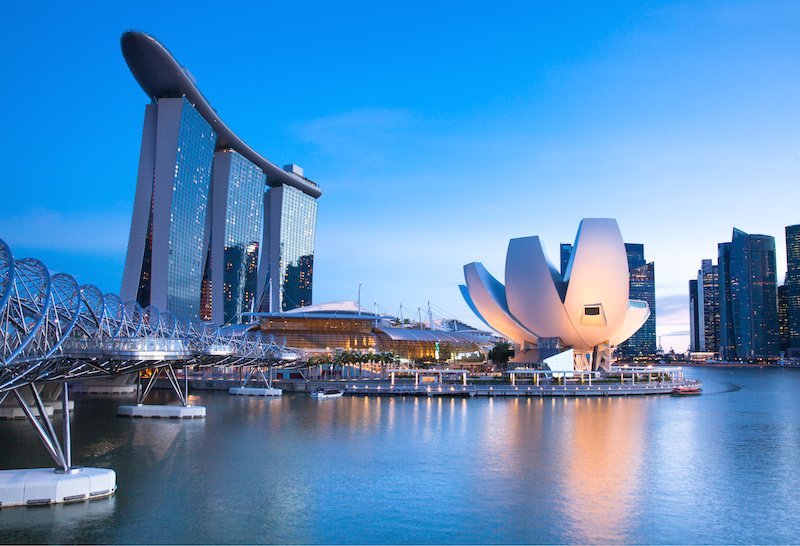
 Image credit:
  Image credit:

 Image credit:
  Image Credit:
  Image credit:
  Image credit:
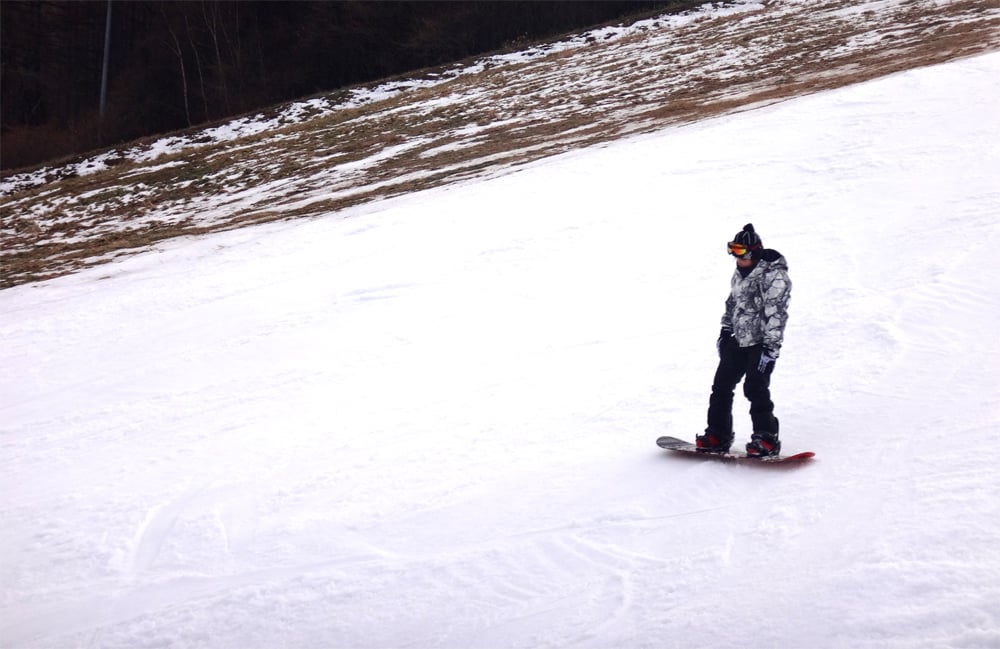
 View of Mt Yotei from Grand Hirafu mountain
 Snow shower outside New Chitose Airport
 A hotel room at Ki Niseko
 Breakfast at Ki Niseko’s An Dining with a view of Mt Yotei
 Kutchan Tofu with Pumpkin Puree from An Dining’s signature course meal
 With our Go Snow instructor at Grand Hirafu
 Go Snow Lessons Slope
 View of Mt Yotei from the Hirafu gondola


 Bunk beds inside a dorm room at Guesthouse Yuyu
 Common Area at Guesthouse Yuyu
 A small store at Cross Hotel Sapporo’s lounge area

 Large Public Bath at Cross Hotel Sapporo (Outdoor)

 Eating Ishiya ice cream outside the factory
 Fresh seafood at Nijo fish market
 Sushi bowl of tuna sashimi, salmon roe, and Hokkaido crab at Donburi Chaya


 Odori park in the morning
 Line outside Nemuro Hanamaru
 Heavenly! Medium fat tuna sashimi at Nemuro Hanamaru


 New Chitose Airport’s Mall Center

 View of snow shower from my hotel room during my last day
 Feeling super cold at the Grand Hirafu mountain slope
 View of Odori park from the Sapporo TV tower
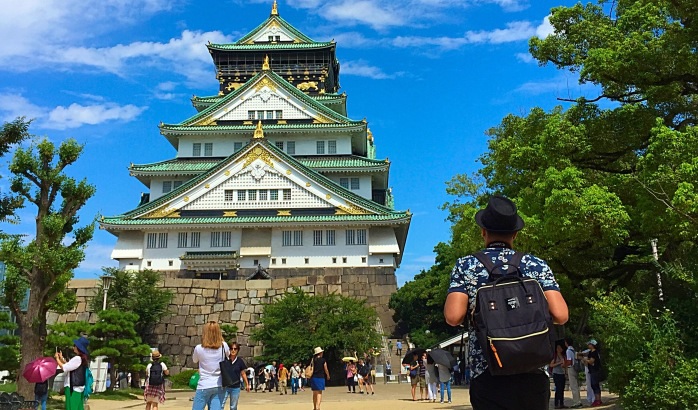

 Kyoto Tower


 Kofuku-ji Temple
 Nandaimon Gate
 Todai-ji Temple
 Daibutsu Hall
 My Kamameshi Nara Special
 Gion Tsujiri –matcha dessert shop in Gion. Eat Tokusen Tsujiri parfait / ¥1,383
 Issen-Yoshoku Okonomiyaki


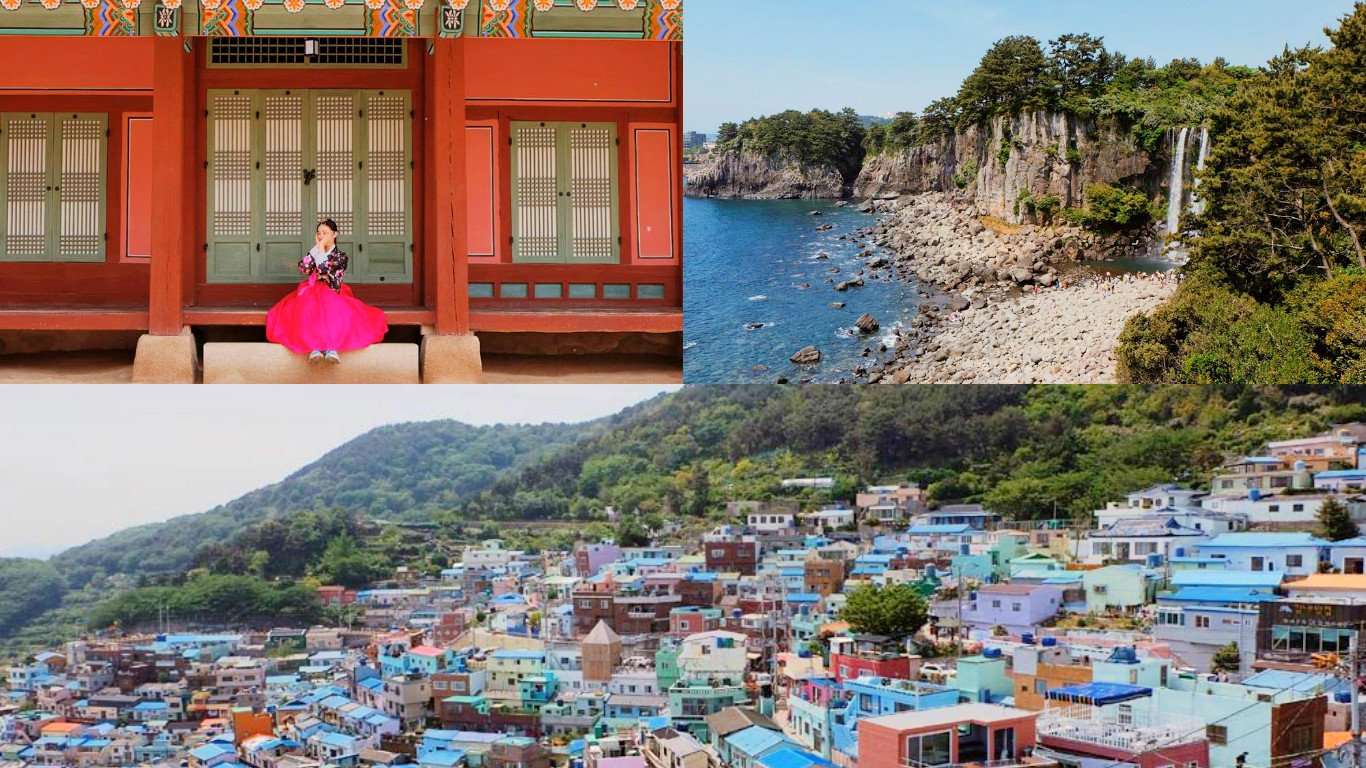
 Seoul, South Korea
 Gimpo International Airport
 Gwanghwamun Gate
 Kimchi Fried Rice with Soup for only ₩5,000 (₱210)
 Inside the train
 Sunset at Dongdaemun Design Plaza
 Sunrise Peak
 Tourist in Traditional Hanbok
 Inwangsan overlooking Namsan and N Seoul Tower
 Seongsan Ilchulbong
 Jeongbang Falls
 Gamcheon Cultural Village

 Image credit:
 Image credit:
 Image credit:
 Image credit:
  Image credit:
  Image credit: