My Siem Reap Adventure: Travel Tips & Expense Guide for Filipino Travellers
Travelling Siem Reap for the first time? Read this guide complete with travel tips and cost breakdown.
Angela Talattad Angela is an agricultural engineer who currently holds a day job in a Japanese firm. She started travelling at 30 and believes it is never too late for anyone to fulfil his/her dreams of seeing the world. She is fond of ancient architecture and cultures and dreams of chasing the Northern Lights someday.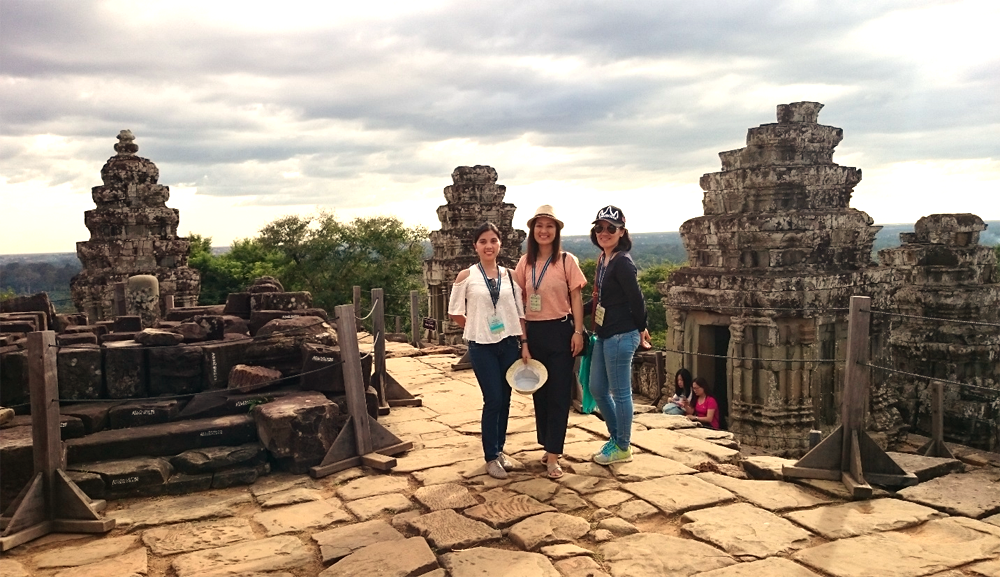
Contributed by Wanders of Eve
First, let me kindly make it clear that this article is not about giving tips on how to spend less in your trip to the land of Angkor Temples. Rather, let this serve as a guide on what you can see and experience, to give you an overview of things you are possibly going to spend on as I talk about the breakdown of our expenses and tips on how you can make the most of your visit to Siem Reap.
Also read: Siem Reap 2-Day Itinerary for Filipino Weekend Warriors
Cambodia is the fourth country I visited, but based on the vibe of the city of Siem Reap, I would highly recommend it for your first out of the country trip either with friends or with family. I saw throngs of travellers tagging their kids along while temple hopping in the Angkor Complex. I also recommend it for solo travel as the city is not difficult to navigate and it is fairly safe. Plus, the hospitality of Cambodians is almost the same as that of Filipinos. Like what our Tuk-Tuk driver said, “Cambodians and Filipinos. We are the same.”
The best time to visit Siem Reap
Knowing when to visit is a must. The best months are from November to February when the days are dry and cool. It can get hot by mid-day but eventually the cool breeze will soothe you. Unless you can handle the scorching heat, it is not recommended to visit from late March to June. Proof of the boiling temperature, according to our tour guide in the floating village, is the waterless Tonle Sap Lake during these months. It is the biggest freshwater lake in Southeast Asia by the way.
 Facing the 10th century Prasat Kravan Temple is a body of water afloat with small yellow flowers and is surrounded by tall trees. The still water exudes a serene vibe. Sunny days. Cool breeze. The weather was pleasant. Our trip was very timely | Image credit: Mary Lyn Tenorio
Also read: Why Siem Reap Should Be Your First Out of the Country Barkada Trip
Airfare
Now that you have determined the best time to visit, set your target date next so that when there is a seat sale alert, you can book your plane tickets right away without fumbling on your calendar. If you are travelling with friends, agree on the dates prior to booking your flights. I booked our round trip tickets via Cebu Pacific in June this year for 29 Nov - 3 Dec 2016. I got mine for ₱4,630.37 and my friends’ at ₱6,219.37 each. What we did was to add up all the costs and divided them equally among ourselves. That’s around ₱5,690 each. We also added a two-way baggage for a total of ₱1,070 which we also divided equally into three. Yeah, sometimes that’s how true friendship works. ☺
 My trip to Vietnam-Cambodia which was originally scheduled last March 2016 with another set of friends was cancelled because of health concerns. But I thank the LORD for giving me another chance to see Cambodia this year with these two ladies. Yep, don’t give up on your travel goals. Behind us is Angkor Wat, a grand display of the Khmer ingenuity. It is the largest religious monument in the world | Image credit to a friendly traveller
Travel insurance
Always avail of an insurance whenever you travel. You will never know what emergency situations you are going to encounter while on a trip abroad. It will keep you protected. You can buy from Cebu Pacific’s Travelsure like we did. Or you can purchase from travel agencies like Universal Holidays or Discovery Tour. Prices vary depending on the duration of your trip. A four-day trip will cost you around ₱600-800. For Cebu Pacific, though, their travel insurance is at ₱200, we got ours at ₱400 each. I guess it’s higher when it is purchased on another day after booking your flight.
Visa and other relevant documents
Filipinos do not need a tourist visa when travelling to Cambodia and are allowed to stay for up to 21 days. If this is your first out of the country trip, make sure to bring a copy of your Certificate of Employment. The immigration officer in NAIA might ask for this. It will also be helpful that your COE states your compensation and that your company assures your return to work after your trip. Bring your company ID or a business/calling card if you have it as a proof of your connection to your company. A copy of your hotel bookings and itinerary will also be useful. And most importantly, be truthful to the immigration officer when answering questions.
Accommodation
We stayed in Khmere Maison D’ Angkor, a guesthouse near the city centre like around 1.5 kilometres from the Old Market and Pub Street. It is a traditional Khmer house with a modern twist located near Wat Kesararam. Should you come to Siem Reap, I highly recommend you stay here.
We initially booked a Deluxe Twin room at US$52/night inclusive of roundtrip airport transfers, and free Tuk Tuk for our two-day temple hopping. There’s also the complimentary bottled water, coffee and tea and a Khmer scarf as a gift. The owner and his staff speak English well and are very attentive to the guests' needs. Their resident Tuk Tuk driver is also very helpful. When we arrived, we were delighted to know that our room was upgraded to a Family Suite at the same rate which made our stay all the more enjoyable. For inquiries, you can contact Mr. Jacky Long directly at jacky@khmeremaisondangkor or his staff at relations@khmeremaisondangkor.
The only drawback I find about this guesthouse is that they are not serving meals so you have to go out early in the morning for breakfast. But there are many restaurants across the street so this should not be a big deal. The owner also told me that they are already planning to put up a food corner in the property which will open by 2017.
 Our family suite at Khmere Maison D' Angkor. It is a mahogany, high-ceiling room with two single beds and one queen bed and a dresser. This property sits in a quiet area near the city centre. If the Tuk Tuk driver is not familiar with the property, just tell him it is located inside Wat Kesararam compound. My friend here is wearing a pair of traditional Khmer night clothes which is also included in the room amenities | Image credit: Sheryl Pesito
 It has a seating area, a bar and a private rain shower bath with 24-hour hot and cold water. I am guessing this room is around 45-50 square metres. Want to experience the traditional Khmer accommodation at a very reasonable price? Come stay in this guesthouse | Image credit: Sheryl Pesito
 In our traditional Khmer skirts at the reception area of Khmere Maison D’ Angkor. With us is the owner, Jacky. We extended our stay for another half day on the day of our departure because our flight is at 10.30pm. According to the guesthouse’s policy, we should be charged a night’s rate but Jacky was kind enough to let us pay for just half the rate at US$26 | Image credit: Mary Lyn Tenorio
 Khmere Maison D’ Angkor is located at #482, City Centre, National Road No.6, Wat Kesararam Street Group 17, Phum Taphul, Siem Reap City ,P.O Box 93090, 17000, Cambodia | | Image credit: Wanders of Eve
Currency
US Dollar is the currency used by travellers to Cambodia. However, when you buy stuff and your change is below US$1, they will give you Cambodian riel instead. When I bought a Pocari sweat at US$1.10, I was expecting US$0.90 loose change but the cashier gave me 3,600 Riels. Currently, US$1 is equivalent to 4,000 Riels.
 Cambodian Riel. I kept these as souvenir | Image credit: Wanders of Eve
Going around the city by Tuk Tuk
Tuk Tuk for a day costs around US$20-25 if it is not included in your room rate. As our free Tuk Tuk was only for sightseeing around the Angkor Complex, we paid for fares separately when going around the city. We usually pay a total of US$2 from our guesthouse to Pub Street or Old Market. Because of the concentration of Tuk Tuk drivers in this area of the city, some would even offer a ride for a measly US$1.
 Discussing our route on our first day with our friendly Tuk Tuk driver, Mr. Ron, from Khmere Maison D’ Angkor. He would patiently wait for us outside the temples and would wave his hand with a big smile when we return from every temple escapade. He drove us around the Angkor Complex for two days | Image credit: Wanders of Eve
 Mahangin sa labas. On your way to the temples, both sides of the road are covered with either tall trees or rice fields | Image credit: Mary Lyn Tenorio
Admissions and tour
Most accommodations in Siem Reap arrange tours for sightseeing so if it is available in your hostel you don’t need to book online with travel agencies. You can just ask your hostel in advance or upon check-in to arrange it for you. Our half day package tour to Tonle Sap costs US$18 which included pick up and drop you off at the guesthouse. We visited the floating village, floating mangrove forest and Tonle Sap Lake. Please note that it did not include food; we were just given bottled water after the tour.
Also read: Off the Touristy Path: A Different Side of Siem Reap
 At the Kompong Phluk floating forest | Image credit: Mary Lyn Tenorio
 Kompong Phluk Floating Village | Image credit: Sheryl Pesito
The National Museum pass costs US$12. The Landmine Museum is also worth visiting. Pass costs US$5 which goes to a worthy cause like clearing of landmines in Cambodia and supporting children living at the museum.
The Angkor Complex admission comes in a single day pass at US$20, three-day pass at US$40 and US$60 for a seven-day pass. However, there was a recent price hike announcement by the Cambodian government that starting February 2017, a single day pass will cost US$37, a three-day pass at US$62 and a seven-day pass at US$72. That’s steep. If you are planning to see both sunrise and sunset, I suggest you buy the three-day pass. Go see the sunset at Phnom Bakheng on your first day, and sunrise at Angkor Wat the following day.
 My three-day Angkor Complex Pass. It is valid for one week. There is no need to bring a picture as they will take your photo at the ticket booth the day you buy your pass. Don’t lose it; you need to show it every time you enter a temple. The holes punched in the upper right corresponds to the number of days I used my pass | Image credit: Wanders of Eve
 Waiting for sunset at Phnom Bakheng. They limit the visitors here to 300 and they will hand out ID tags upon entry which you have to return after. So be there early. You have to walk about a kilometre up a hill to reach this temple | Image credit: Wanders of Eve
Food
Food is fairly cheap in Pub Street, especially along streets near the night market. An order of fresh or fried spring rolls for sharing costs US$1.50. Fried rice for sharing is also at US$1.50. What we did was to order several dishes and divide the cost after. Chicken amok was really good. We usually pay US$2 per meal per person. Their fruit shake was a bestseller to us at US$1. it is a healthy treat because of the generous portion of fruits. Food is expensive in Angkor Wat. A meal will cost you US$5 and up. So it is better to have a packed breakfast when you go there for sunrise.
 Dinner along the night market near Pub Street. We ordered four dishes for US$6 | Image credit: Wanders of Eve
 Fresh spring rolls for sharing | Image credit: Wanders of Eve
 Dragon Fruit with Passion Fruit shake. It is about to overflow. It is by far the best fruit shake I’ve ever tasted | Image credit: Wanders of Eve
Food is expensive in Angkor Wat. A meal will cost you US$5 and up. So it is better to have a packed breakfast when you go there for sunrise.
Souvenirs / Gifts
A trip will never be complete without the “pasalubong”. Phsar Chas (pronounced as Sar Cha or Sa Cha) commonly known as Old Market has a wide variety of goods from souvenirs to clothing to food to jewellery, you name it. You can also buy souvenirs from shops outside the temples which I observed were cheaper by around US$0.50 to US$1.
I saw children in school uniform selling postcards and other stuff in Angkor Wat. According to our guesthouse owner, these children help their parents after school so it is okay to buy from them. Haggle, but please be reasonable. Do not be too stingy. The locals make a living mainly out of tourism in a city where over one-third of the population live below the poverty line; have some compassion. Please take note though that they have a policy that prohibits giving money to children who beg from tourists. Giving will encourage them to drop from school and for parents to exploit their children. If you encounter this, just refuse politely.
 Souvenir shirts at US$2 each. Kid’s shirt at US$1.50. The material is the same as Old Navy | Image credit: Wanders of Eve
 I bought these pillow cases with Angkor Wat embroidery for US$5 a pair. I thought it would be a good idea to have this in our living room. My mother will surely be delighted | Image credit: Wanders of Eve
Summary of expenses
What I spent on this trip is actually a little over what budget travellers usually discuss in blogs that I have read in the past. Yet sometimes, loosening your pocket a little bit will not leave you bankrupt as long as you have planned and saved for your trip well. I am not urging you to splurge; I am suggesting you be sensible. Besides, the return of your investing in travel experiences cannot be measured by any amount. In fact, it leaves you with more because it enriches your life as much as you are enriching the lives of people in the places you go.

We really enjoyed our trip to Siem Reap, Cambodia. In fact, our stay in this country exceeded our expectations. And as much as we were amazed by everything we saw, nothing compares to God’s amazing grace we experienced during our entire trip. From the room upgrade to the warmth and kindness of the Cambodian people, to the delight over meals, to every eye-opening encounter and simple joys like walking around the streets, to our daily safety and strength, and to every little provision like the packing tape we found in our cart at the airport to secure our bags when we were about to leave, we were blessed beyond what we expected.
Also read: How I Travelled Solo in Siem Reap for 2 Days with Only ₱7,650
Plan your trip soon to the Kingdom of Wonder. Come to Cambodia! :)
More photos
 Sunset at Phnom Bakheng | Image credit: Sheryl Pesito
 Entrance to the Banteay Kdei Temple | Image credit: Mary Lyn Tenorio
 The intricate carvings of Banteay Srei. This temple is popular for its pink sandstone. Well, it is not actually pink; looks more like peach to me | Image credit: Mary Lyn Tenorio
 The Kompong Phluk floating village | Image credit: Sheryl Pesito
 Lotus flower in Angkor Wat pond | Image credit: Mary Lyn Tenorio
 In God we trust. The floating church in Kompong Phluk village | Image credit: Wanders of Eve
 Yours truly at Sras Srang | Image credit: Wanders of Eve
 Mary Lyn at the Prasat Kravan Temple | Image credit: Wanders of Eve
 Sheryl and the grand walls of Angkor Wat | Image credit: Wanders of Eve


 Image credit:
 Image credit: Remedios Lucio
 Image credit: Remedios Lucio
 Image credit: Remedios Lucio
 Image credit: Remedios Lucio
 Image credit: Remedios Lucio
 Image credit: Remedios Lucio
 Image credit: Remedios Lucio
 Image credit: Remedios Lucio
 Image credit: Remedios Lucio


 Image credit:
 Image credit:

 Image credit:
  Image credit:


 Image credit:

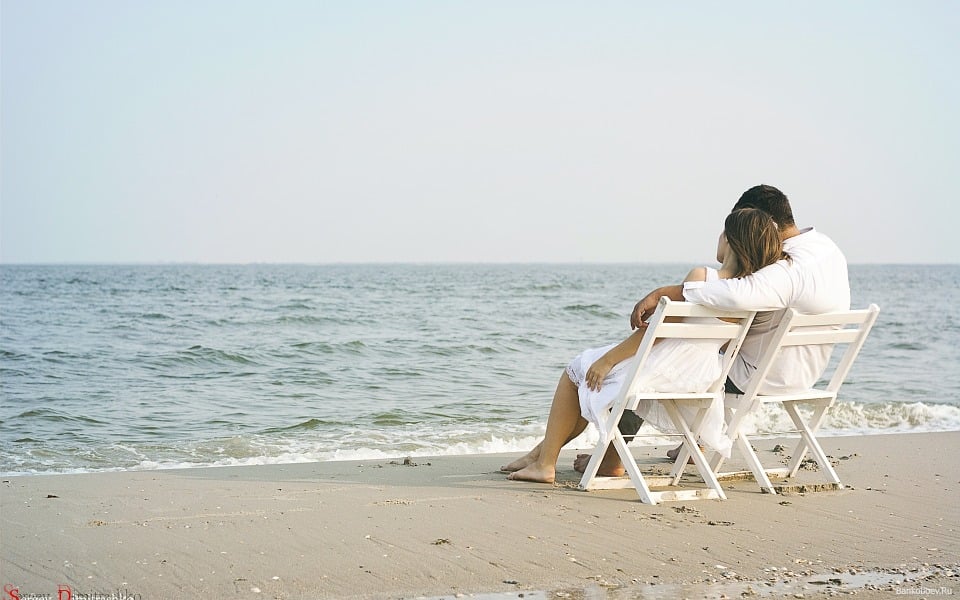
 Check out these

 Image credit:
  Image credit:
  Image credit:
  Image credit:
 Image credit:
 Our ryokan in Nara
 I don't know the name of this food as it was in Japanese characters. This was on the 6th floor of Kyoto Yodobashi just across Kyoto Station. The set meal is at JPY980.
 The one-day city bus pass in Kyoto
 My five-year multiple visa
 At Fushimi Inari-taisha in Kyoto
 The Kinkaku-ji Temple or Golden Pavilion in Kyoto
 Tenryu-ji Temple in Arashiyama, Kyoto
 Todaiji Temple in Nara
 Meriken Park in Kobe
 At the Umeda Sky Building in Osaka
 My colleague at the Osaka Castle
 Universal Studios Japan
 My colleague and the USJ Globe
 The Glico Man
 A must photo of Merlion Park to prove that you've been to Singapore
 RAWR at the Merlion Park
 The best delicacy of S’pore: Laksa! for S$3 only (₱108/US$5)
 A must try ice cream at Ion Orchard for S$1.2 only (₱43.2)
 First lunch at Singapore for only S$2 (₱72). It was sumptuous indeed. It tasted like an authentic Singaporean cuisine.
 My most expensive meal I bought for S$7 (₱252) at Sentosa Island
 I saw a lot of people eating this meal that's why I tried it. It only costs S$3 (₱108)
 In a world full of expensive food in Marina bay, we saw this milk tea shop that soothed our thirst after from walking an hour from Sentosa to Vivo City
 My mistake. I should have bought a Singapore Tourist Pass
 Their efficient MRT
 Sunflower Garden at Changi Airport! Woah!
 Helix bridge beside the Marina Bay
 Palawan beach from the observatory deck


 My host’s house in Ghent, Belgium

 View from train going to Maastricht, Netherlands
 Metro entrance of Palais Royal – Musée du Louvre


 La Romana Gelateria

 Louvre Museum


 Aerial view of Sun Moon Lake via gondola.
 My Gua Bao
 Longshan Temple
 Entrance of the Park
 Chiang Kai SHek Memorial Hall
 National Theatre
 Chiang Kai SHek Monument
 This the Hotel Chartered Tour Services and Pick-up Services


 Eternal Spring Shrine
 to Swallow Grotto


 Tourists at Angkor Wat during Sunrise
 At Ta Prohm
 Outside Siem Reap International Airport
 Pre departure Area at Siem Reap International Airport
 Female Dorm at One Stop Hostel
 TV Common Room at One Stop Hostel
 Temple during the motorbike tour
 Countryside Red Roads
 Country Side Roads
 Siem Reap Highway
 Basket Weaving at Local’s Home
 Falling Rocks
 Ta Prohm Look a like tree
 At the Eco Lake
 View of Bakheng Mountain from the base
 View at Bakheng Mountain
 Rain view at Bakheng Mountain
 Riding a Motorbike
 At Pub Street
 Stalls at Pub Street Night Market
 Having fun with these awesome girls
 Angkor What?
 Joy & I at Angkor Wat
 Joy at Ta Prohm ;)
 Sunrise View at Angkor Wat
 Inside Angkor Wat
 Bayon Temple
 Temples at Ta Prohm
 Lots of tourists at the popular Ta Prohm tree!
 Exploring Ta Prohm
 At Khmer Kitchen
 Pineapple Rice at Angkor Wat
 At Pub Street
 Food from Motorbike Tour
 Temple at Chau Srei Vibol
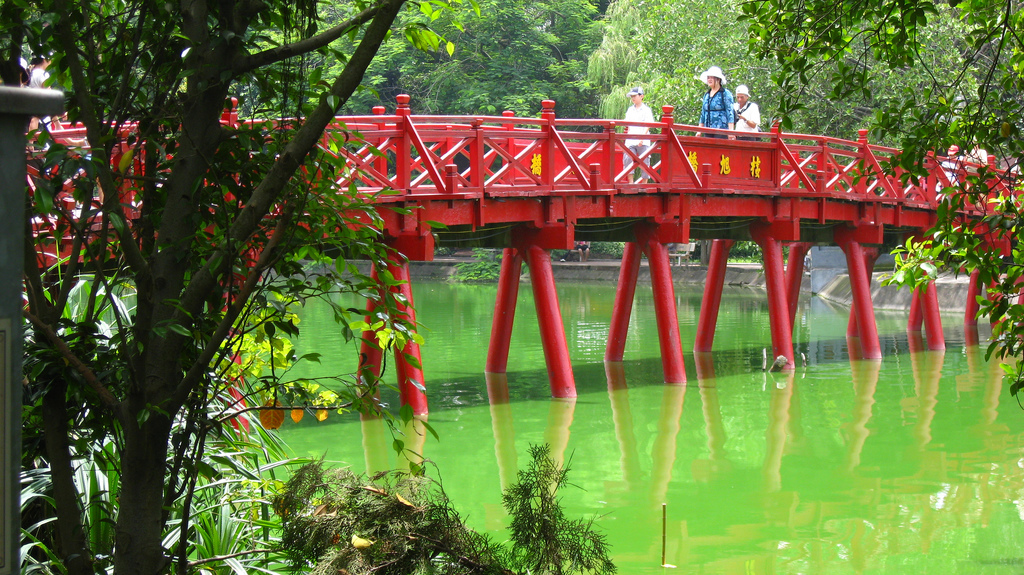
 Noi Ba Int’l Airport
 Entering Hanoi Sports Hotel
 Bottom bunk at Hanoi Sports Hotel
 Before the Synchronised Chaos
 Image credit:
  Turtle Tower at Hoan Kiem Sword Lake
 Egg Coffee!
 Bike & Hat! Very tourist-y of me.
 Awesome Vietnamese Food
 With my Hanoi kid, Lana! Brought her some goodies from Manila! ;)
 Lana took me to the Temple of Literature
 Thang Long Theatre Puppet Show
 Meeting new friends during this food tour!
 Vegetables with Beef and Sprouts
 BEST SUGAR CANE JUICE EVER!
 Mixed Vegetables
 More Vietnamese food!


 Snowing outside BOA Guesthouse
 Outside BOA Guesthouse
 Night Life at Hongik University Street
 Freezing Myeongdong!
 Korean Food at Myeongdong
 Outside the Palace
 In the Jungle
 With Puss and his boots
 Eiffel Tower at Petite France
 Southern France Art
 Namsam Tower
 Nami Island Tree Rows
 Snowman by the Frozen Lake
 Playing around with the GoPro at Nami Island
 Skiing at Elysian Resort
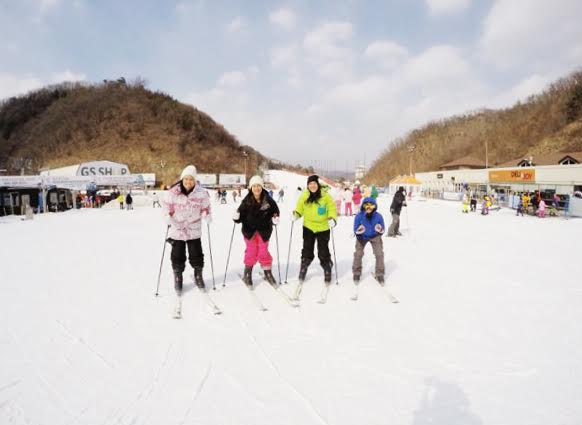
 Skiing at the Beginner’s Hill
 Seeing snow for the first time!